Our Media Room Update

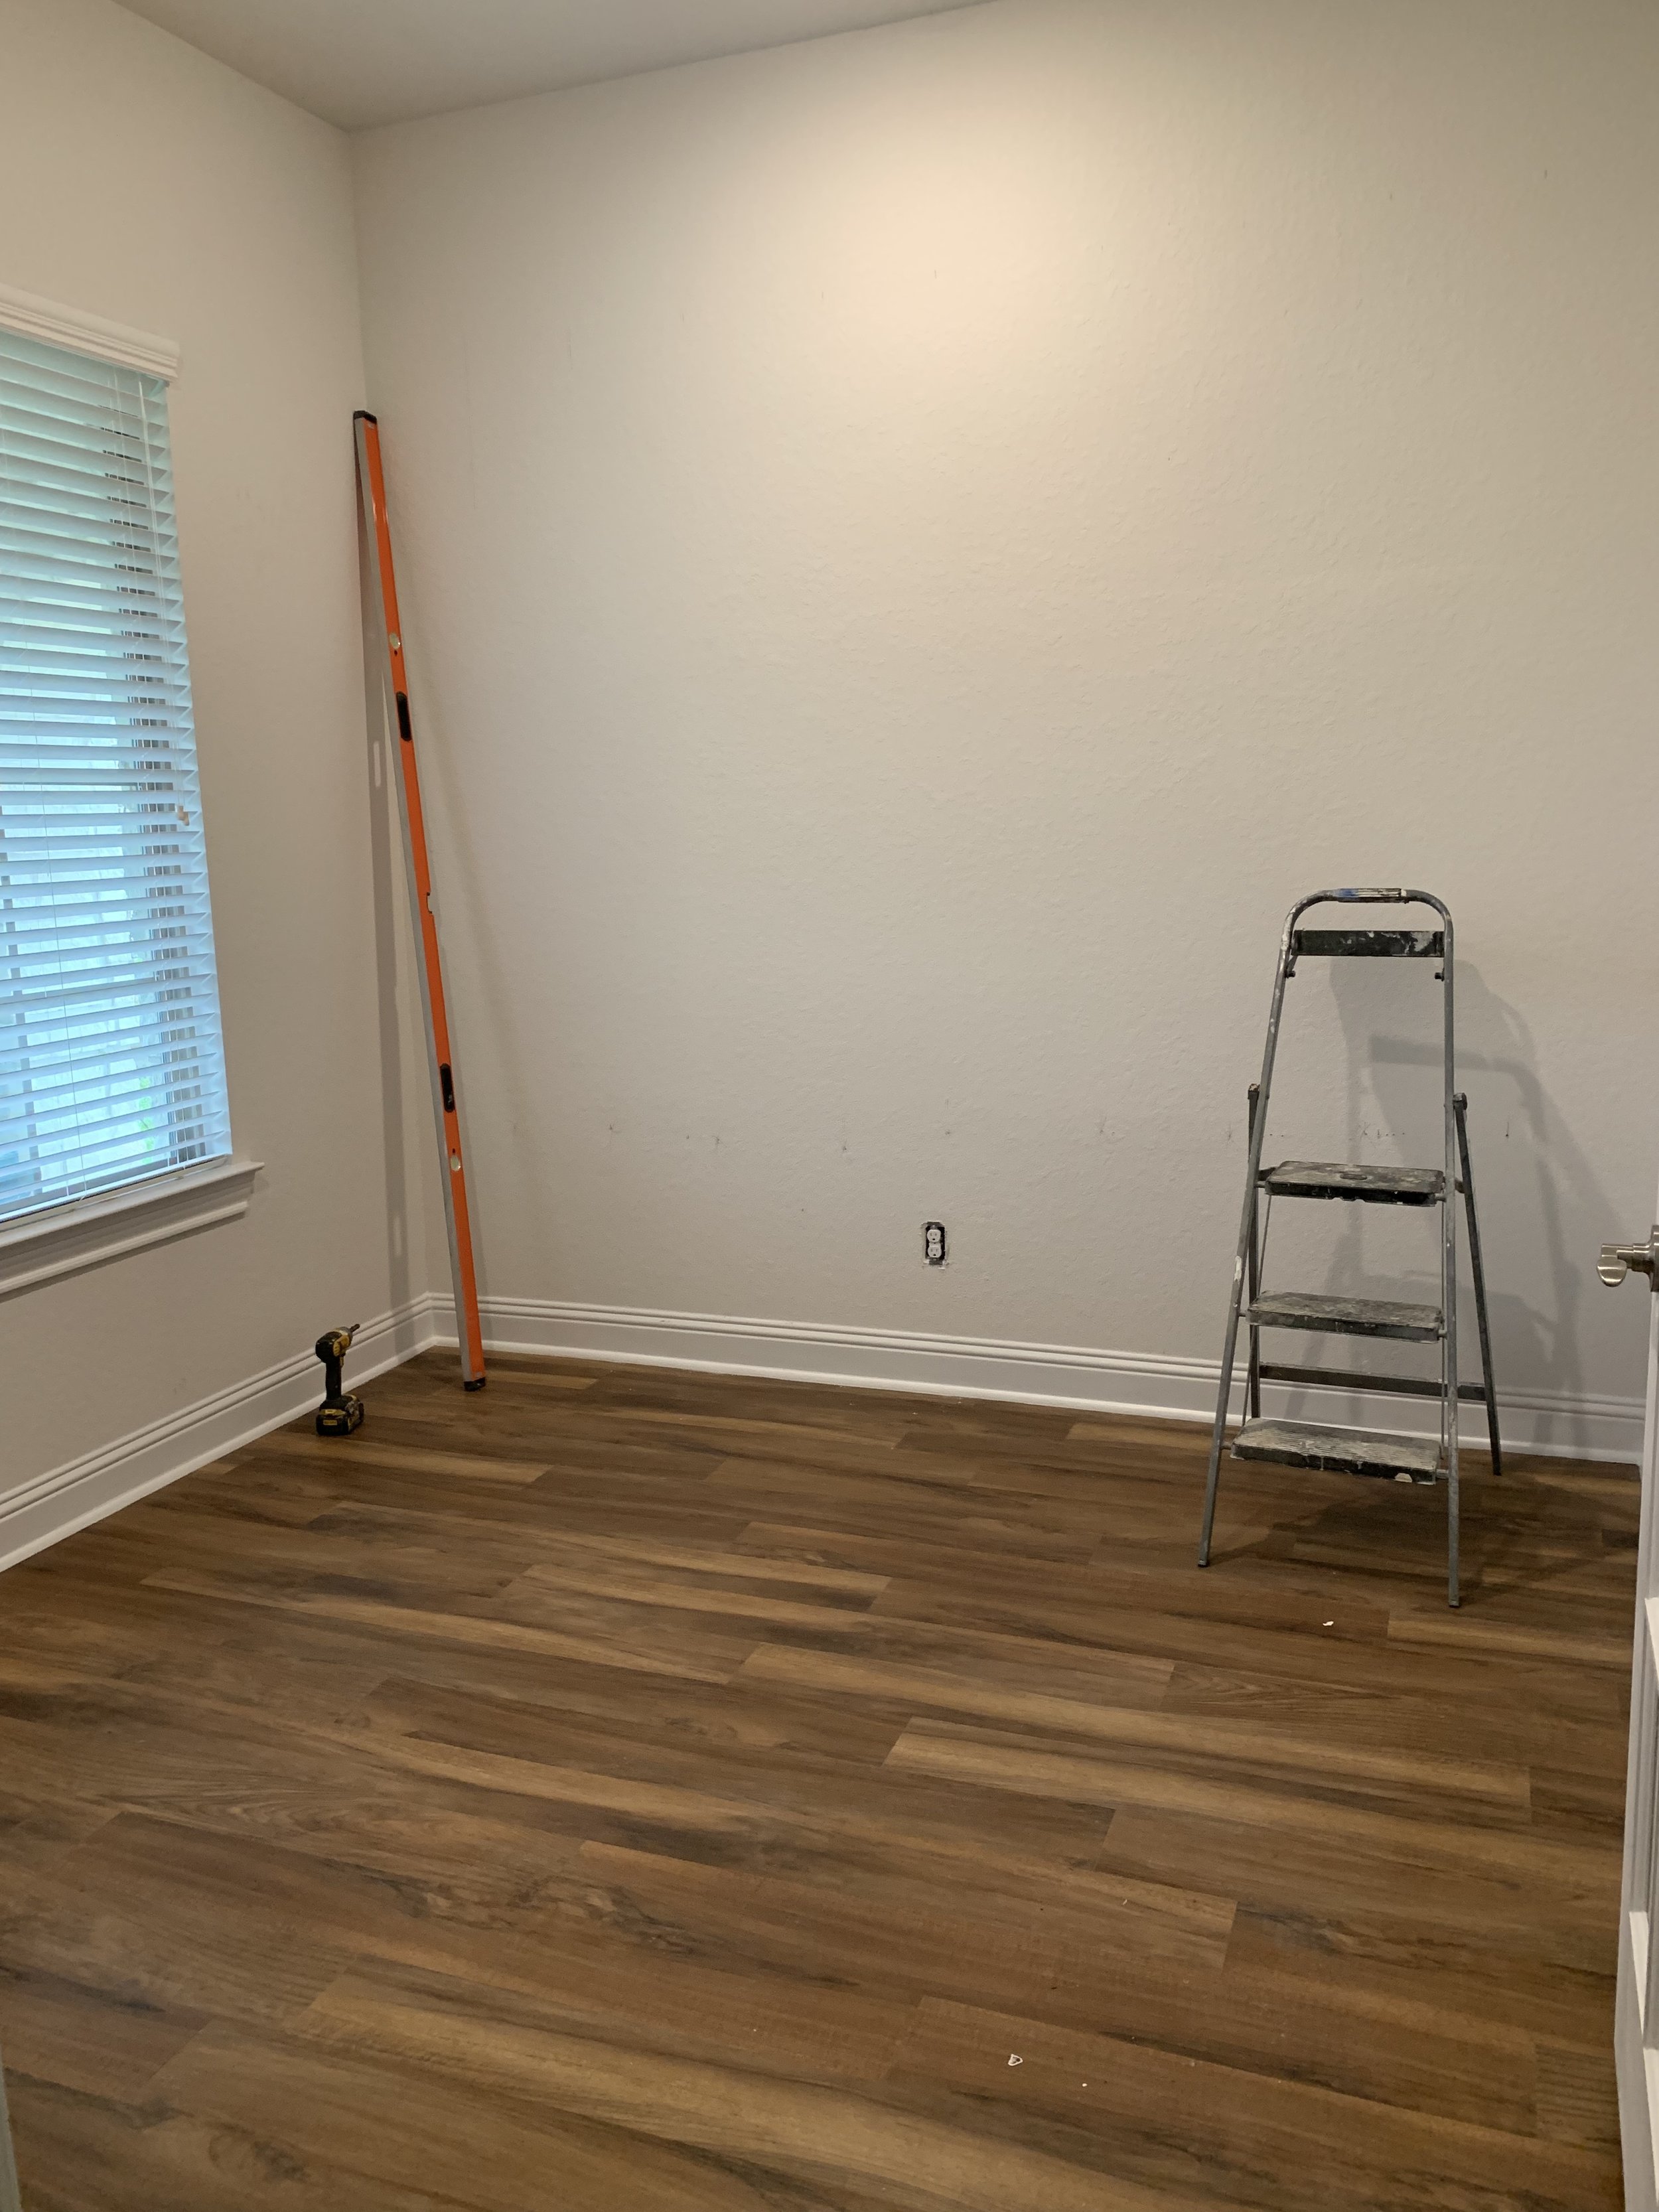
Until now, our media room has been a place for things that do not have a place. Basically a junk room with some old movie seats and a screen. We still watched movies in it but it was pretty rough on the eyes. Thank goodness movies are watched in the dark. Since the pandemic, it’s been a great room for us to escape to and get lost into a movie. So naturally, I said this is the perfect time to fix it up.

I knew I wanted a platform, some more seating, and a bar. I showed our contractor, The Handy Hun, a few pictures and he helped me bring my vision to life. He’s the best! The goal is always to get a nice design without breaking the bank.

IMG_0023.jpeg
IMG_0025.jpeg

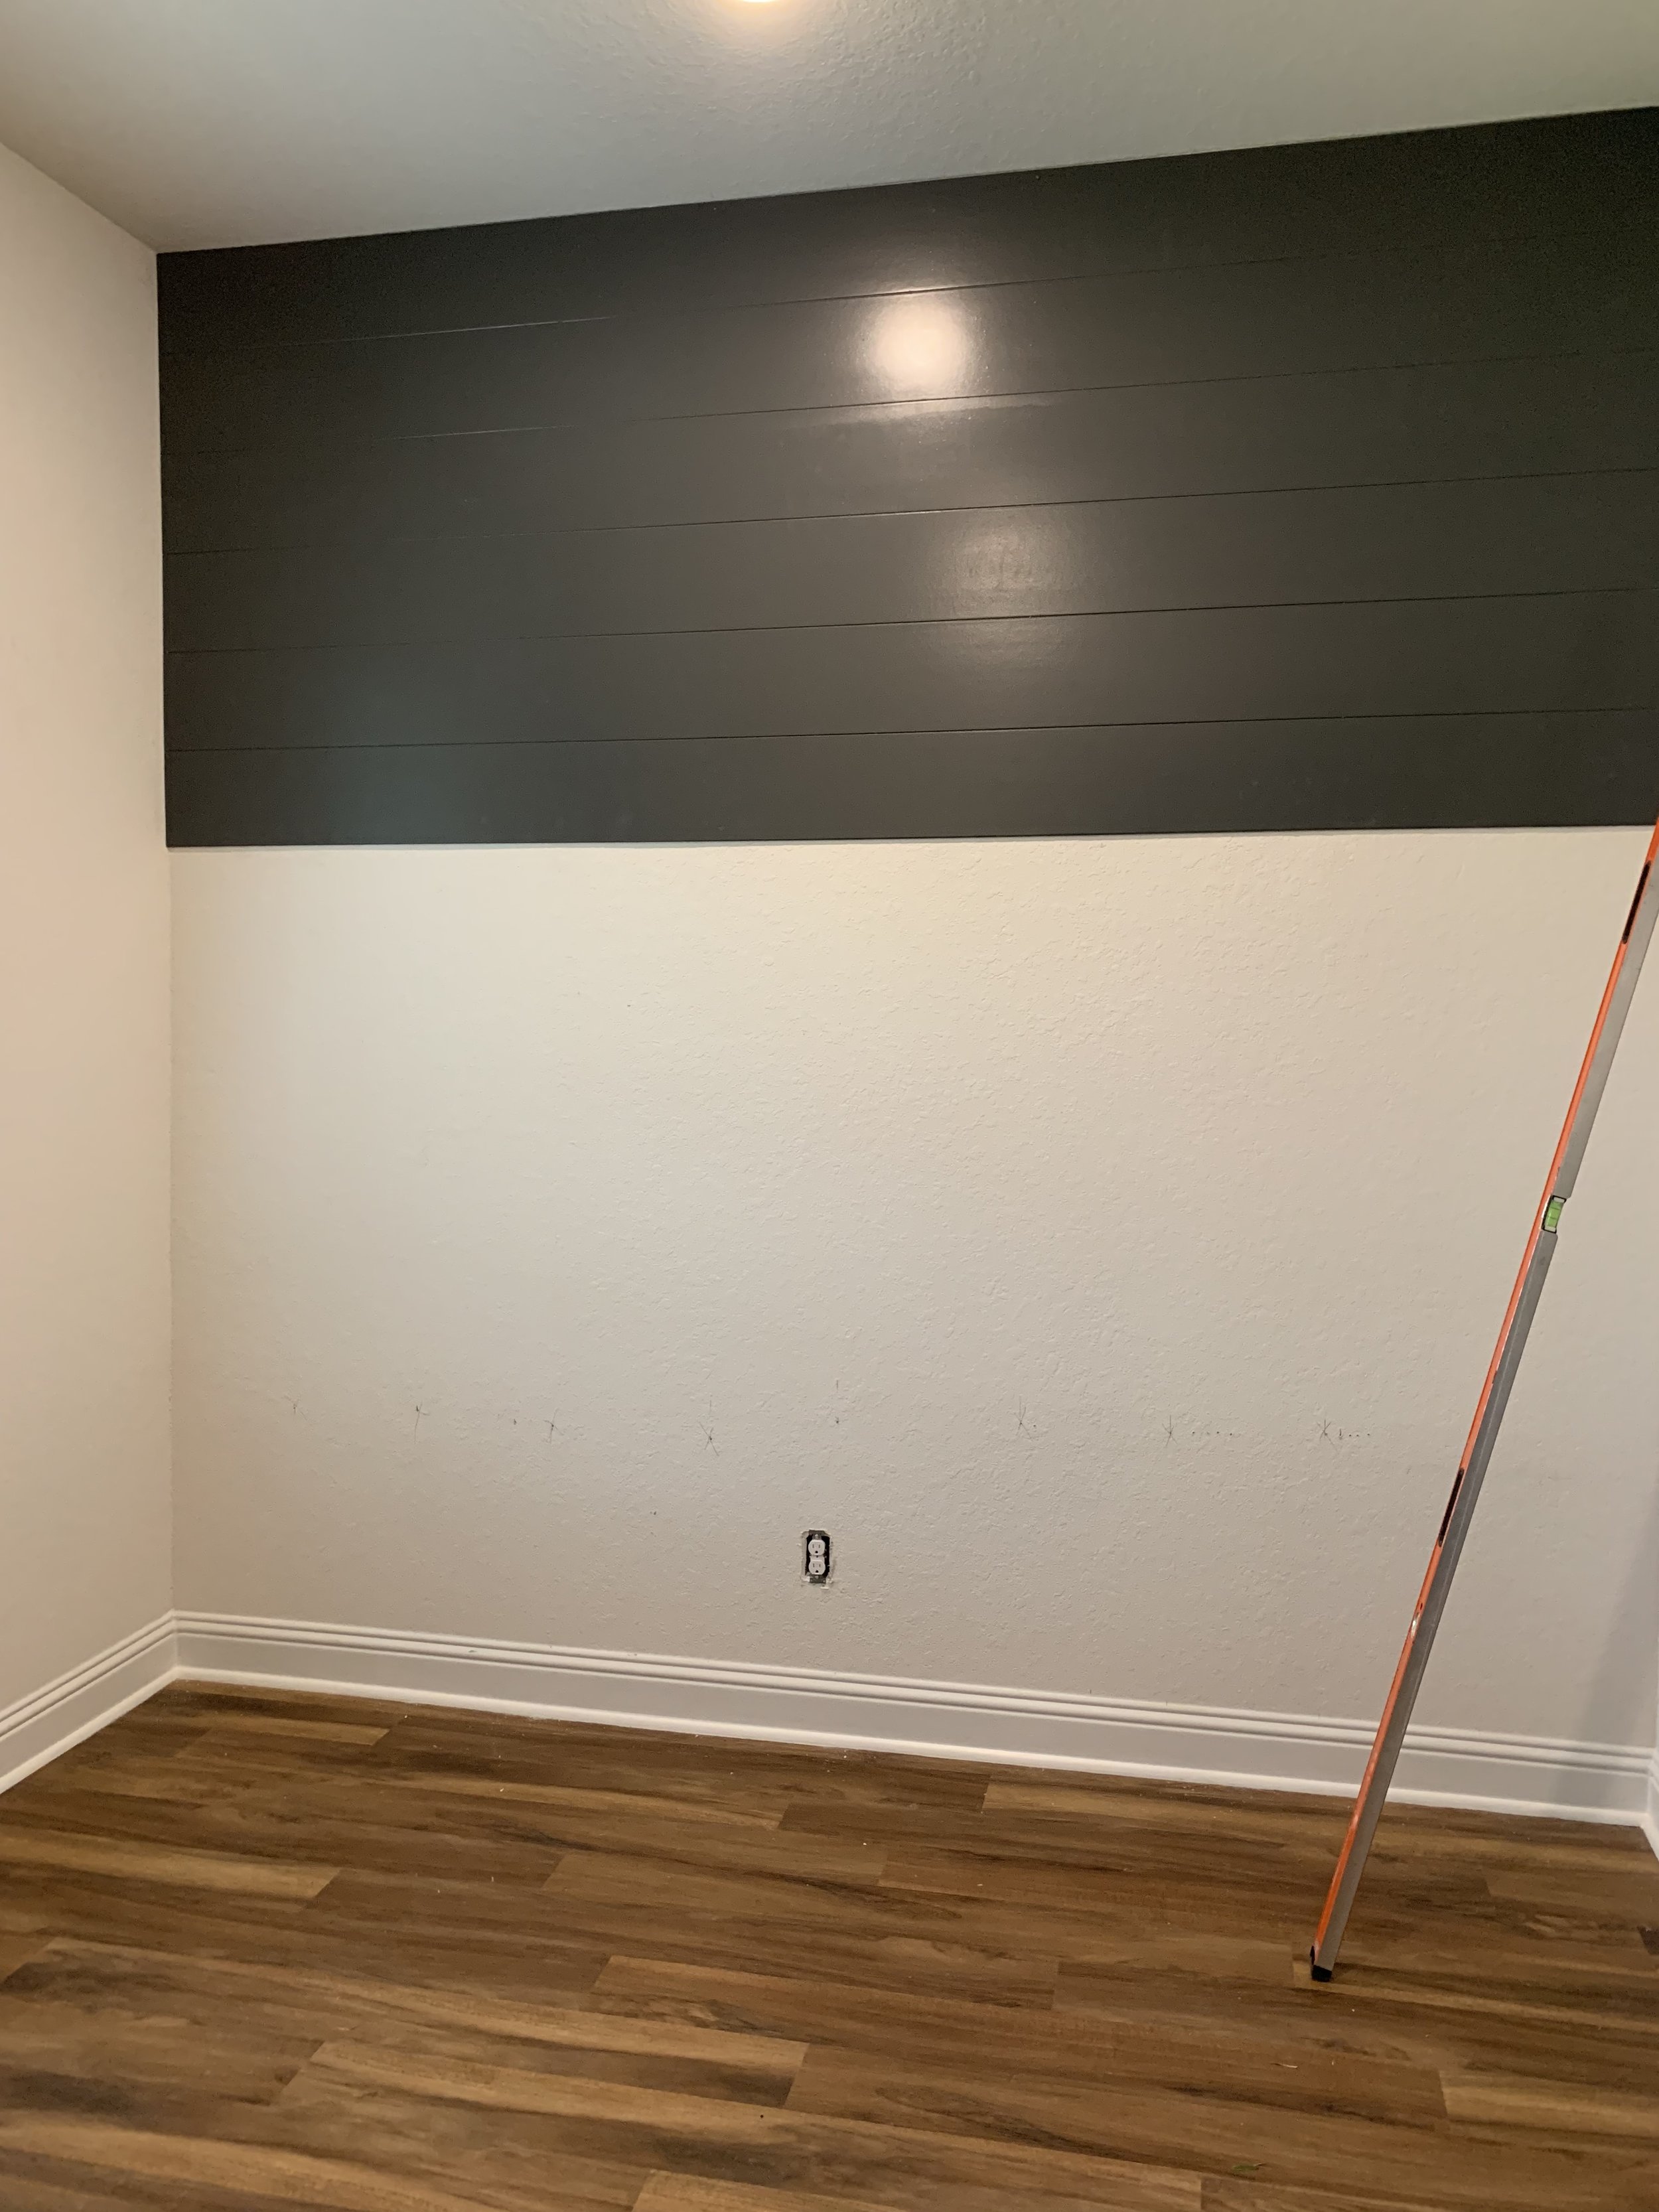
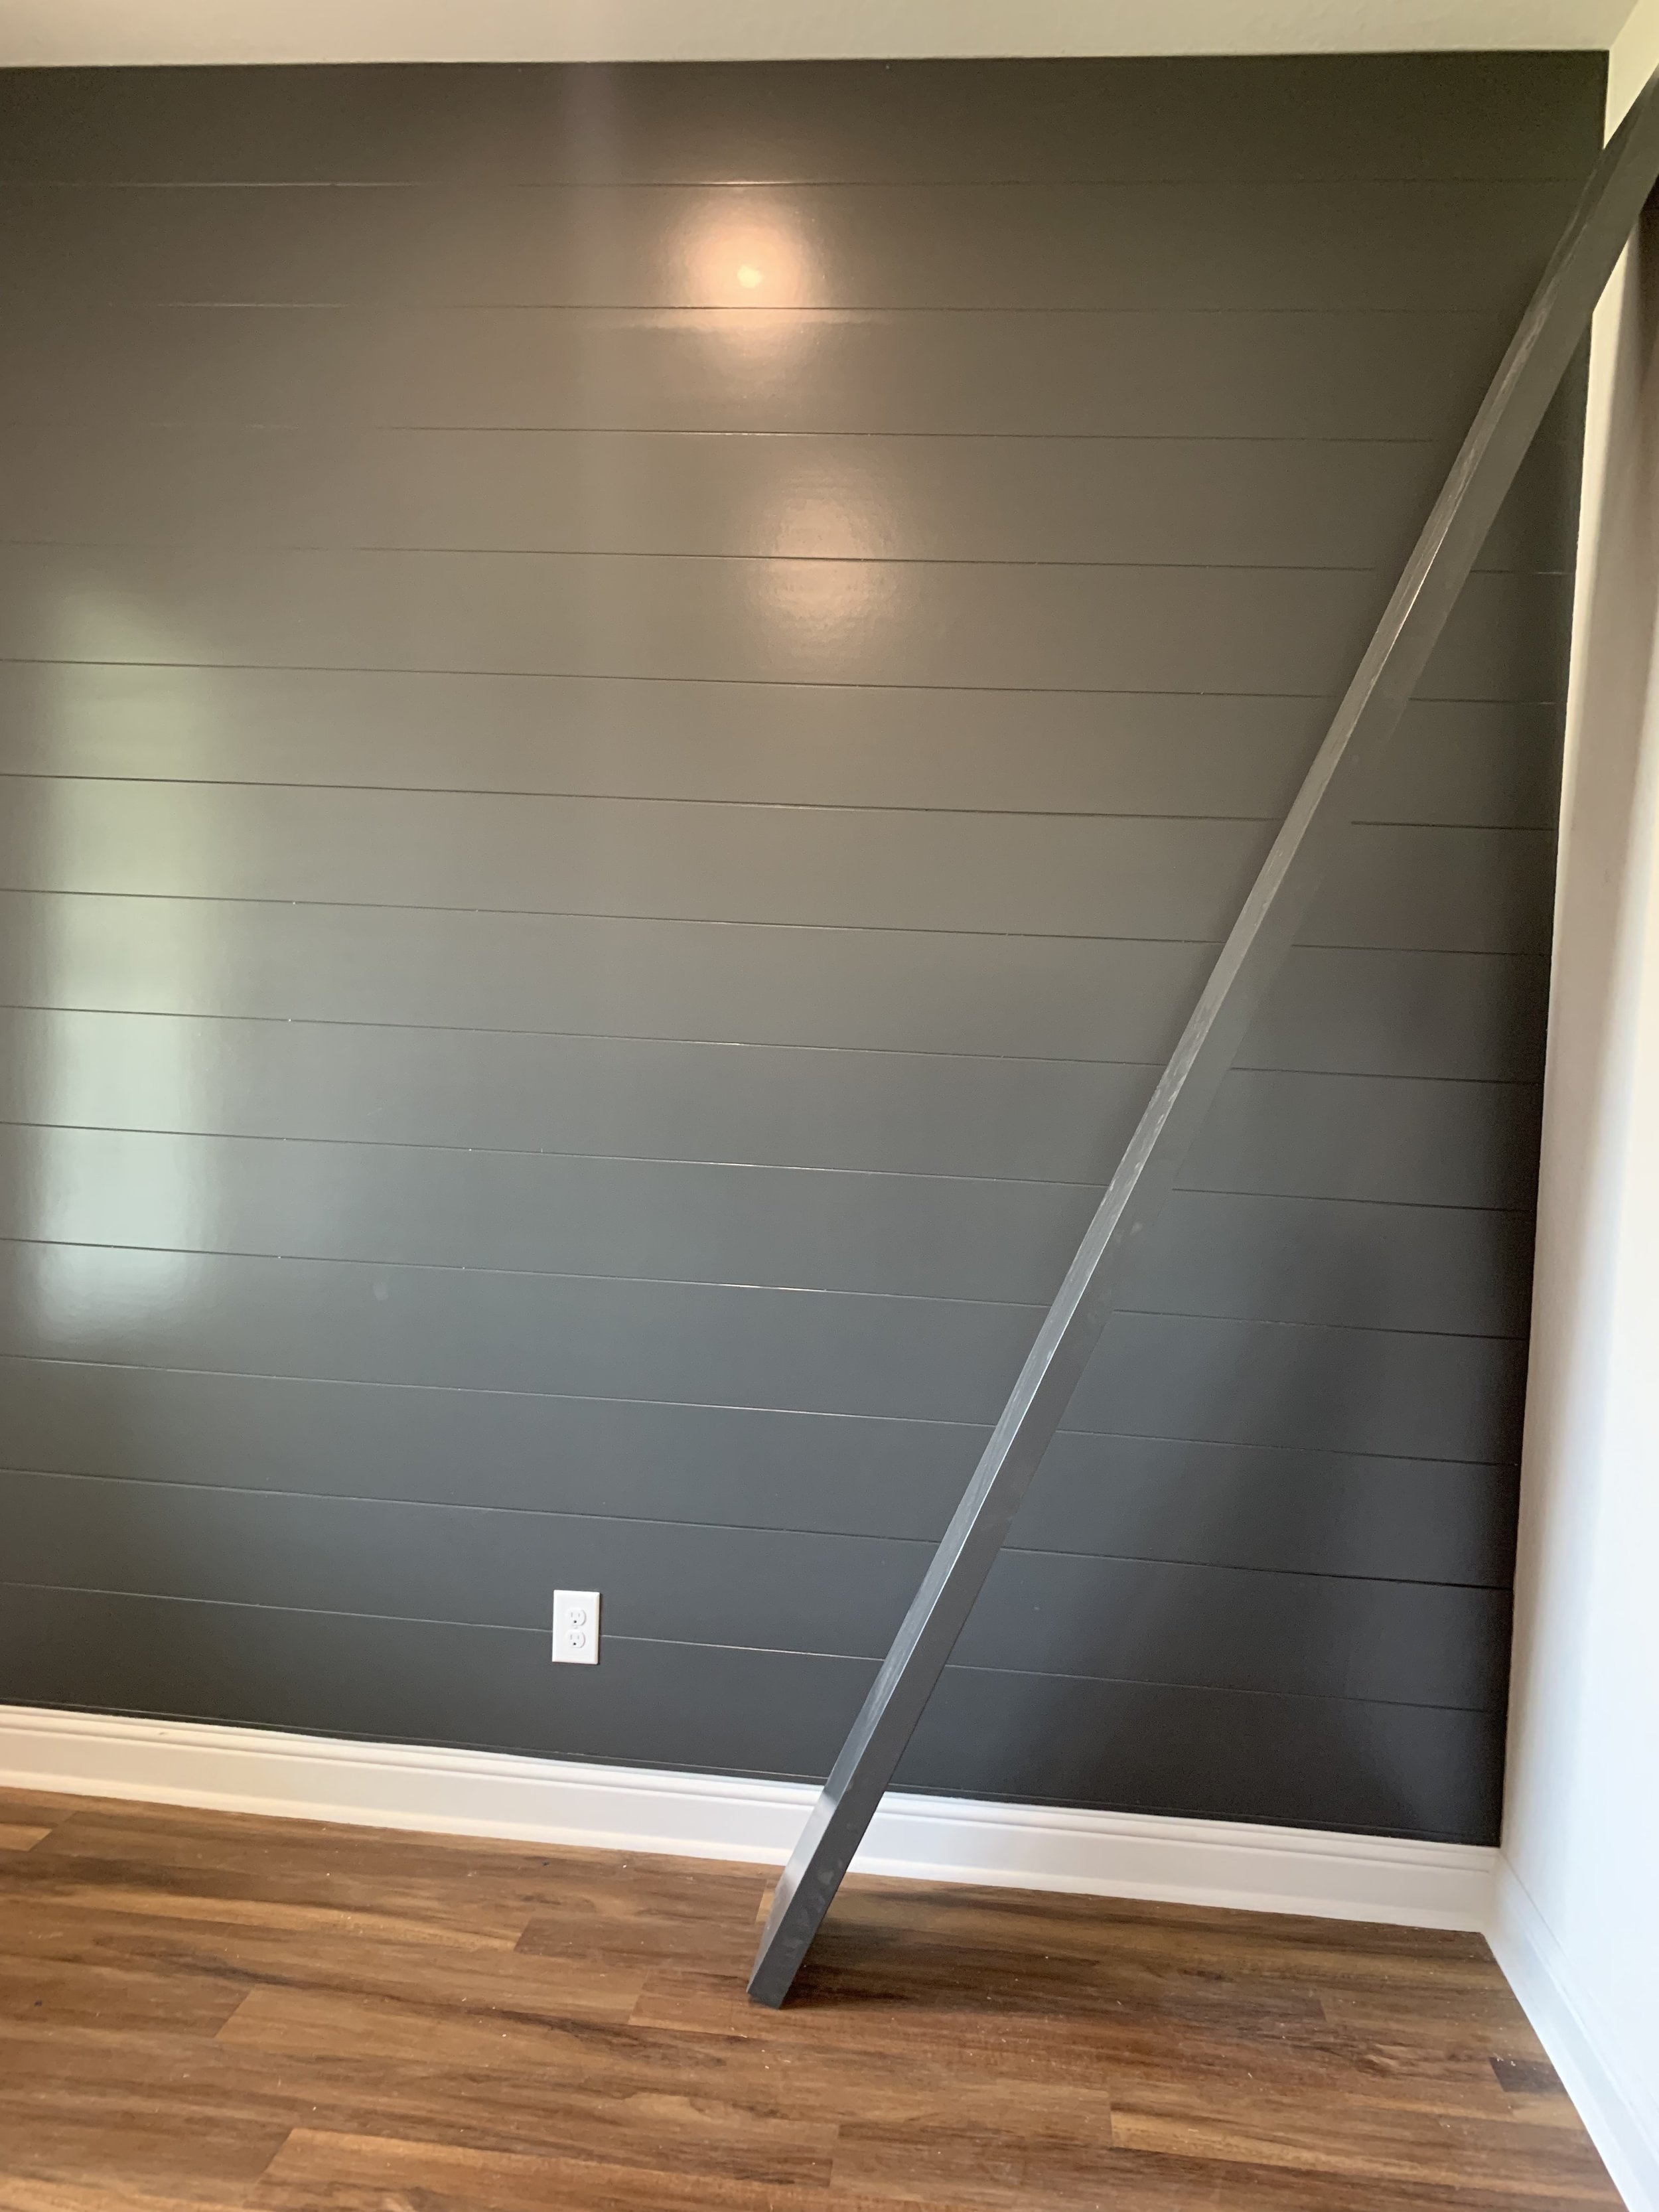
As shown in the images, it was pretty junky. Everything was sort of spread out all over the place and just very much randomly placed. It was time for to fix it up.

IMG_0008.jpeg

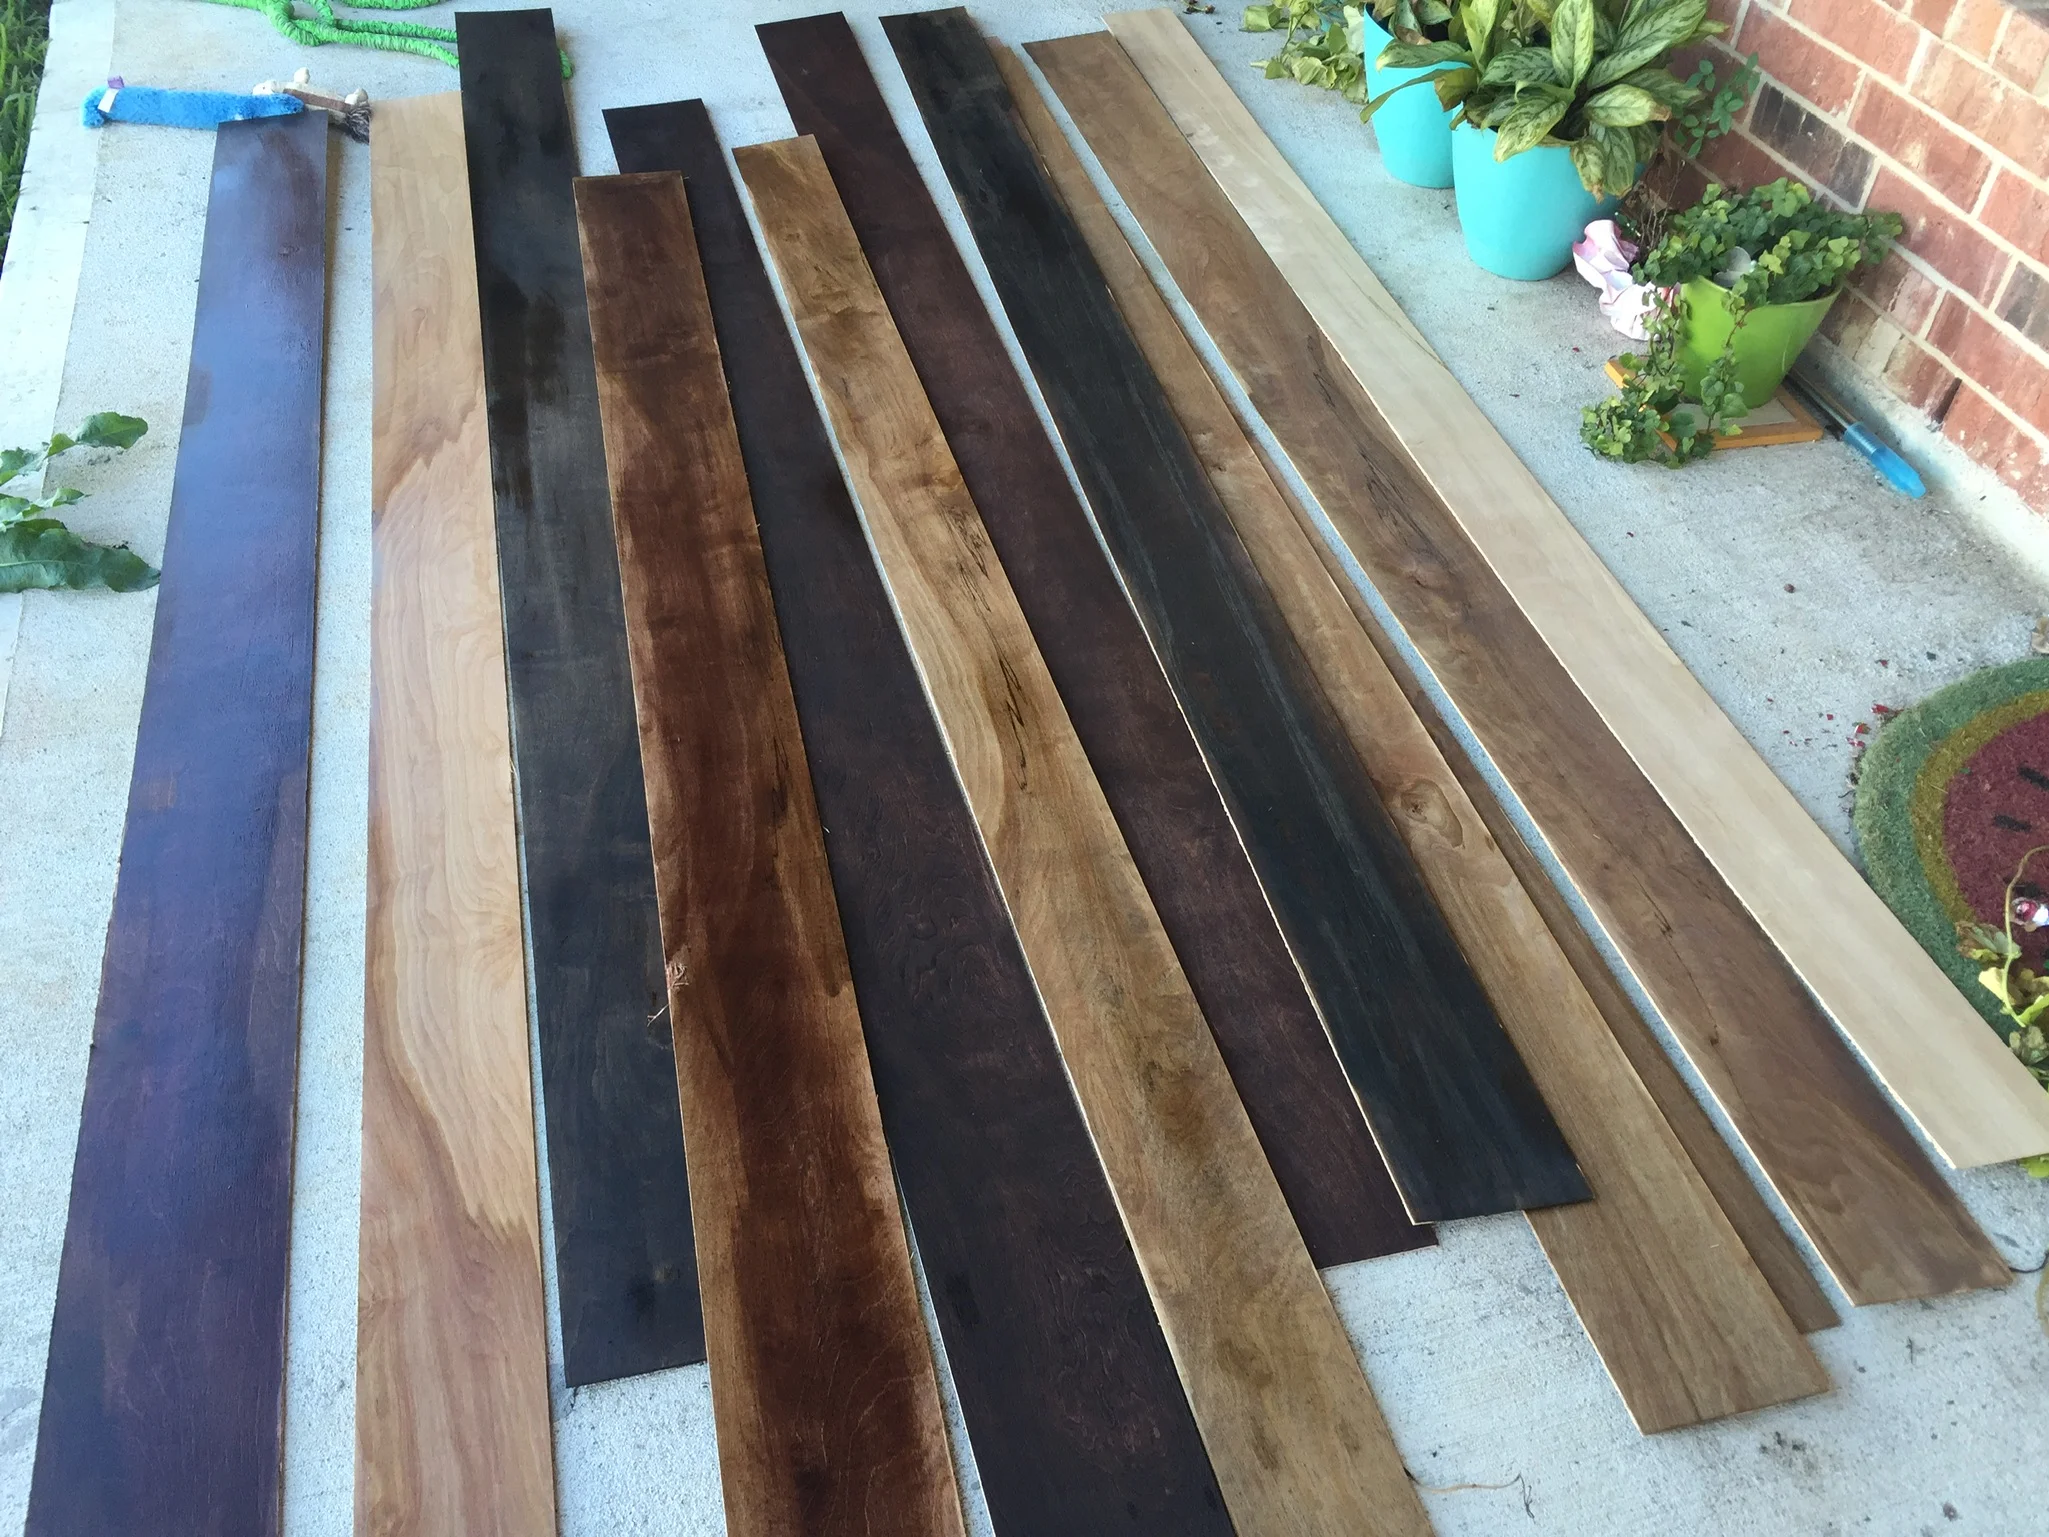
Selecting the bar top took me hours. Originally I wanted a slab of wood stained with a shiny coat, but with the wood wrapping around the bar, it was just too much wood. So I decided to look at either granite or using formica. In an effort to keep costs low, we decided to go with formica. It is so much easier to maintain and my kids seriously make a mess of everything.

IMG_0017.jpeg

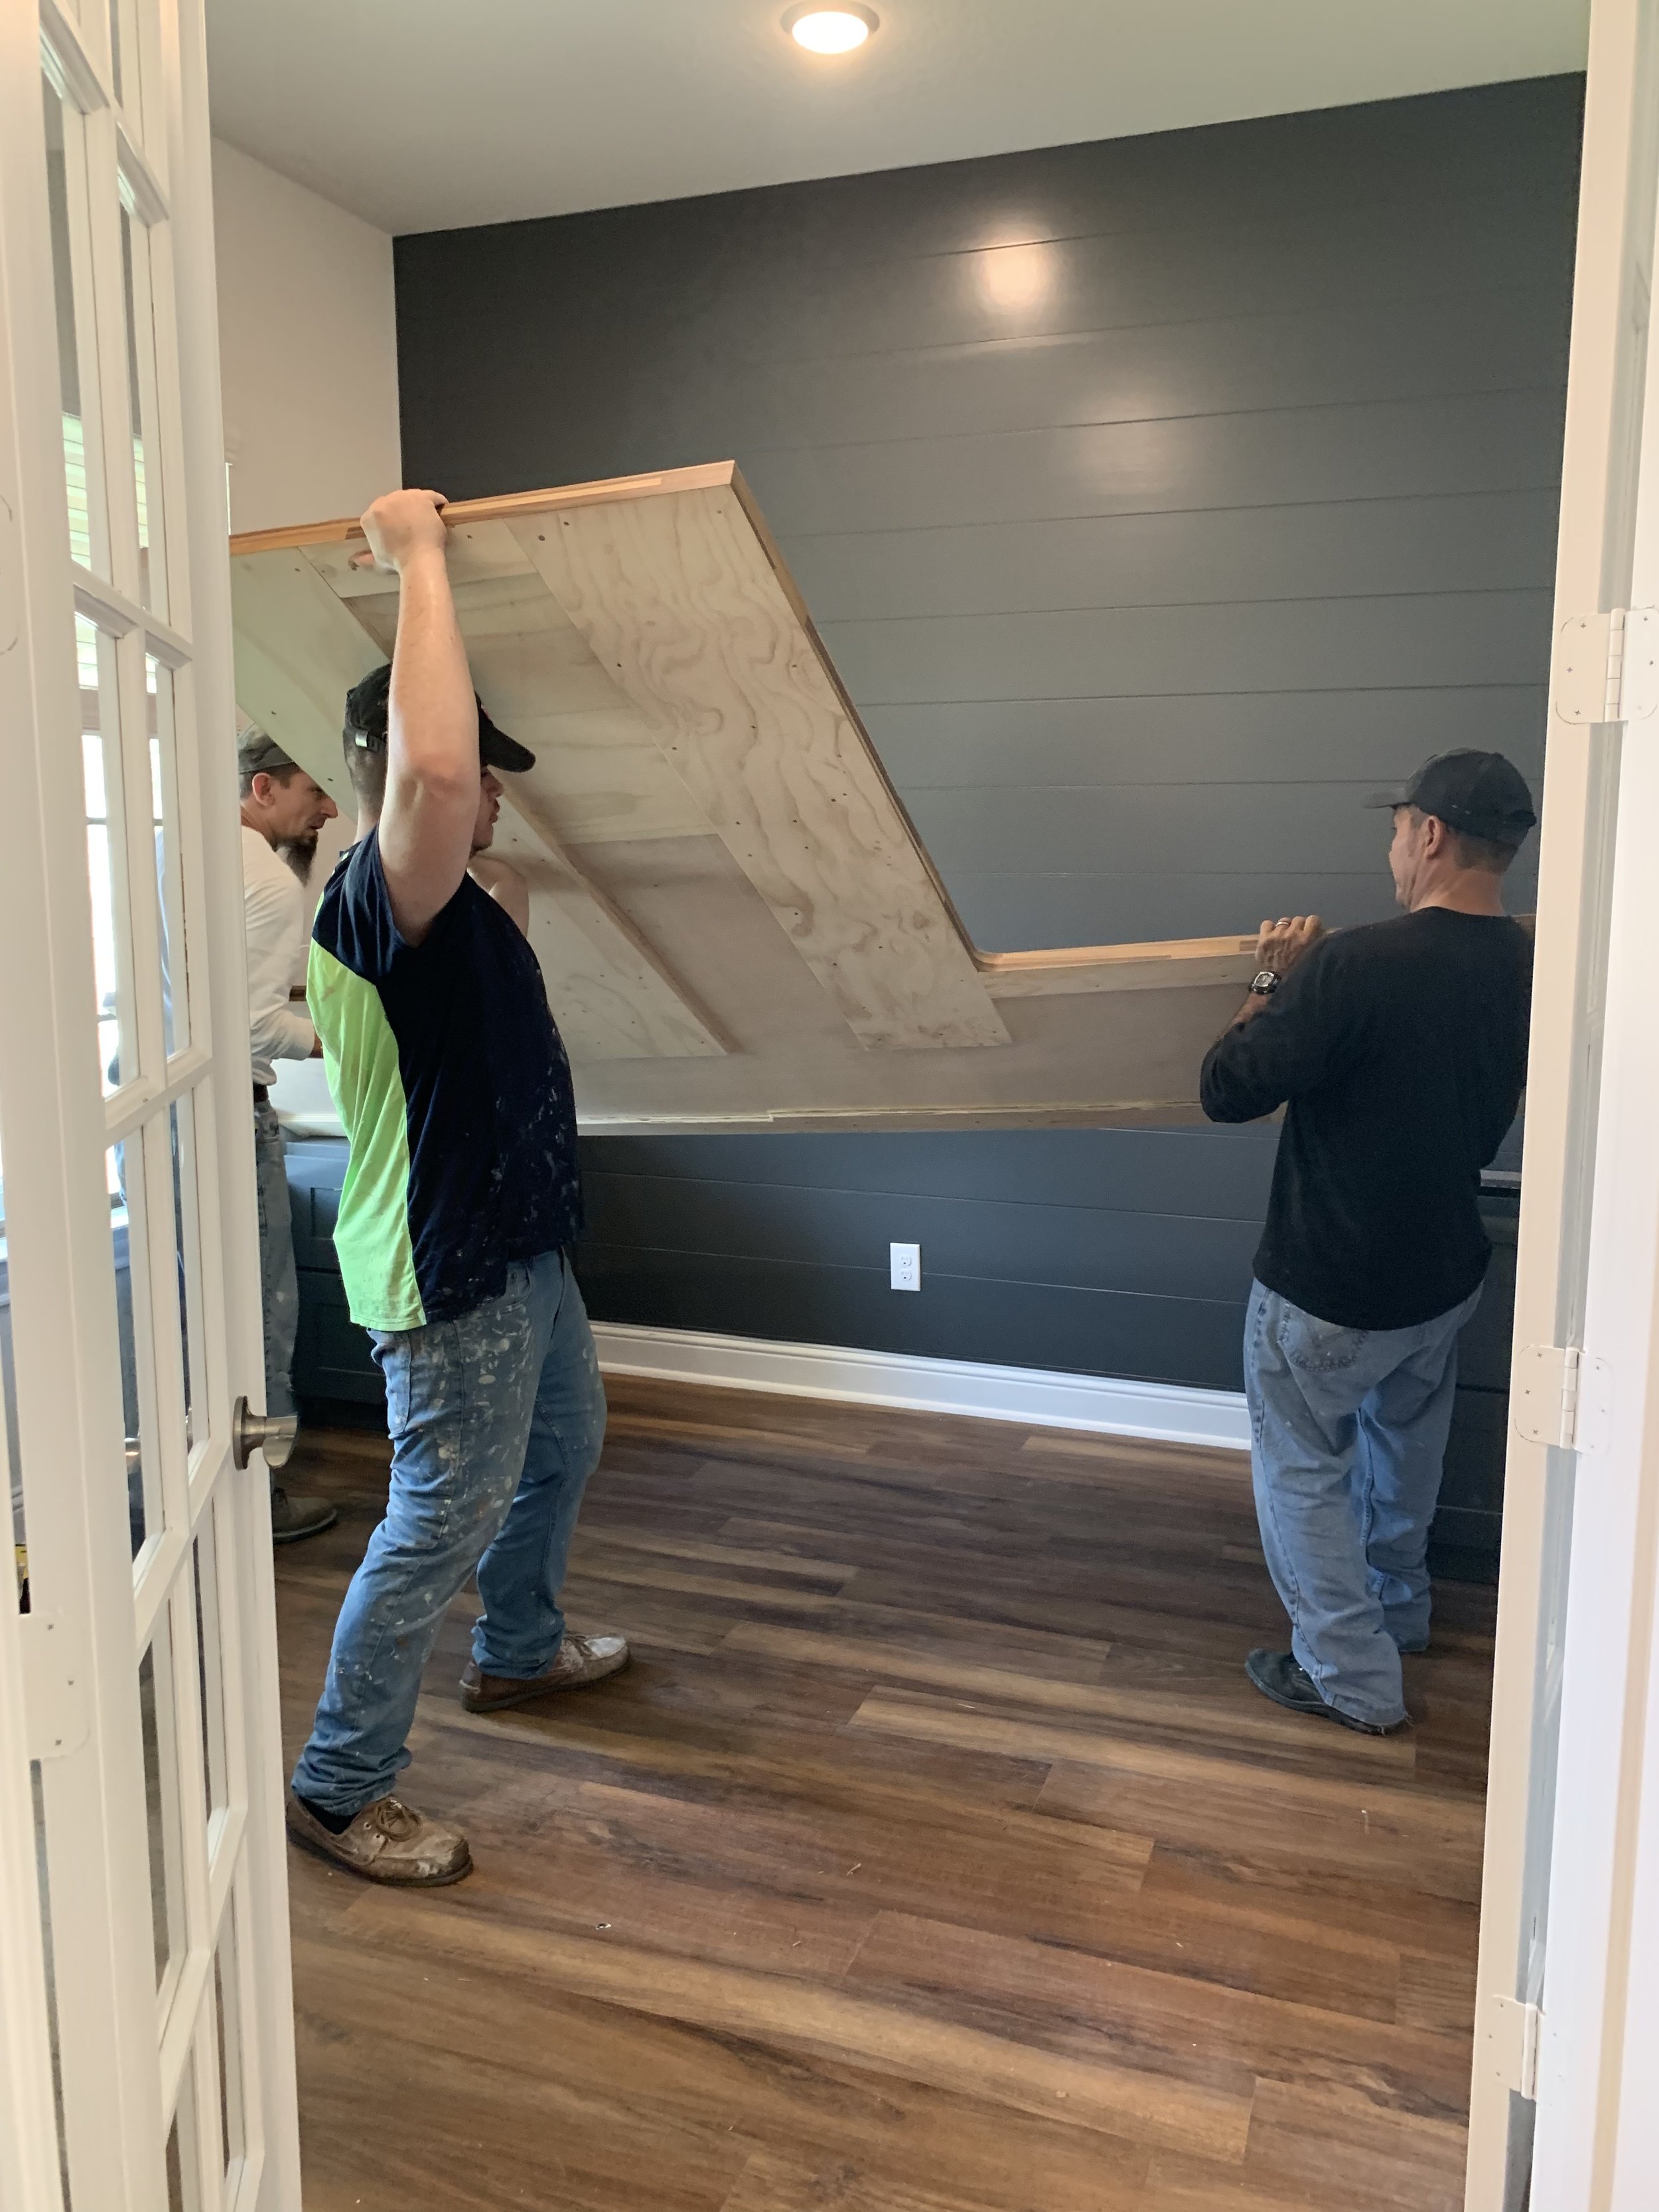
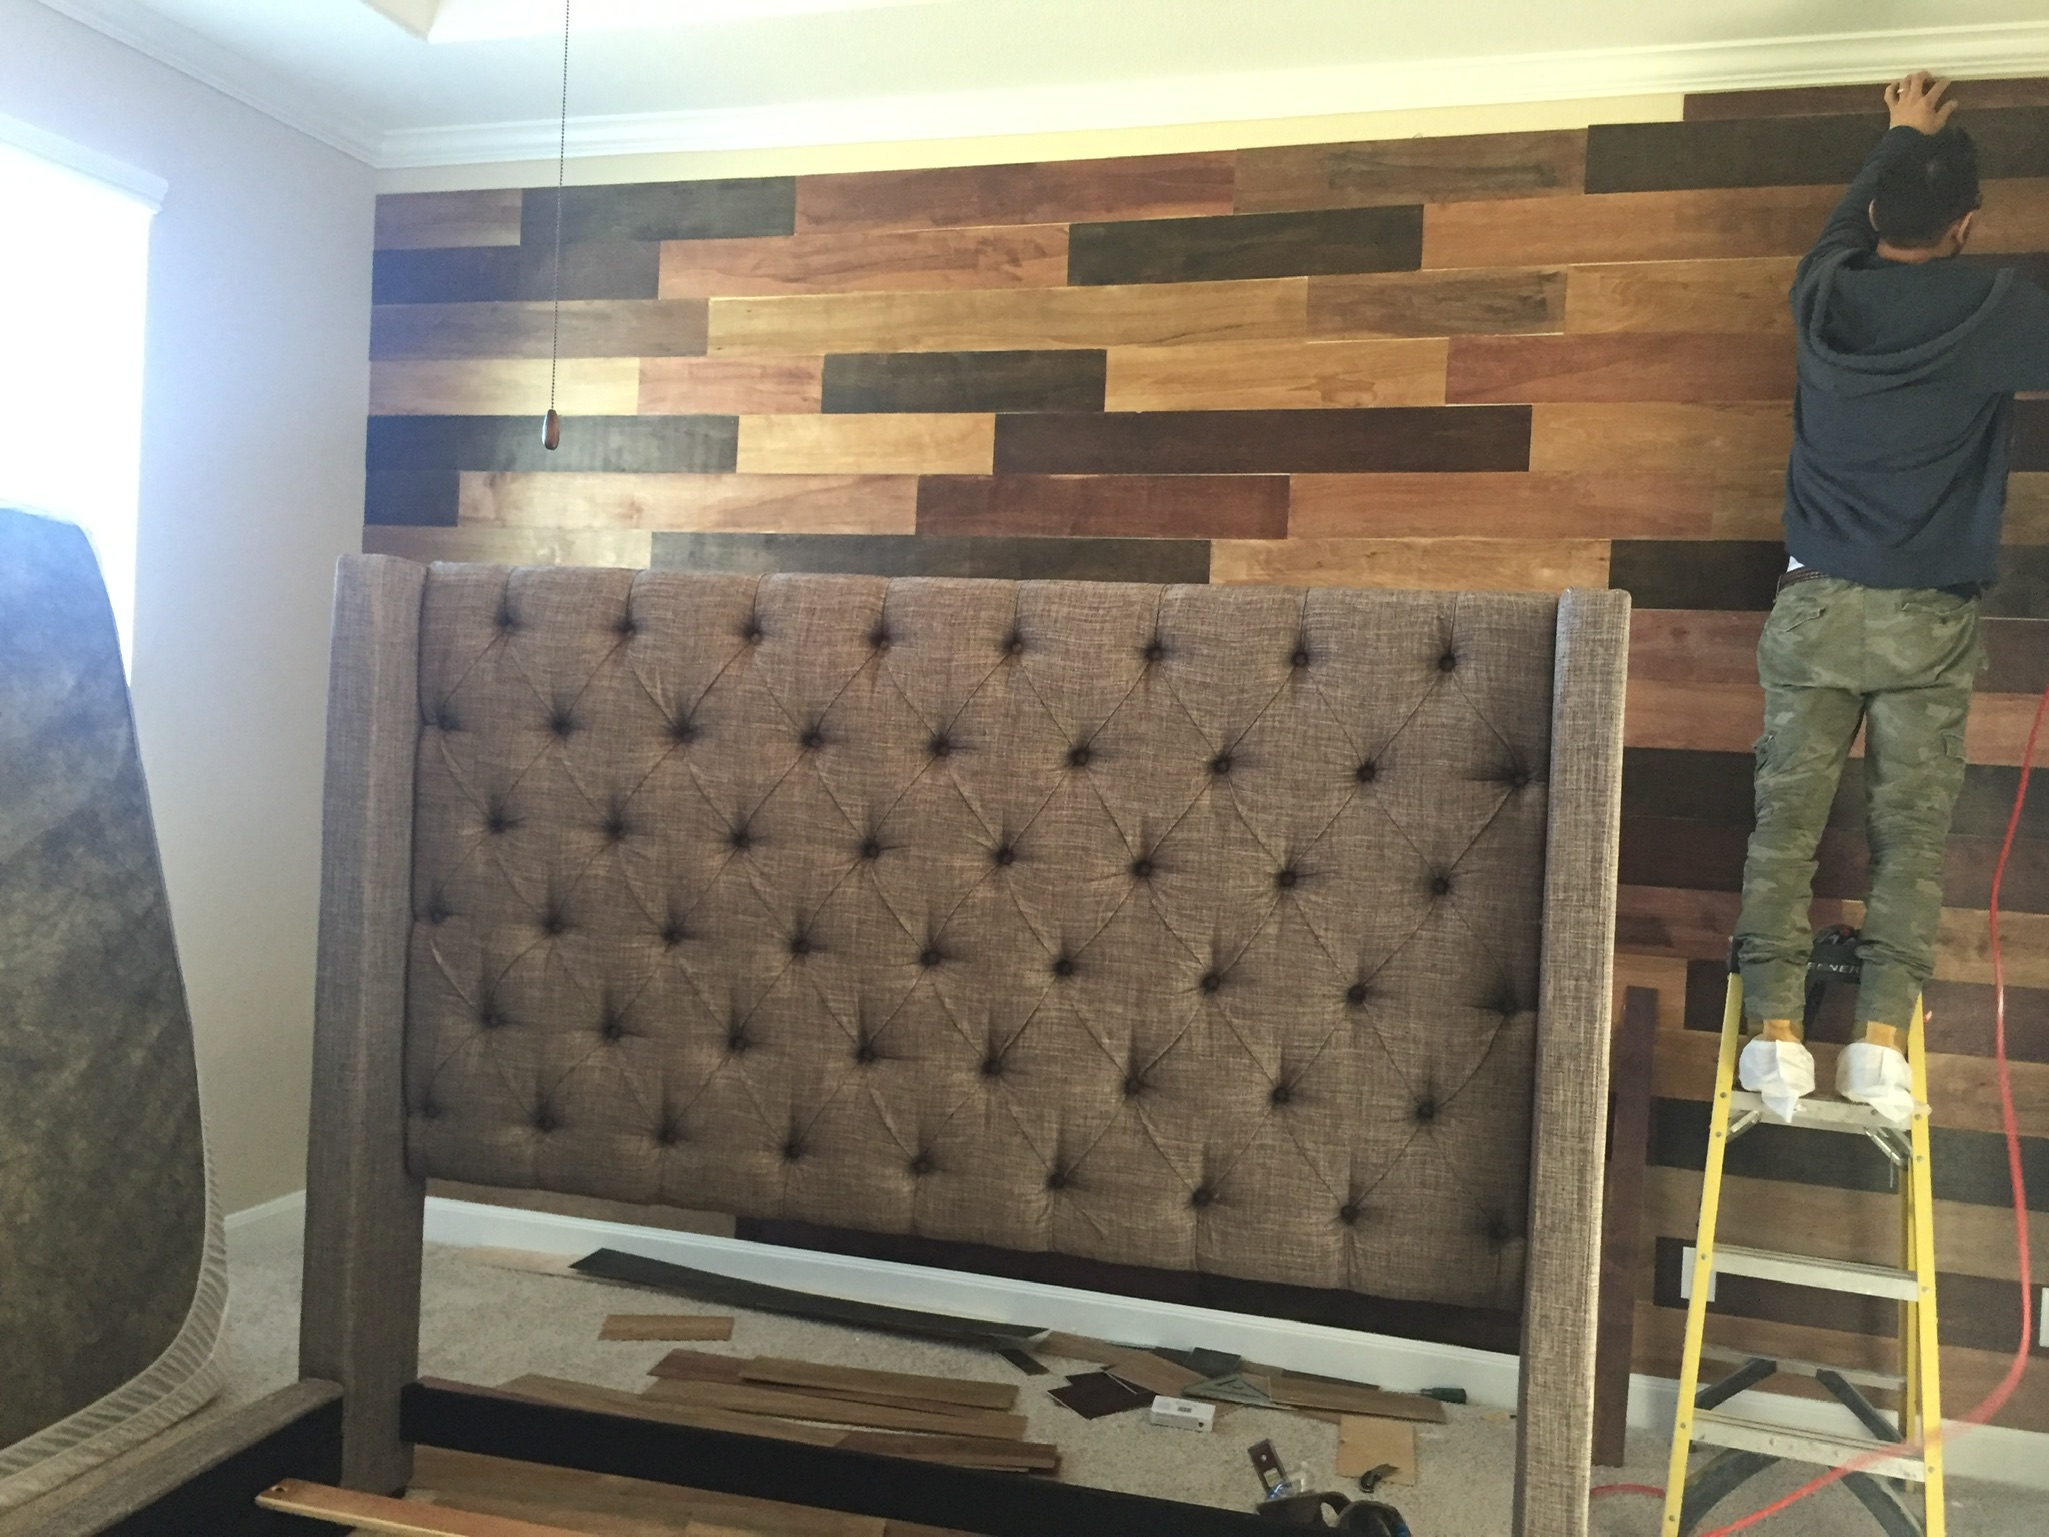
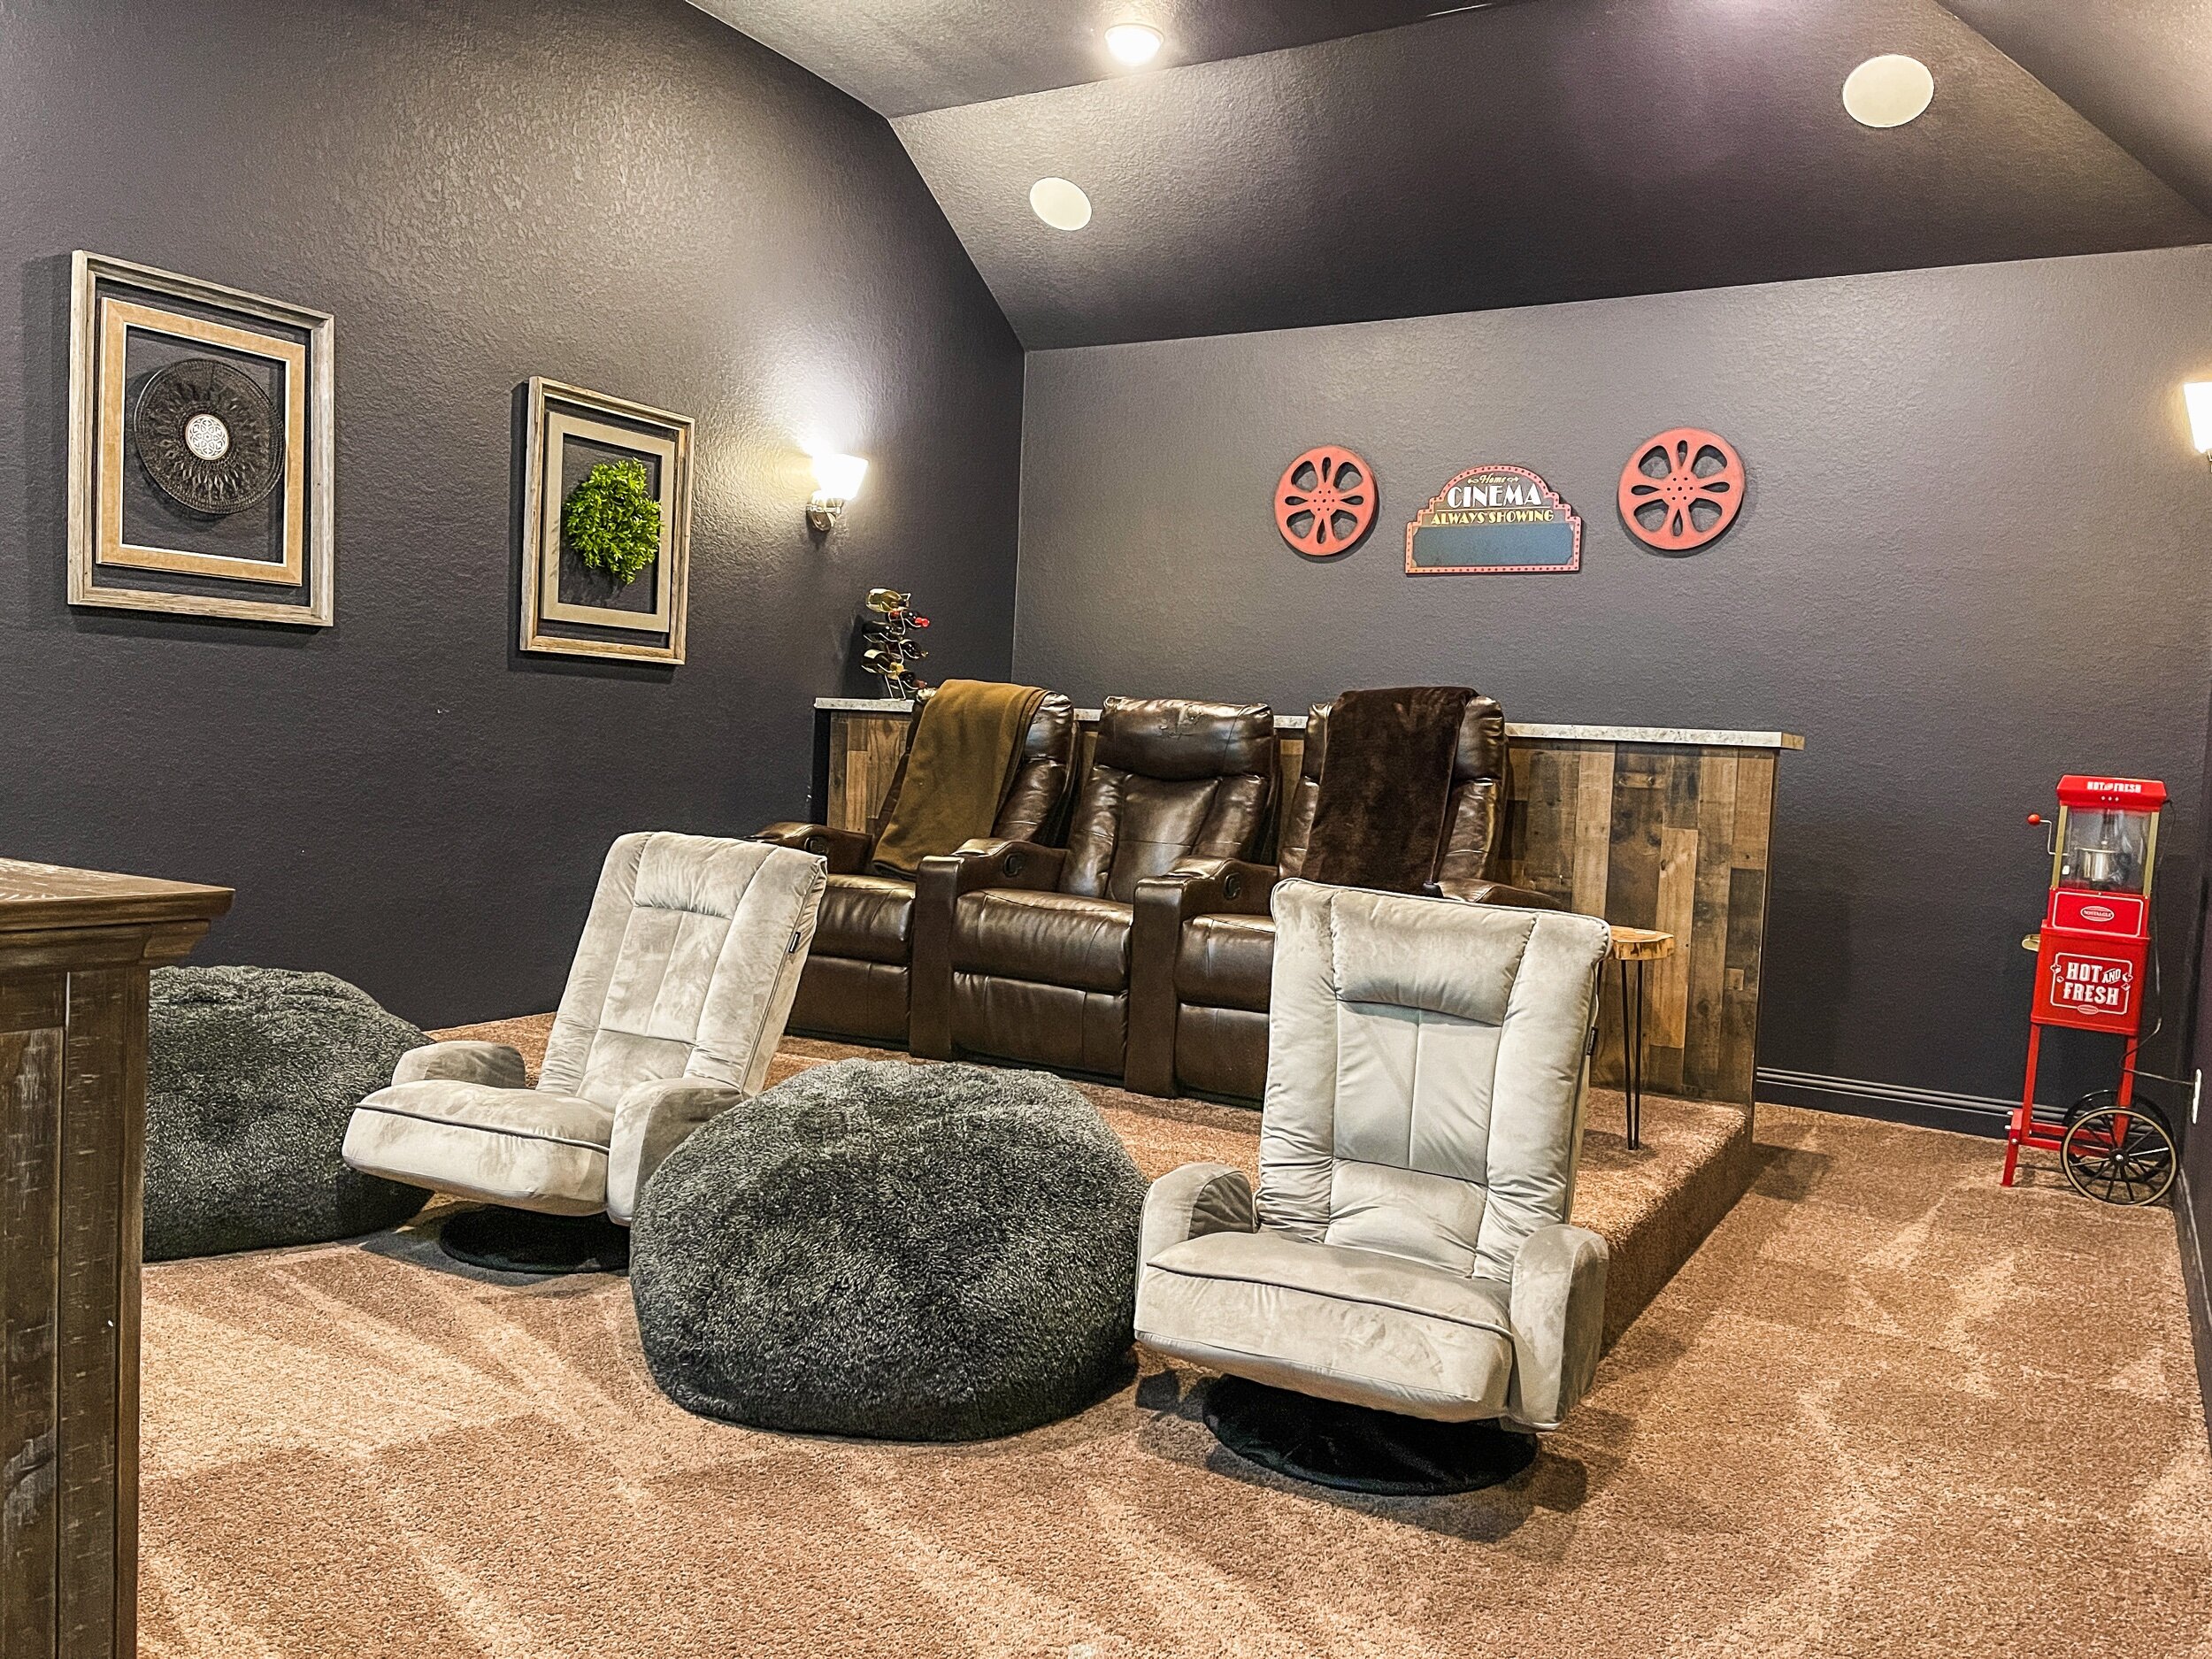
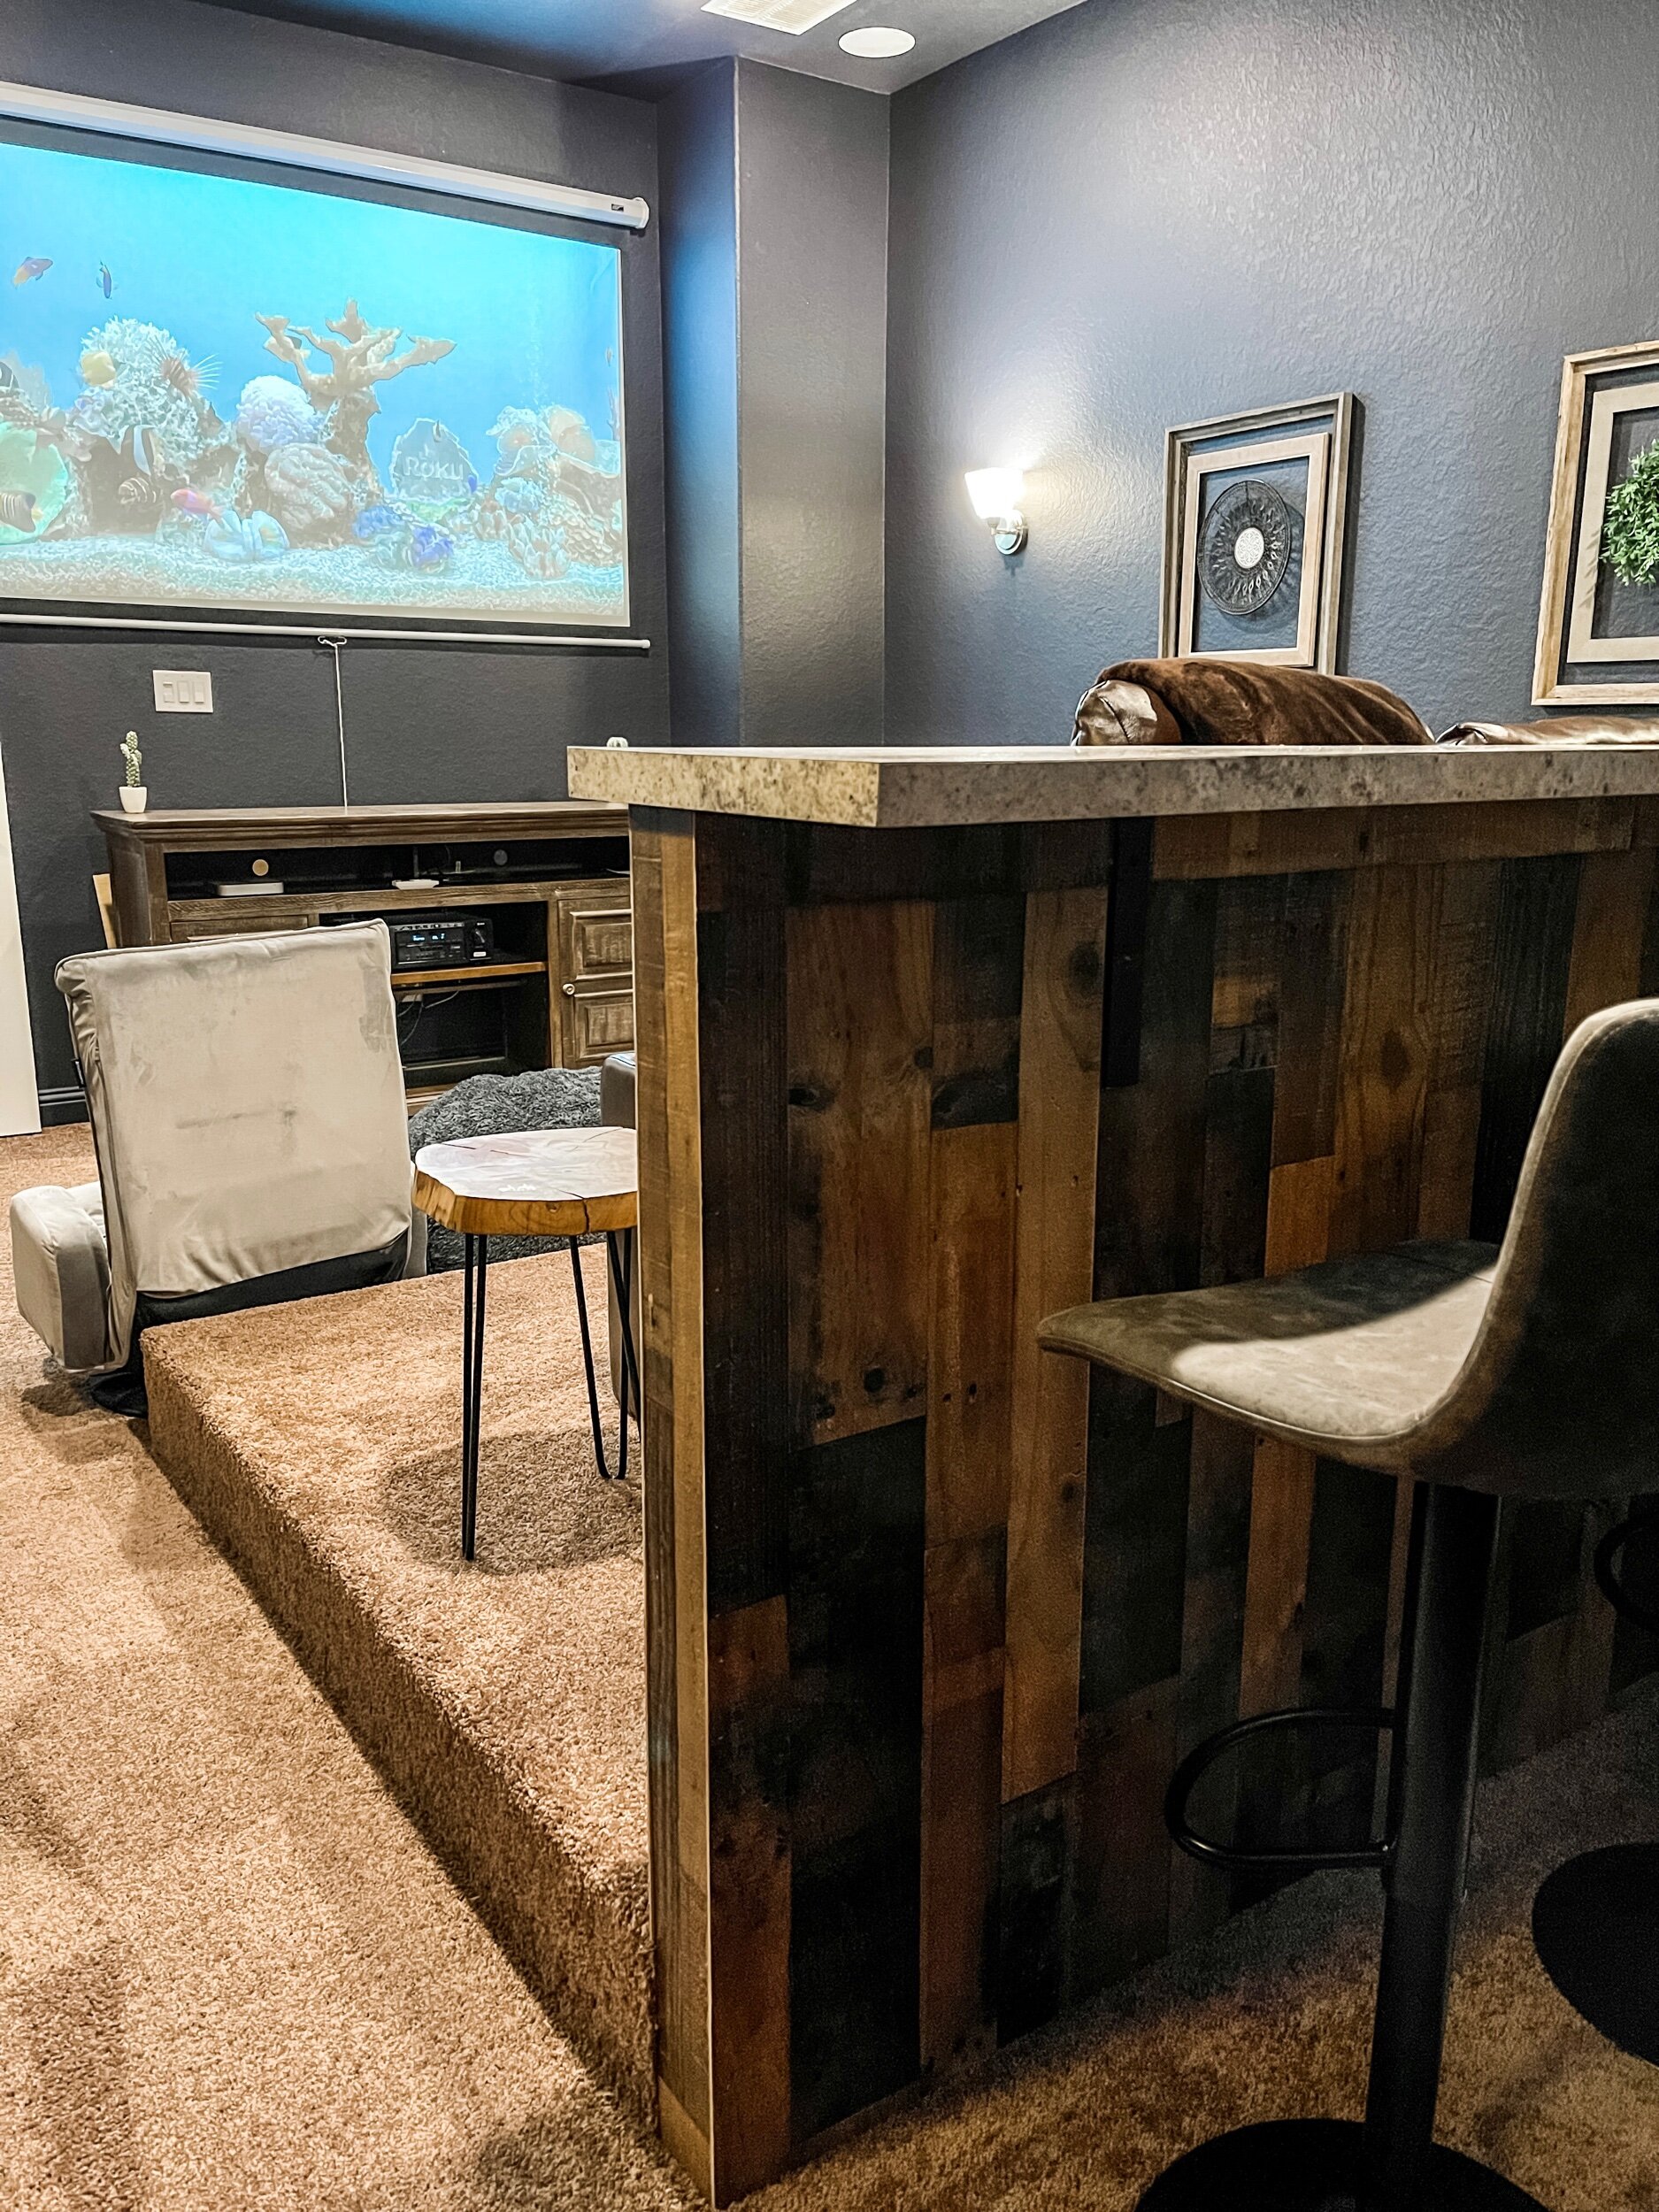
The platform and bar going in! We wanted it large enough for us to lay out our recliners completely. Fun fact: The bar and platform can be moved if we ever decide to move it up or back.

IMG_0003.jpeg
IMG_0018.jpeg
IMG_0024.jpg
IMG_0021.jpeg

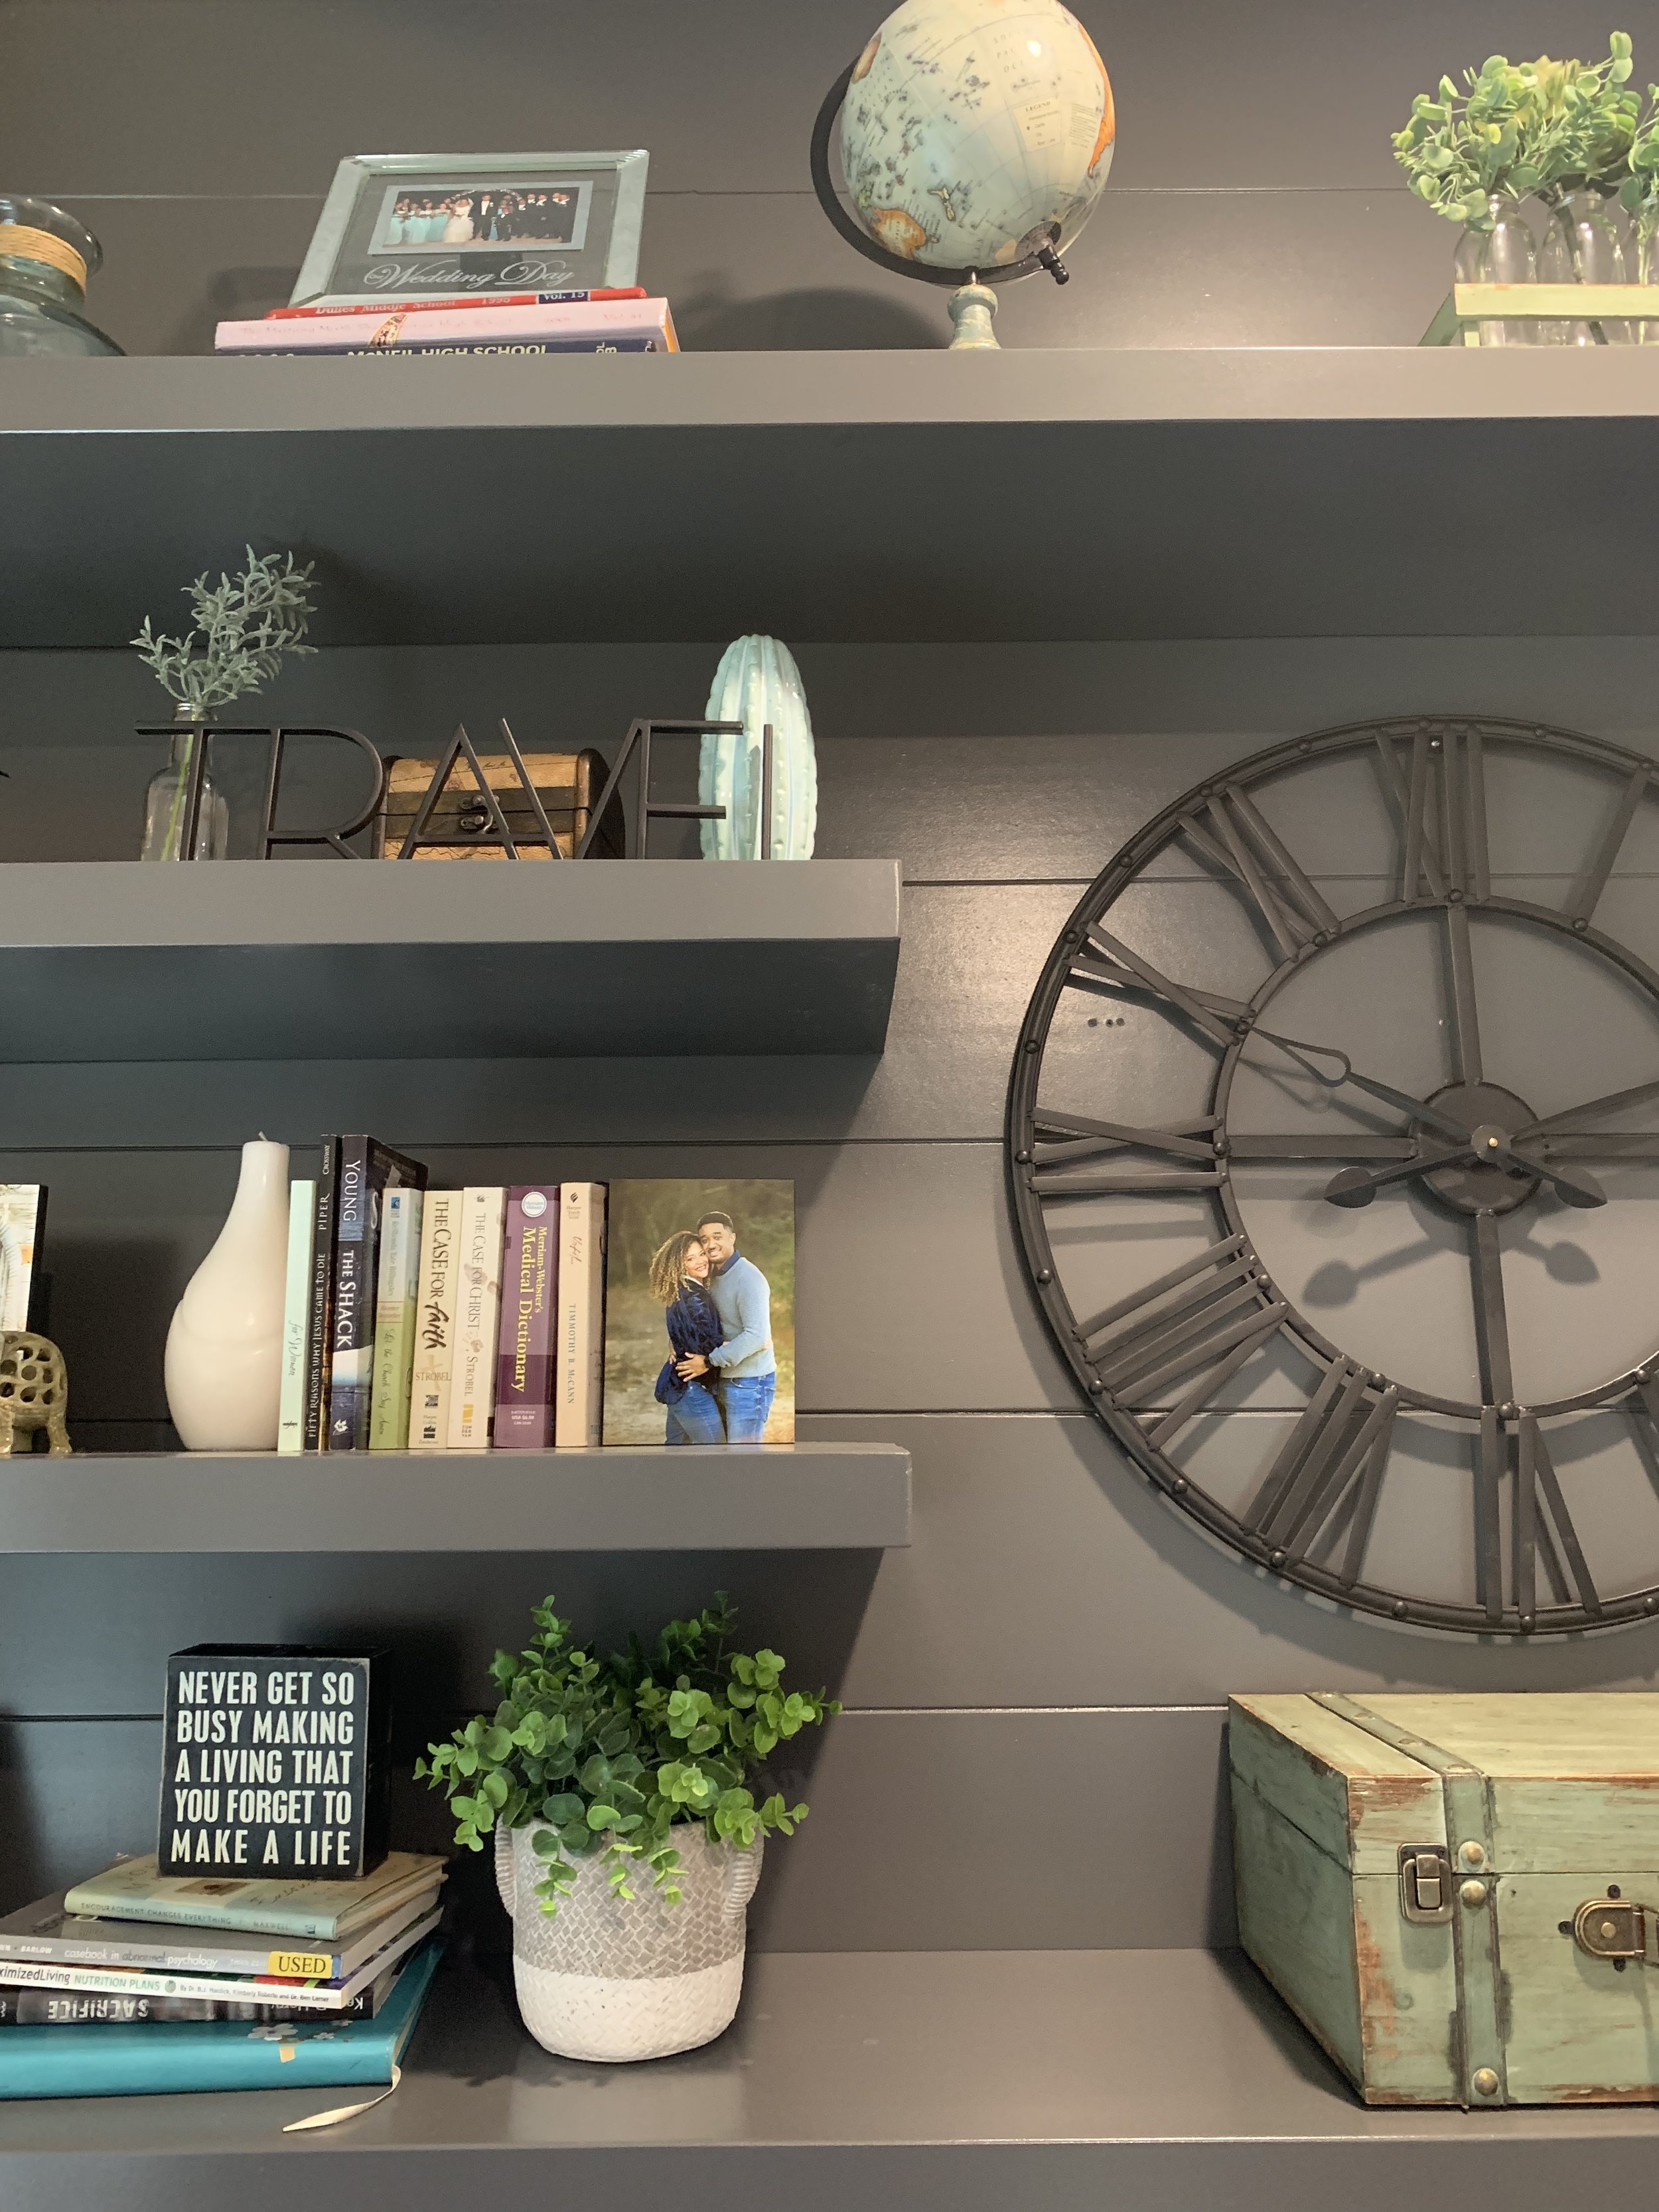
Once everything was installed, the fun part for me began which is decorating. I originally thought we would just go with movie posters, but we had a hard time deciding on what should go in. I went to Hobby Lobby and hoped to get some inspiration.

IMG_0014.jpeg

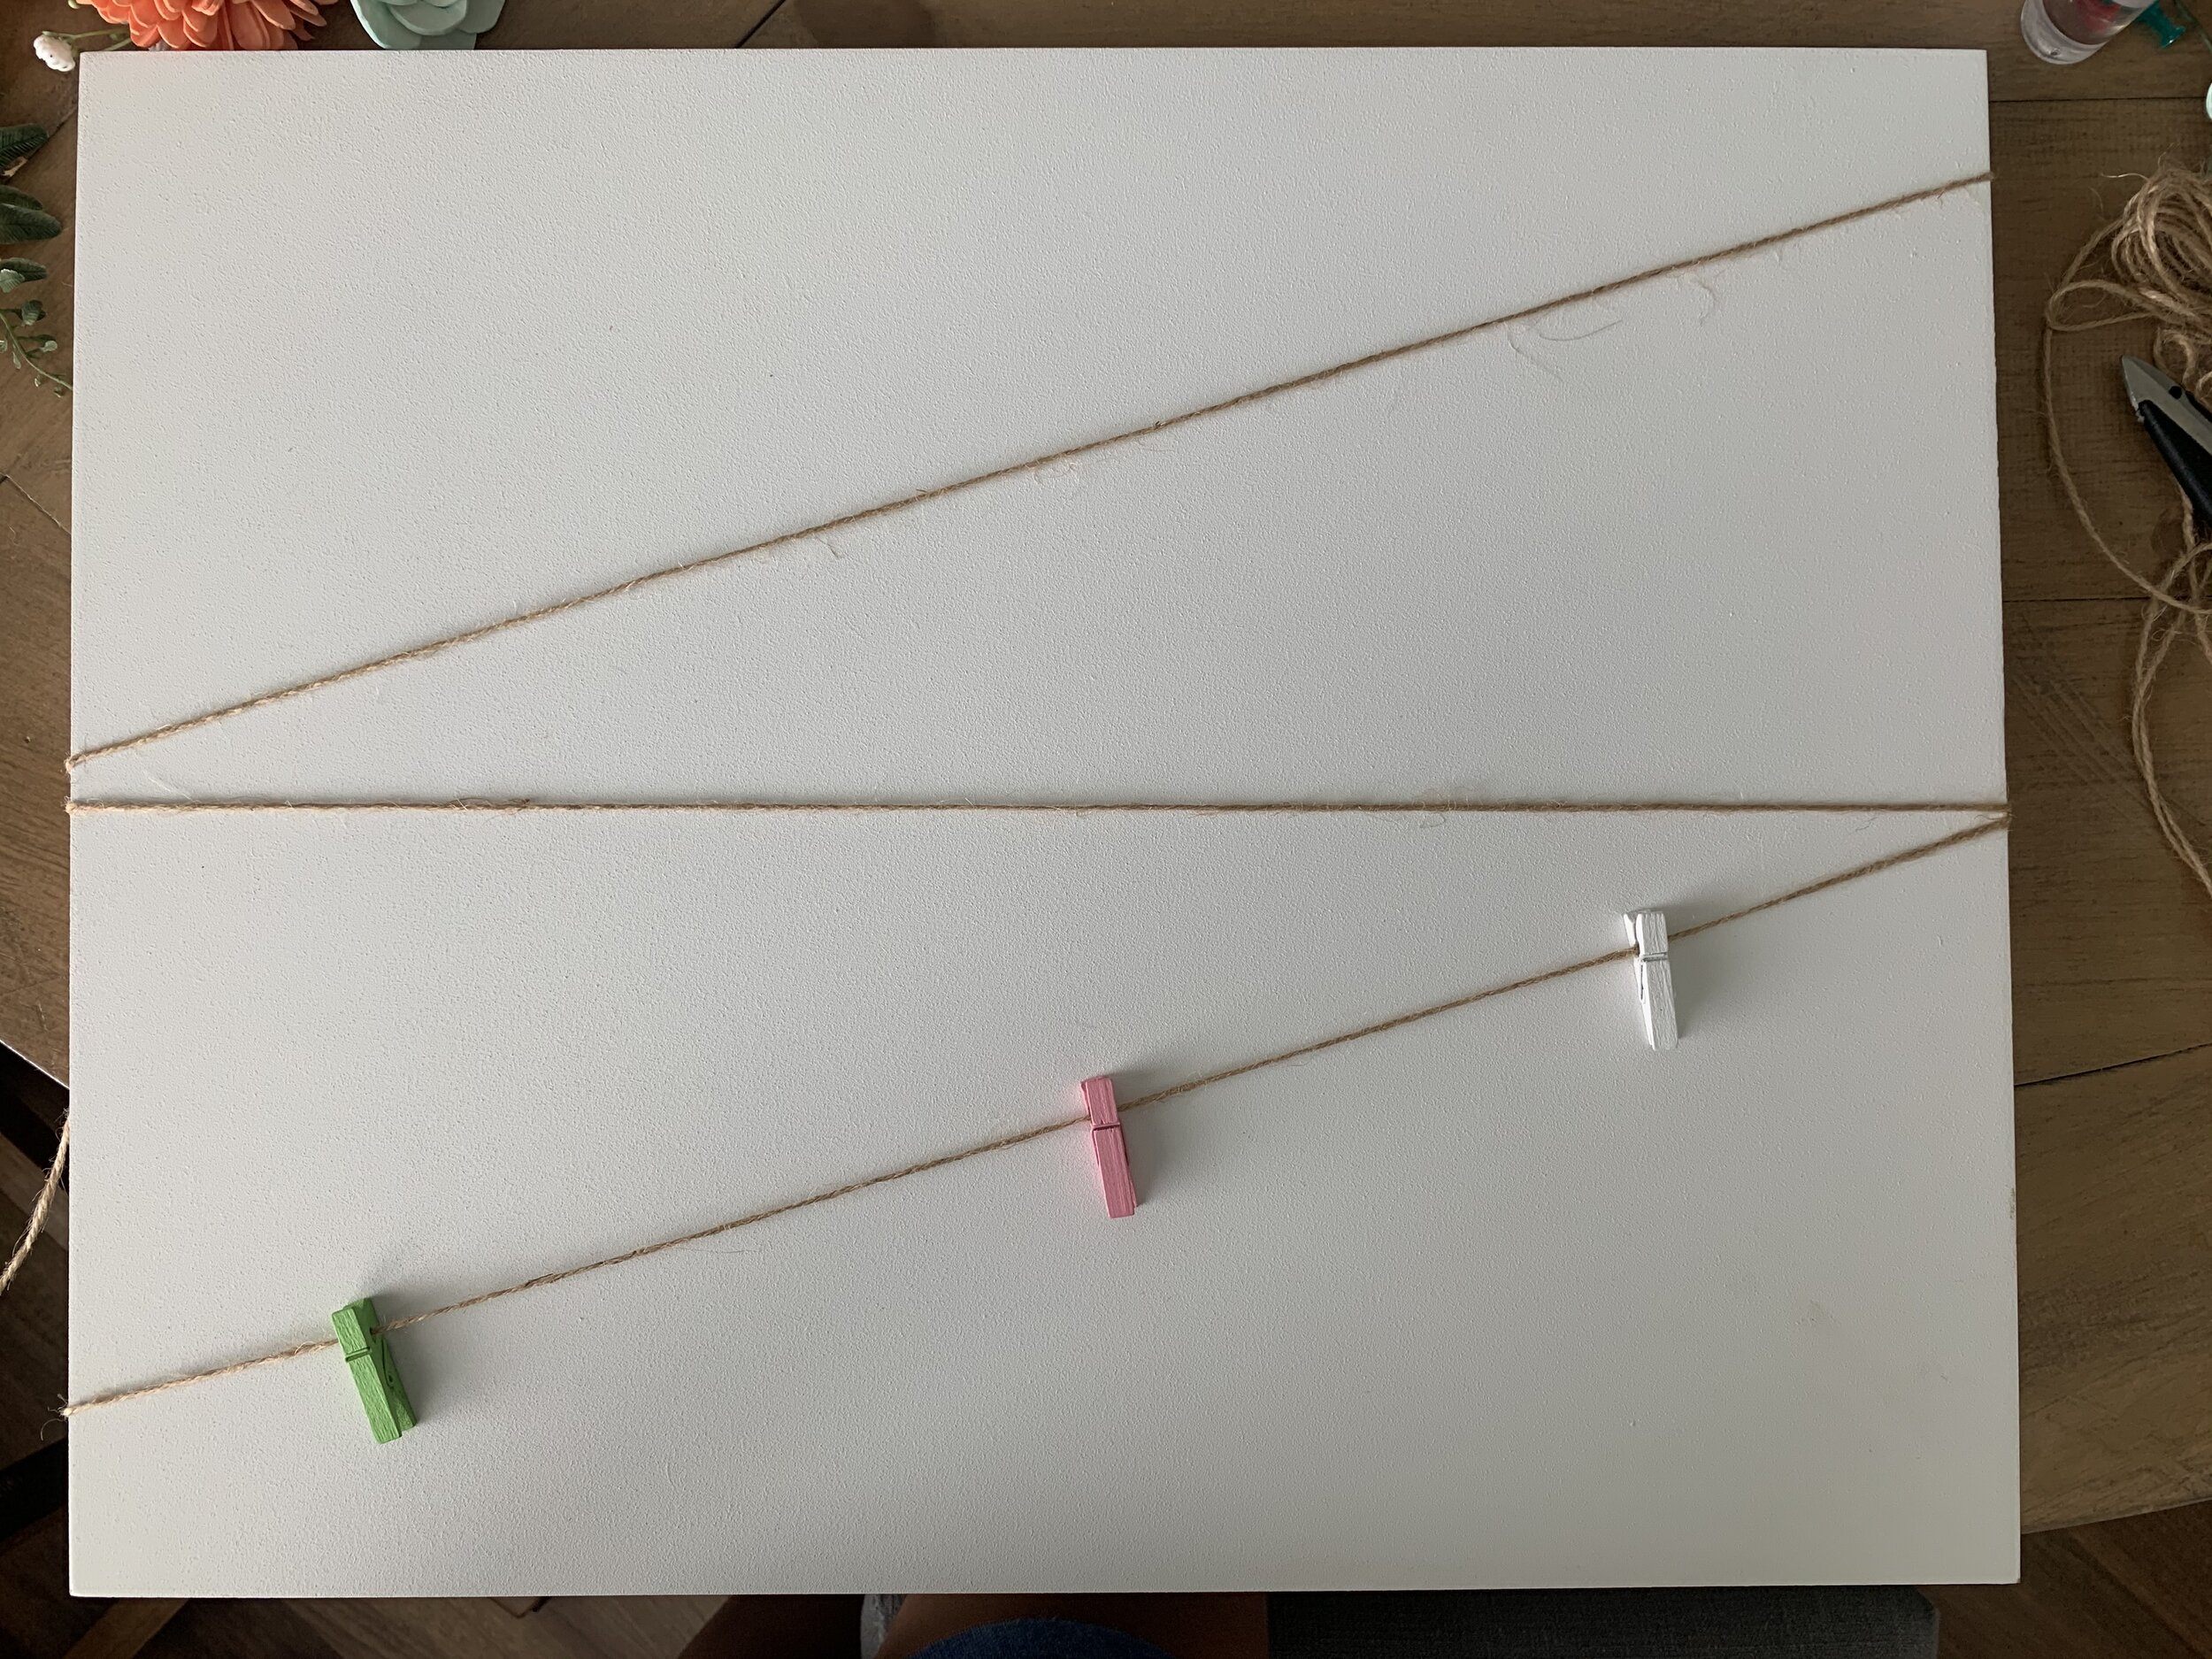
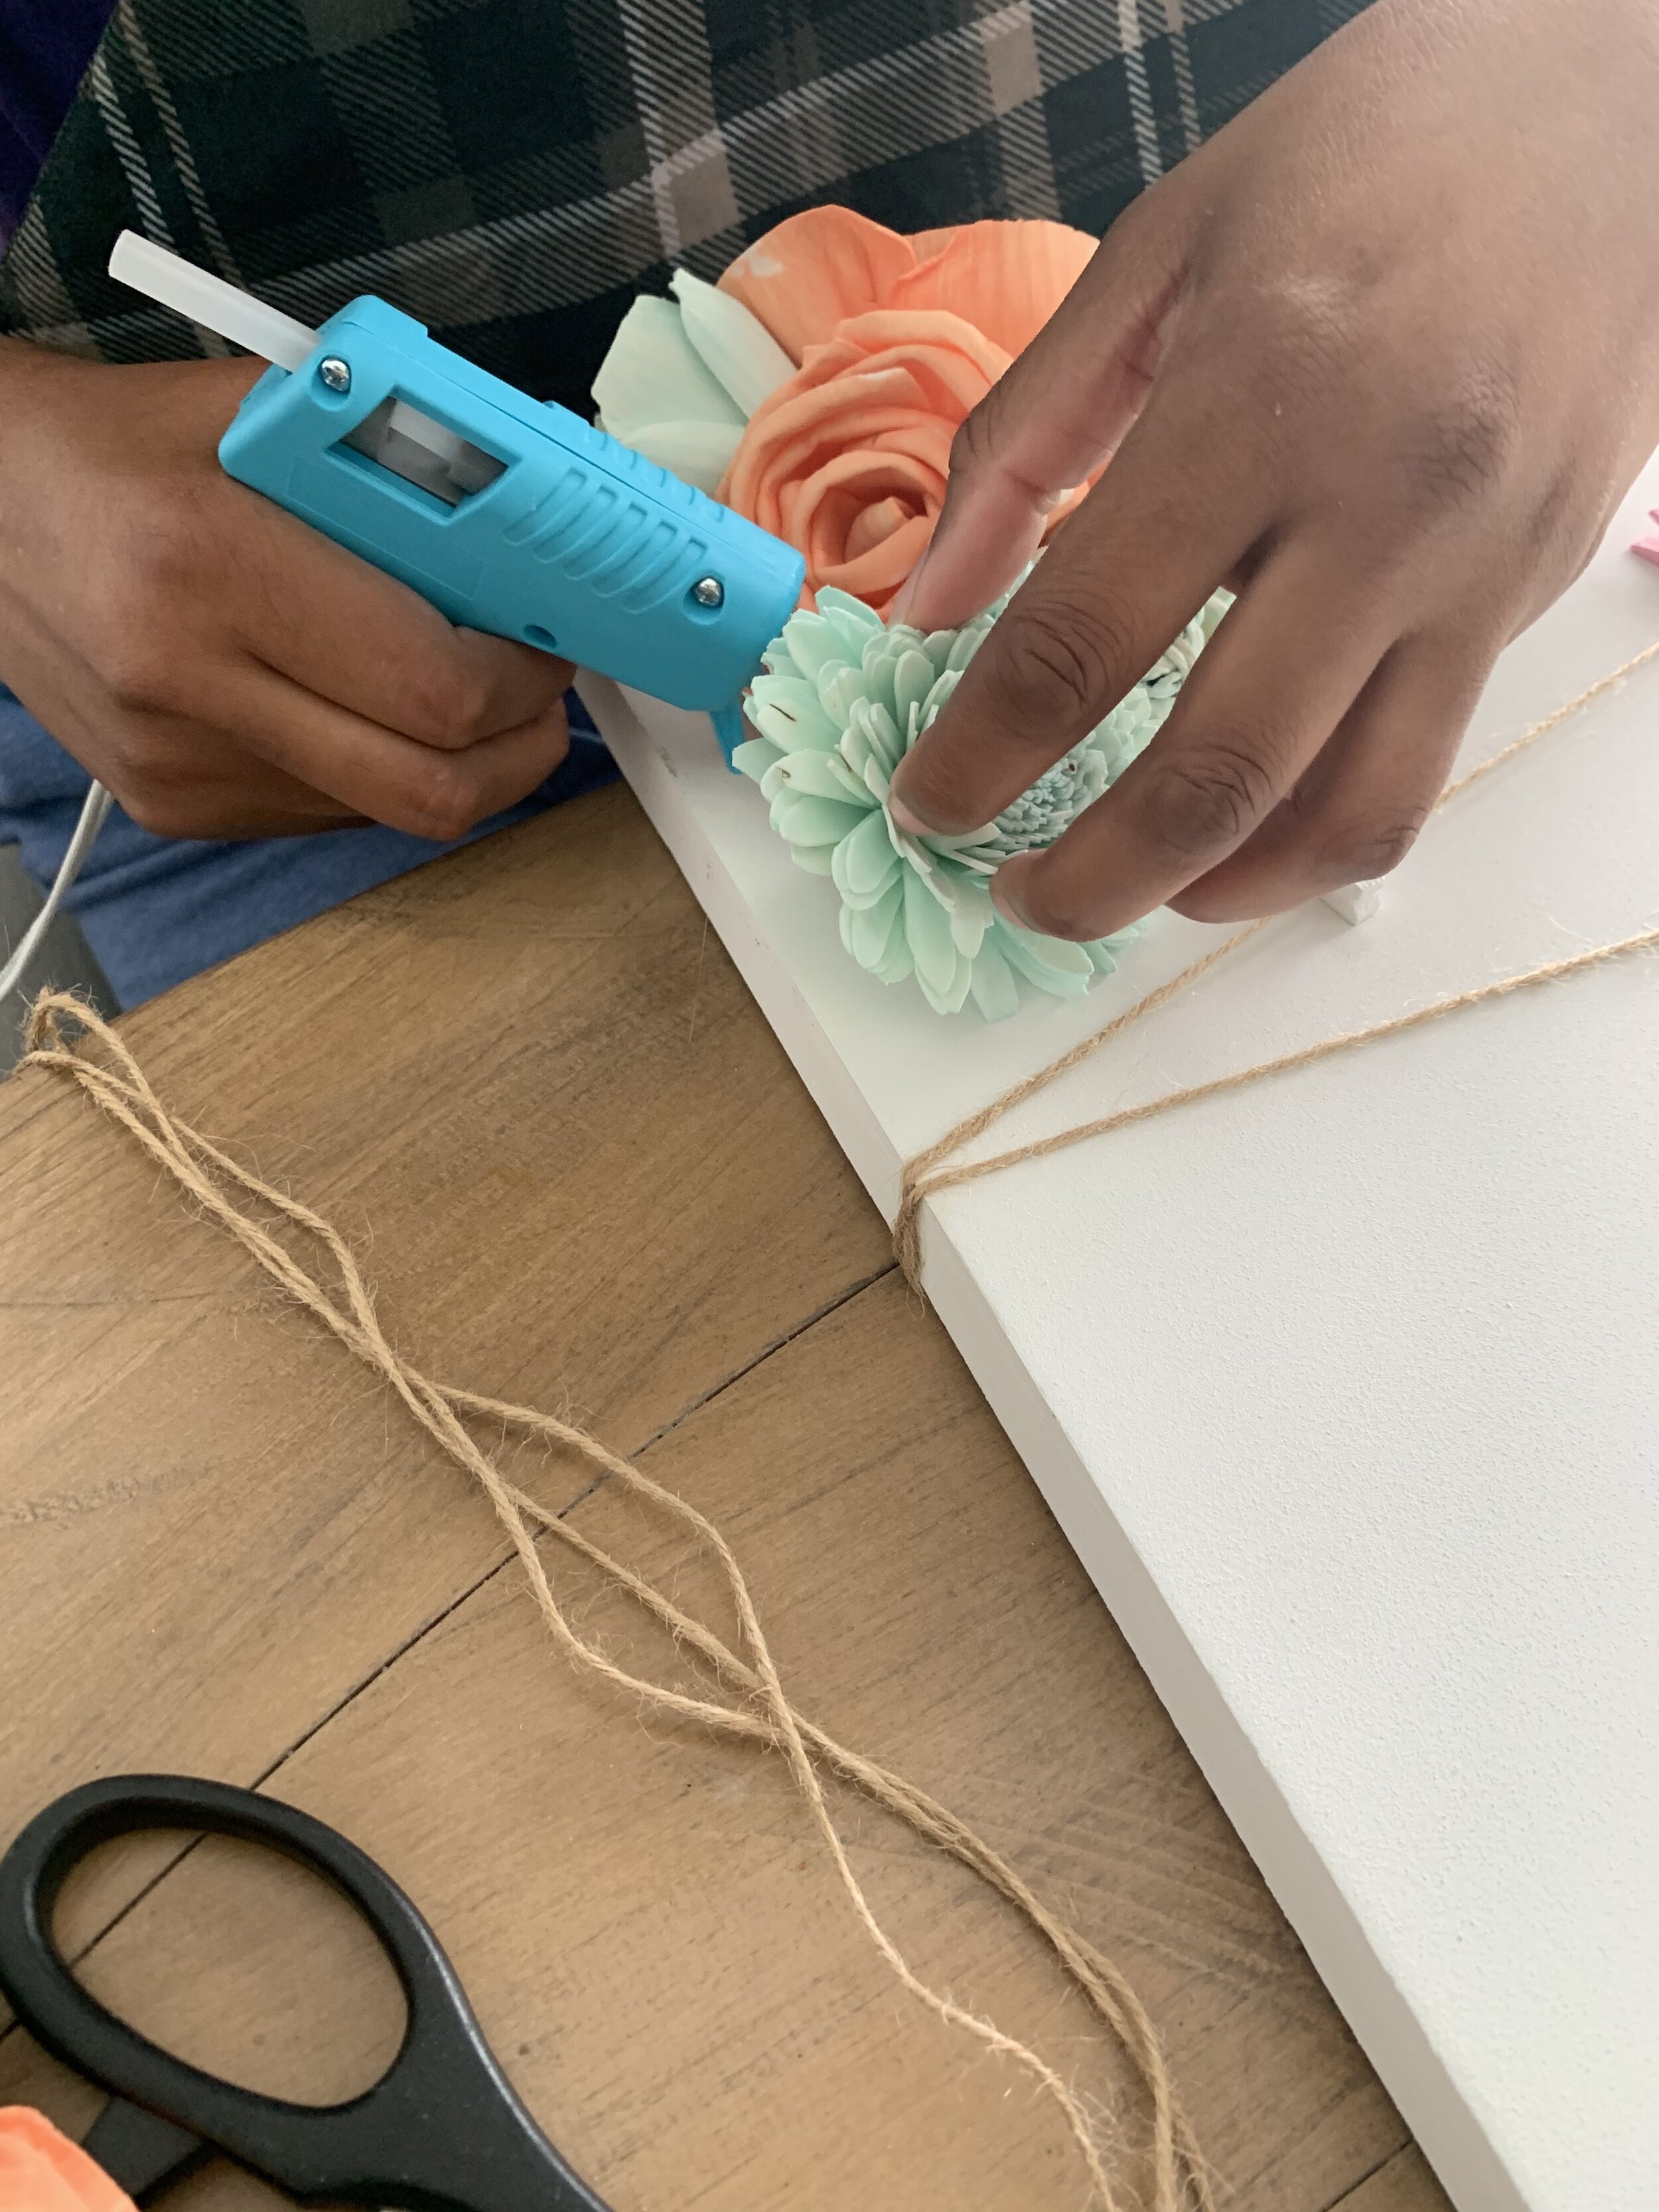
It’s safe to say I found some. I decided to go with layered open frames with a center focal point. I really like the way it turned out. I wanted to make them all the same but fortunately for me, I could not find 4 of everything. It is great because I actually like this better!

IMG_0013.jpeg
IMG_0020.jpeg

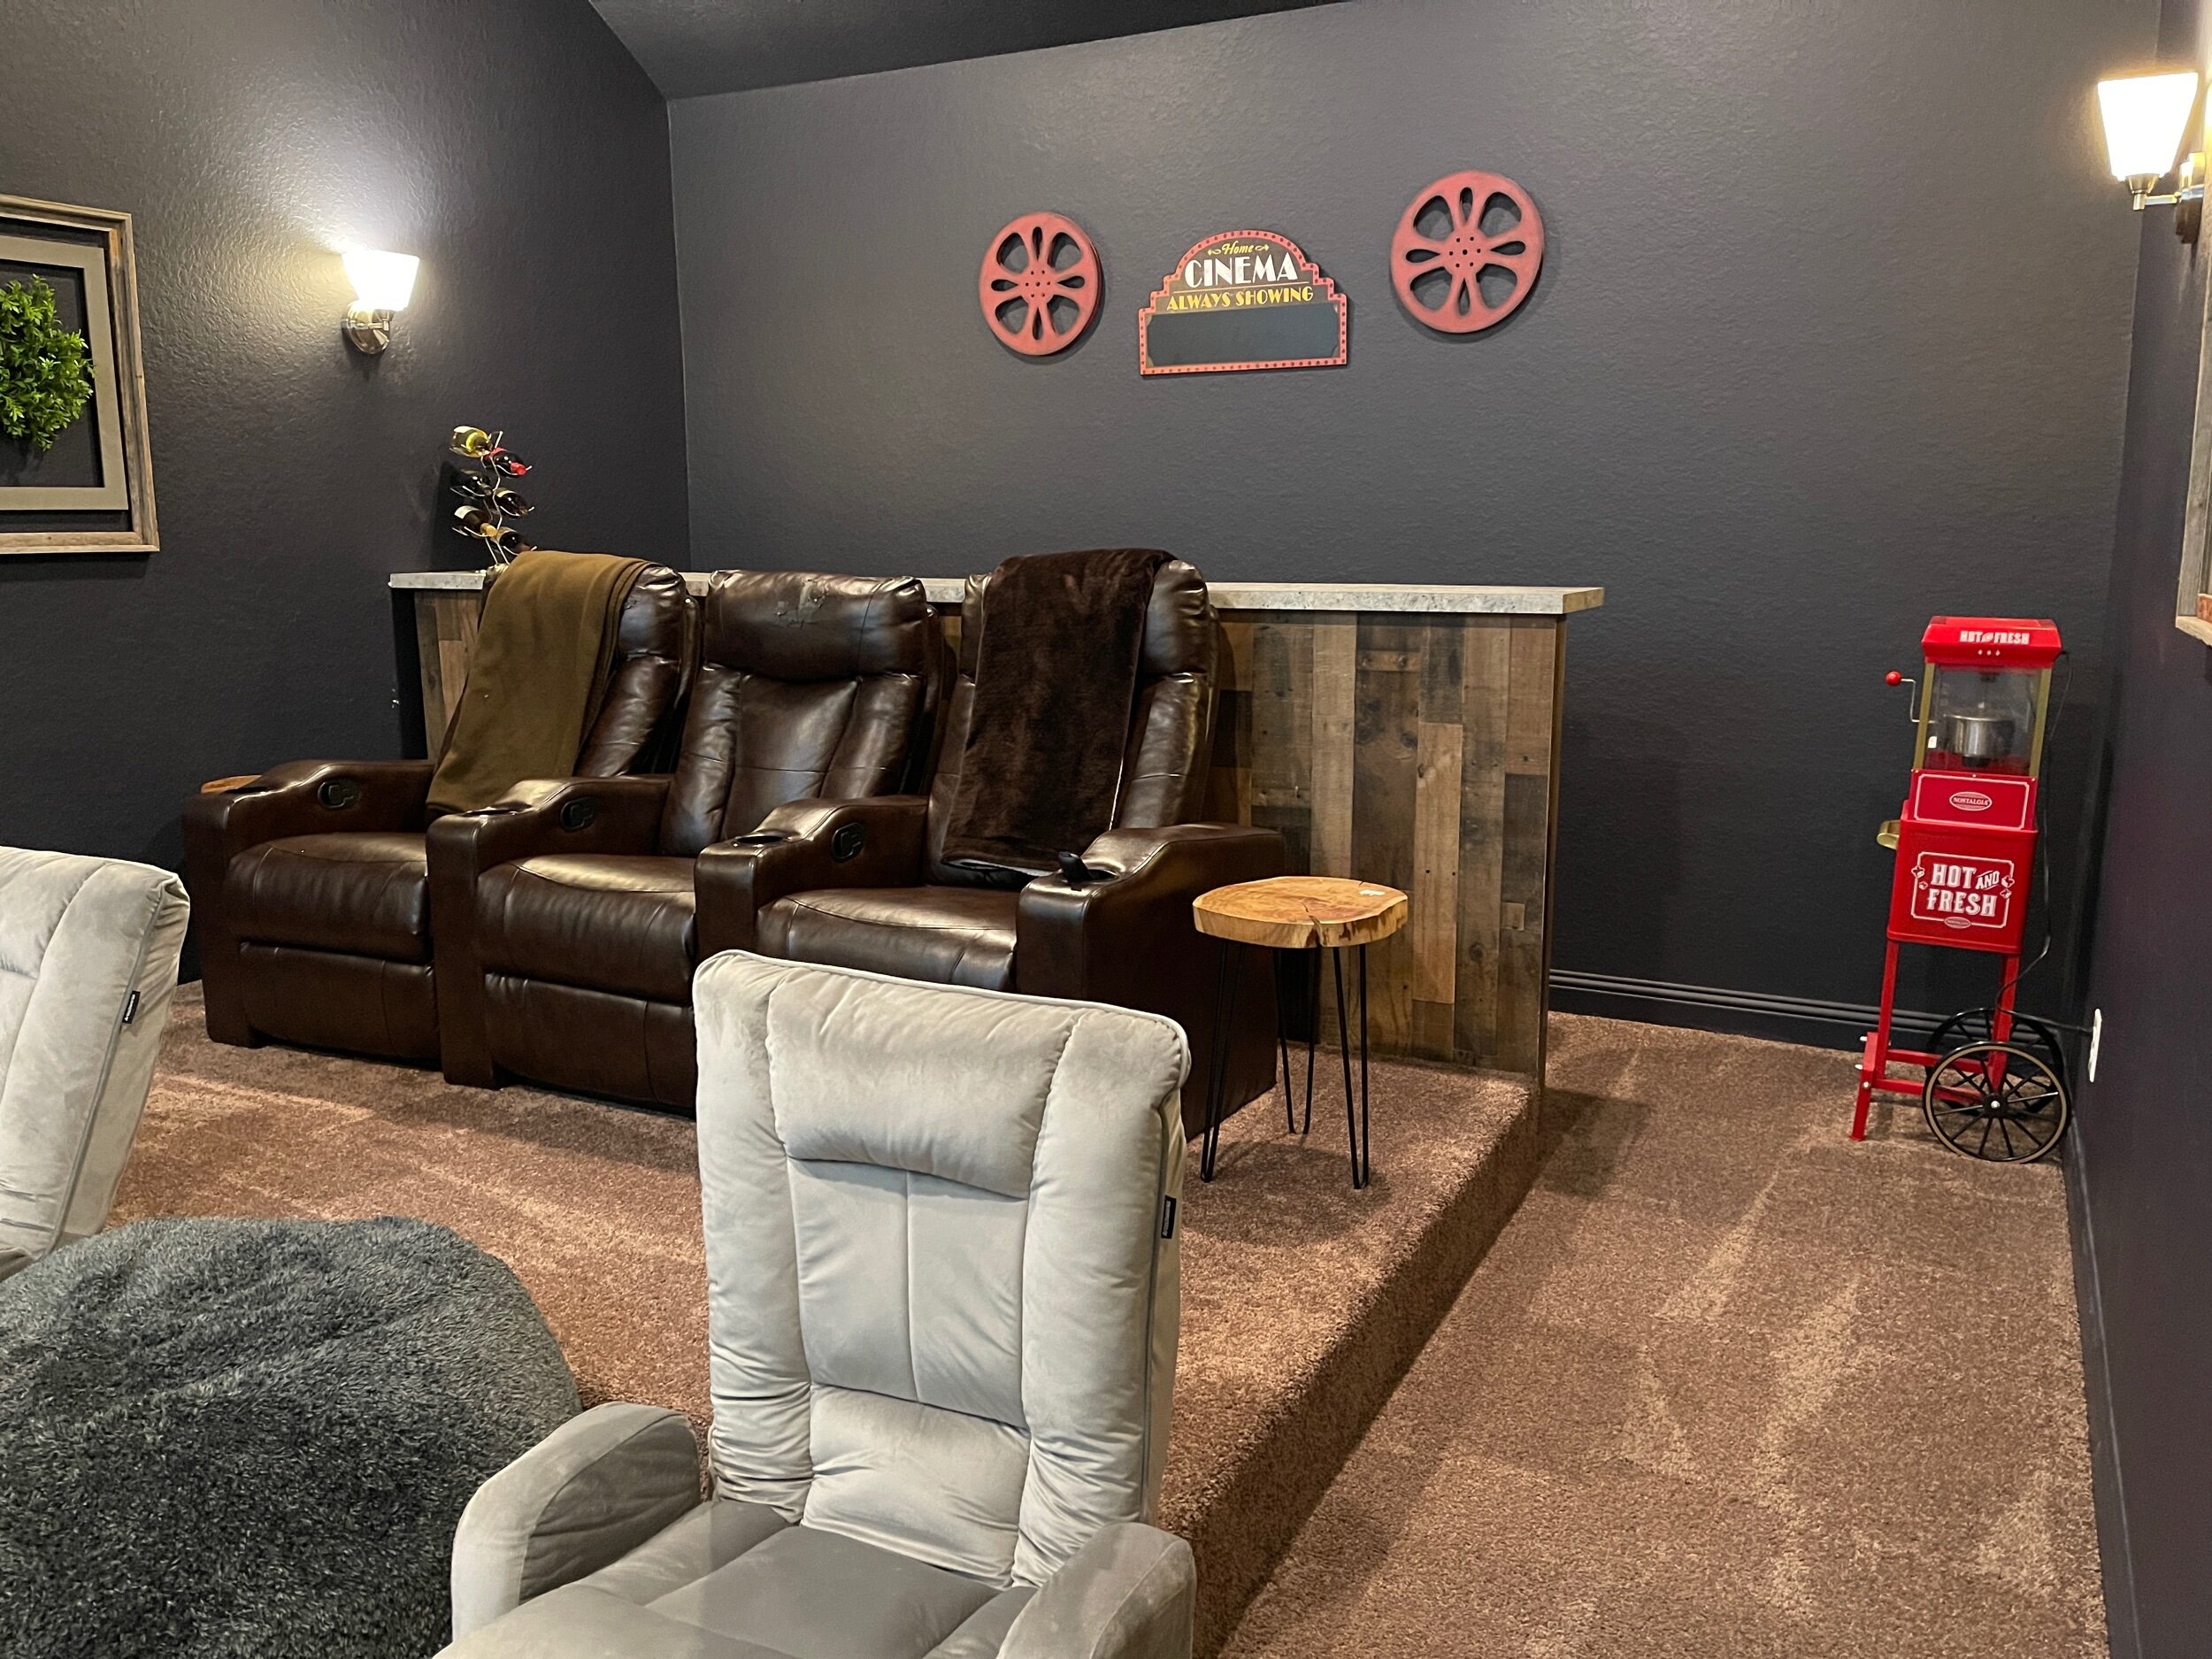
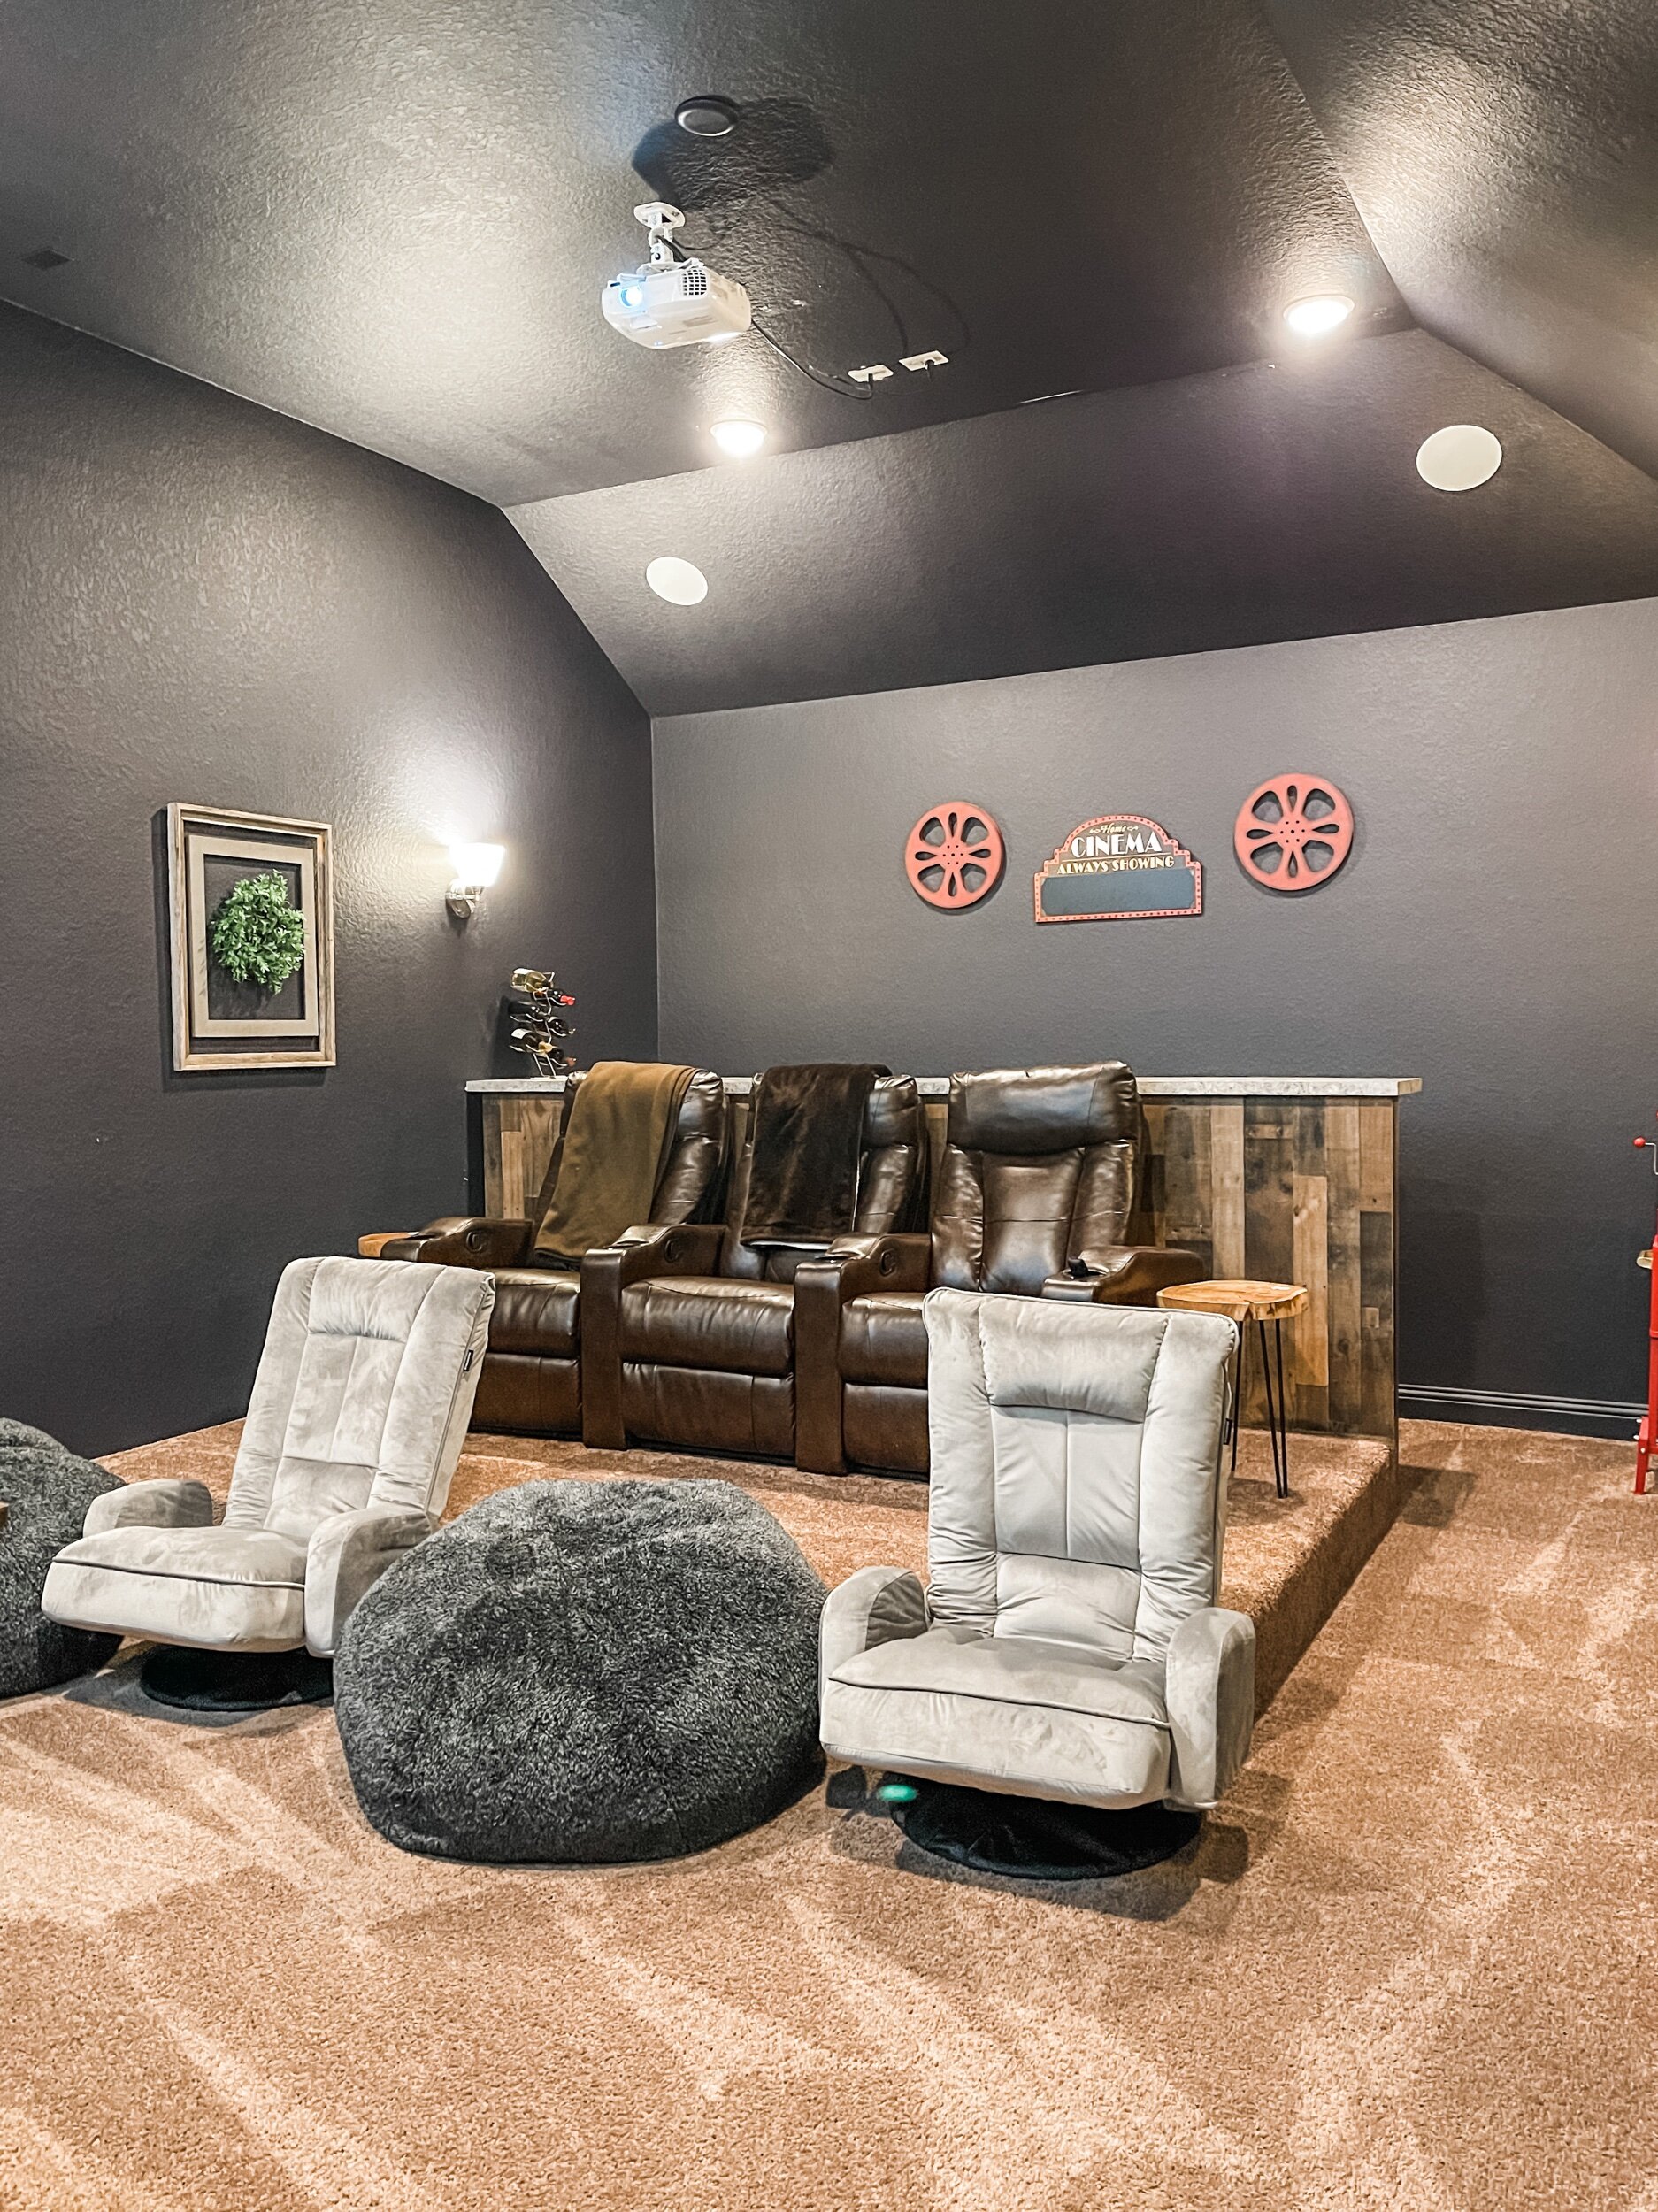
So let’s talk seating. It is EXPENSIVE! We are overdue for a new set, so will eventually (sooner than I’d like), we will have to replace the brown recliner sets. The leather is peeling bad. Our next set will likely be grey and we will do the same set for the 1st row. For now, I wanted to keep things reasonably priced and also wanted some variety. We added these reclining gaming chairs (that my boys adore) and they are big enough for Paul and I to fit. They actually hold up to 250 lbs! Can you believe that? We added the XL bean bags that can be used as a foot rest or for you to snuggle inside. All in all, I like the way

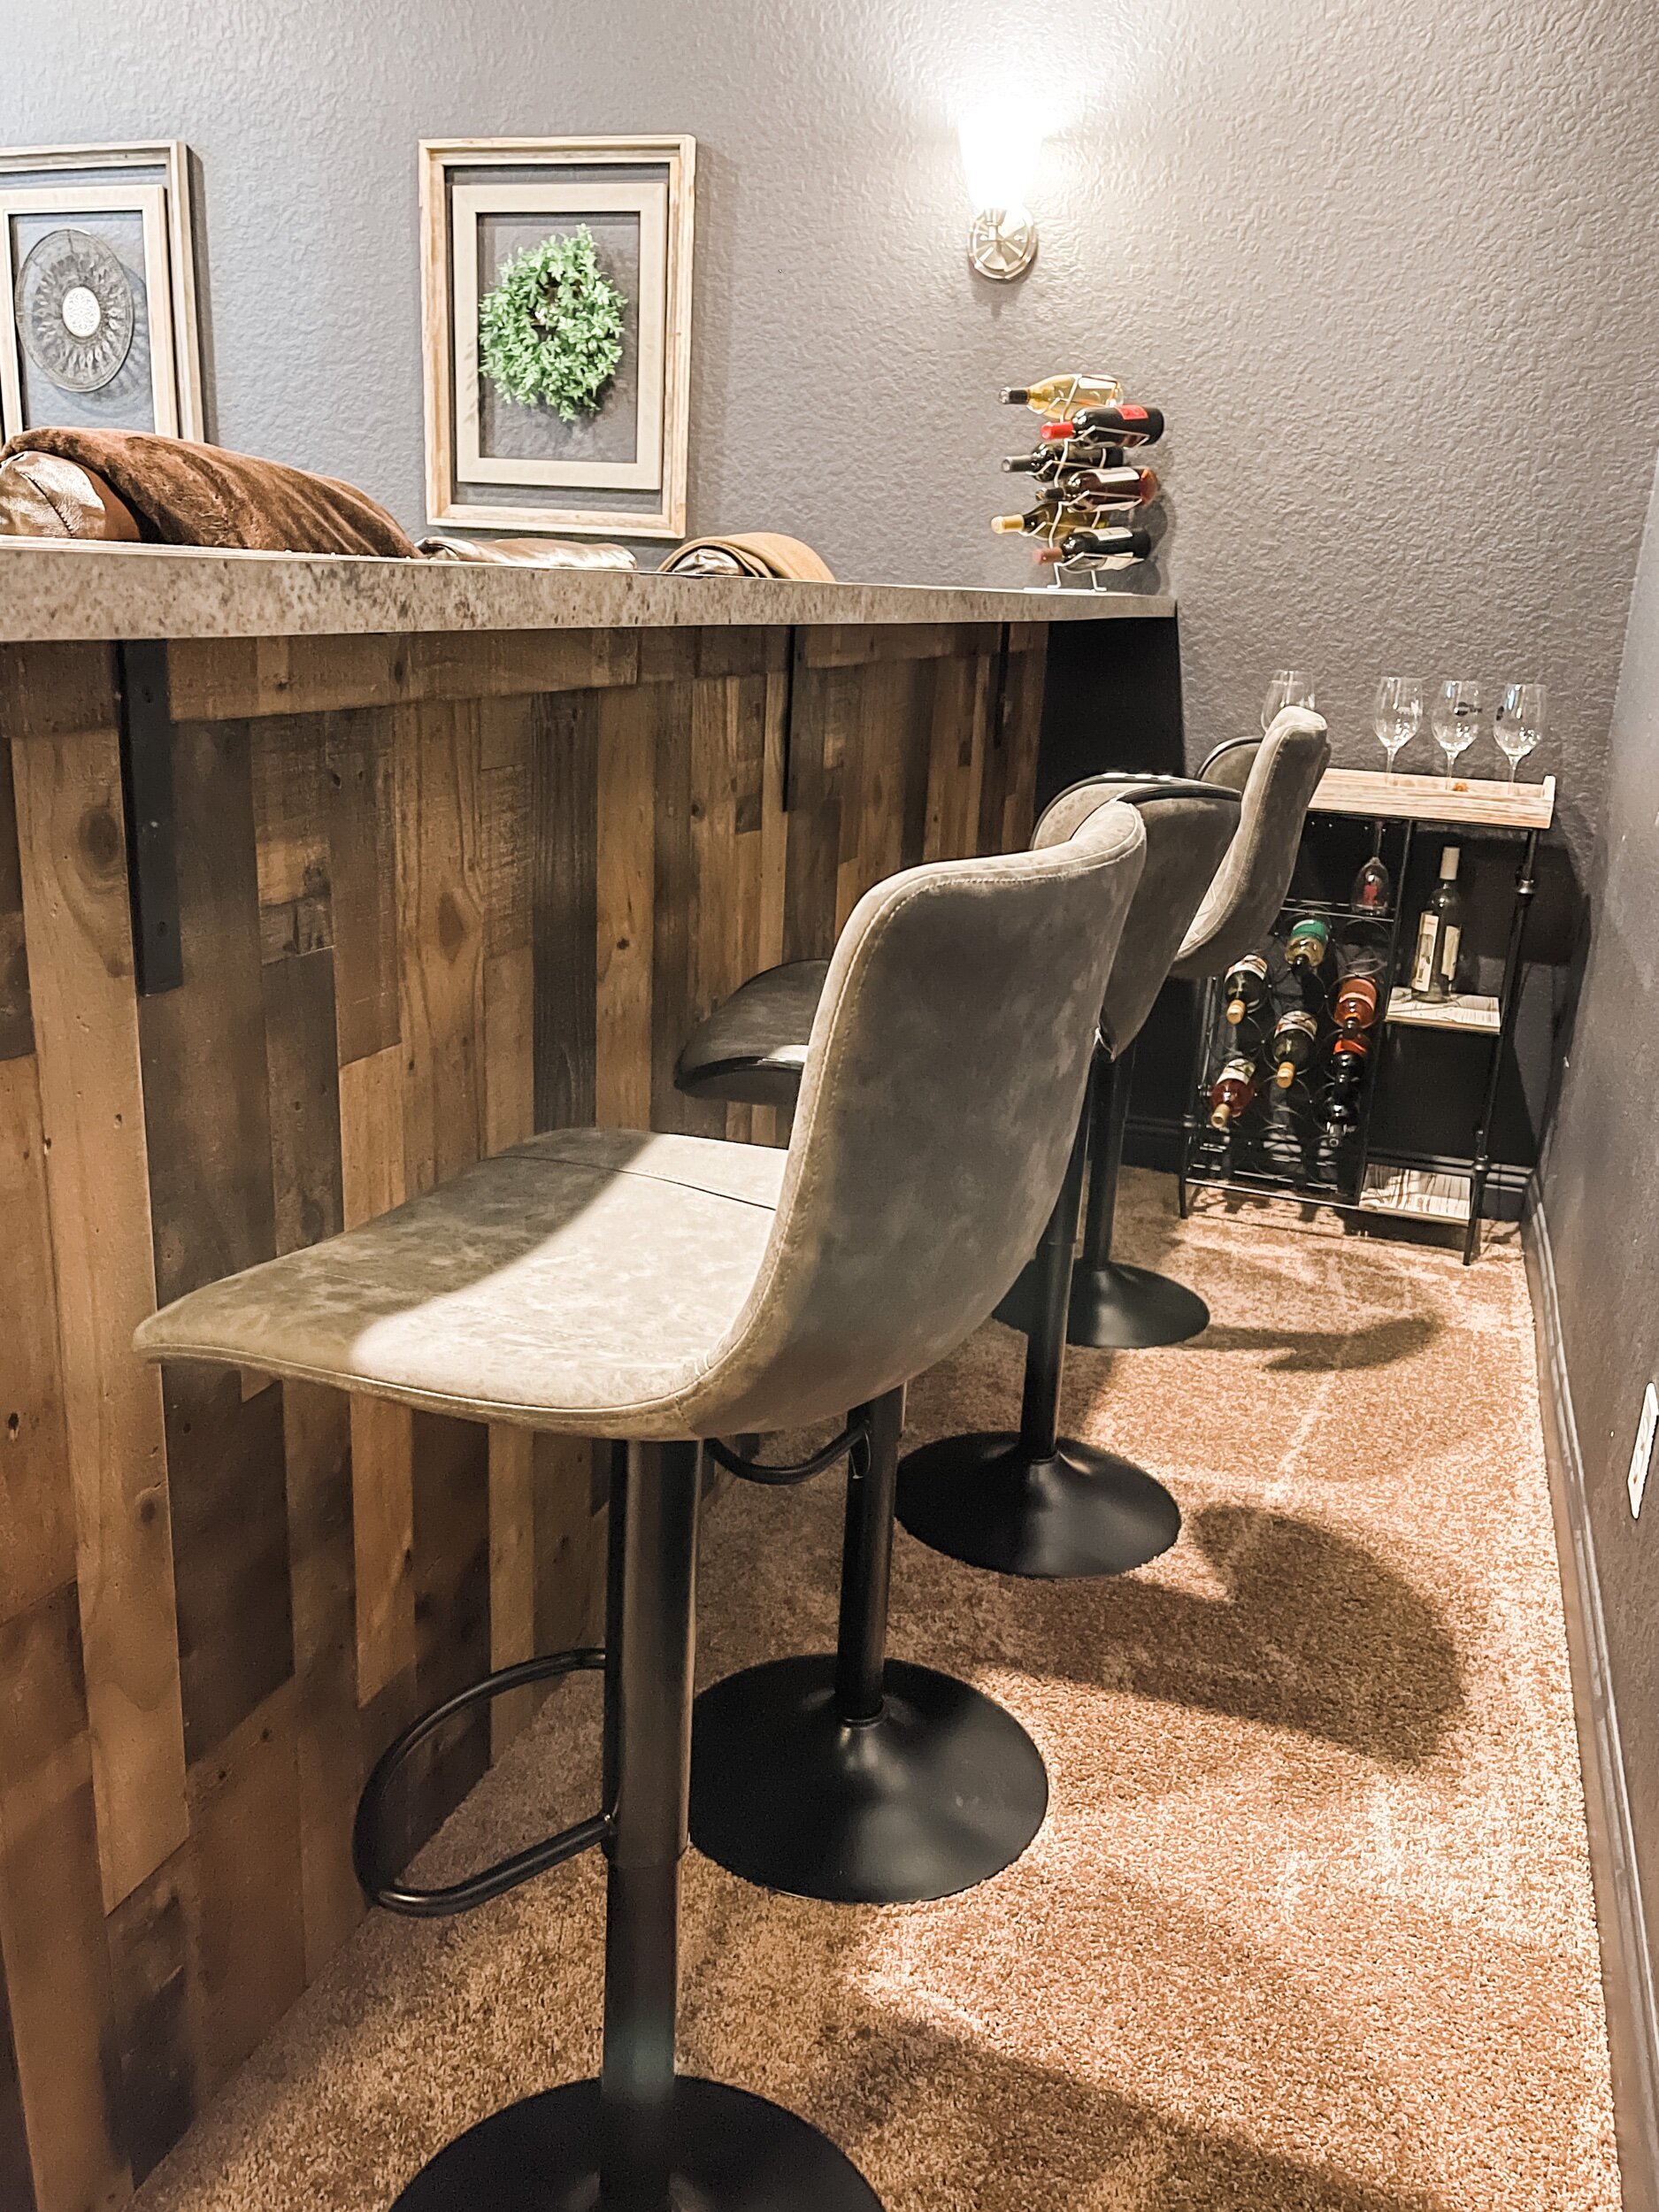
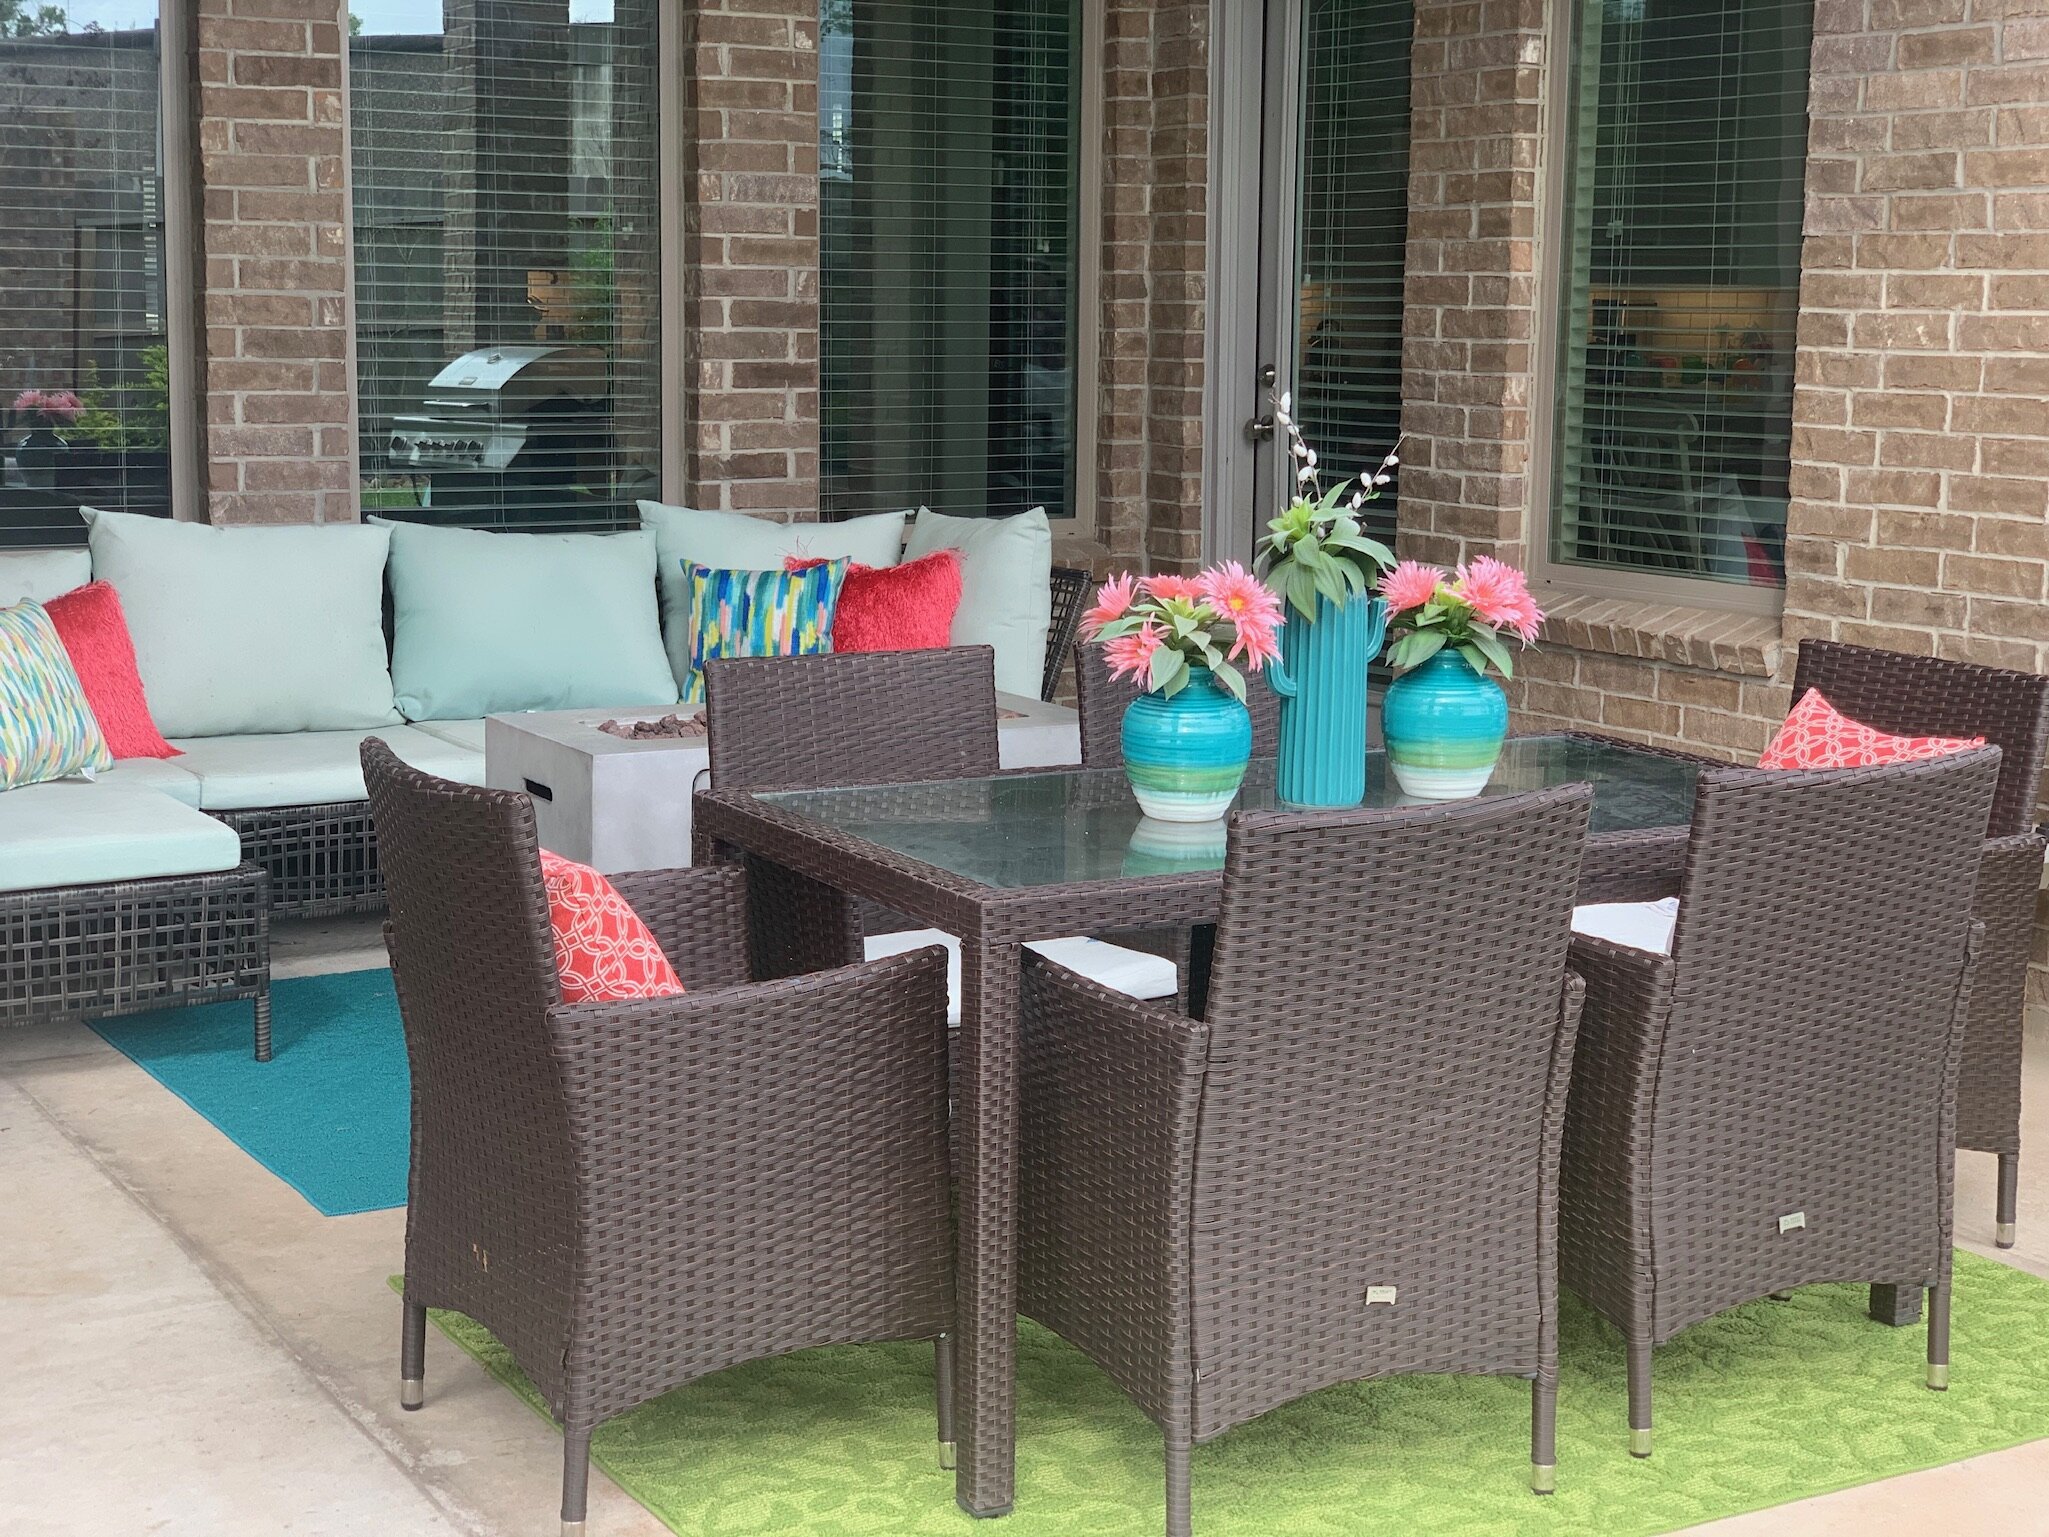
The bar is high (approx 48 inches) and there is no platforms behind it. Due to this, we had trouble finding high enough bar stools. We found some adjustable ones that go up to almost 34 inches and plan to make them work for now. As you can see, they are not the same 4. My husband liked the modern backed bar stools and I preferred the more standard style. Fortunately the colors match perfectly. We found a wine rack at the At Home store that fit perfectly in the space.

The side tables are from Home Goods and the popcorn machine was purchased from a friend. We also added a bigger entertainment center from Ashley Furniture.

So here is our funky space! When I order some new recliners, I will post an update. For now, it has definitely been a family favorite and we will be creating tons of memories here. What do you think?

As always, thanks for reading!!! XoXo

Fall Chicken Wire Wreath Kit

It has been a while since I have made a blog post. I set the goal to blog once a week but the pandemic has me struggling to keep up with all the things I juggle. I also just feel more tired and just not as motivated. But here I am attempting to push myself and get out a post. To be honest, this was the perfect thing as it was pretty therapeutic for me.

So I want to start out by disclosing that as of now, I am an affiliate partner for Sola Wood Flowers. I have worked with them before for just a collaboration and I am so happy for this opportunity to be an affiliate as their flowers are literally the best thing ever created! They are wood flowers but they feel & look like real flowers and the best part…they last forever. Do not get me wrong, I love real flowers and plants, but sometimes you just want something that will last longer. If you do make a purchase, if you can please use my affiliate link, I would appreciate it. I get a small commission every-time you make a purchase and every-time I see a purchase or a link click, I will legit be over here doing a happy dance. I truly appreciate your support. The link is here and throughout the rest of this post .


I am sharing my twist of the chicken wire wreath using the Sola Flower Chicken Wire Wreath Kit. Let me preface that I ordered an extra pack of flowers not realizing they are included in the kit, as are the fillers. I am glad I did because I wanted to add more colors that go with my home decor. The ones that come with the kit are the ones featured in the kit photo as seen on their website. They are a neutral color which is nice too. You get everything you need in the kit so no need to add extra unless you want to. I also picked up some pumpkins that were 40% off at Hobby Lobby.

Here is what you need:

  1. The Sola Wood Flowers Wreath Kit

  2. Wire cutter (optional)

  3. Scissors

  4. Rubber Band (optional)

  5. Hot glue gun (the stick came with an extra large glue stick but I have a small glue gun)

  6. Phone/Camera

IMG_6101.jpg

The extra kits I got are listed below and you can search for them on the site:

  1. Butter Mint Assortment - 25 pack (on sale for $12 at time of purchase)

  2. Eucalyptus Pick - Burgundy (on sale for $3.20 at time of purchase)

Note: If you cannot find either, they may be sold-out, but keep checking back or choose from one of their many other amazing items.

First I recommend placing everything on the chicken wire.

IMG_6104.jpg

When you have it where you want, take a picture so you can use as reference.

I worked from the eucalyptus (dark purple filler) on each side first then started from top to bottom. With the filler, I tied it together using a rubber-band, then cut it. I kept it bunched together and glued it on that way. Then I spread the flowers apart.

Once everything is glued down, check for gaps and add the filler in those spots. When it is to your liking, enjoy your masterpiece! If you plan to put it outside, make sure you use extra glue in the event it gets rainy and windy. I found a cute place inside for mine.

IMG_6121 (1).jpg

There was no real method to my posting. I had a few pieces that I knew I wanted, for instance at least 3 of the yellow flowers and at least 4 pumpkins. Of the pumpkins, I wanted to ensure at least 2 matched. I am usually a symetrical person but working to let that go!

If you do one and decide to post it on IG, tag me please, @ashlillyotm or send it to me on Pinterest. I cannot wait to see it.

This was so relaxing and the flowers are so beautiful that it is hard to mess it up. So do this with confidence!

IMG_8833.jpg

As always, thank you for reading!! XoXo

IMG_6397.jpeg

Our Not-So Fairy Garden, Dinosaur Takeover!

Have you seen those adorable fairy gardens? If not, definitely google them. They are so cute and I always wanted to make one. The thing is, my son is totally not interested in them. I may still make one, one day, but wanted to figure out a way to make it work for the both us.

*Cue the dino garden*

We found a happy medium! Mini dinosaurs with beautiful fresh plants! I wanted to add a worn down house, but my son was not having it. I did order a jurassic park jeep that I may incorporate in there some how. Anyway, if you are a boy mama or your kiddos just love dinosaurs, then this may be it for you! I just wanted to give a quick rundown of what we used:

  1. Container to place the garden in. You can also just do your flower bed around a tree, but I am not that committed smile. We went with a galvanized tub from Michaels (40% off coupon).

  2. Sand

  3. Soil

  4. Decorative rocks - we used river gravel and blue pebbles

  5. Mini fairy structures. We got the bridge from our fav garden store, Enchanted Forest, but Michaels, Amazon, Hobby Lobby, all sell them. Lowes does not, we tried there first. We only got a bridge, small bench, and 2 birds.

  6. Mini shrubs - We used Ming for the larger tree, 5 containers of dwarf mondo grass, 2 hypoestes phyll (splash rose), a fern, and a bonsai mix.

  7. A small plant saucer for the “water”. We could have purchased a cute pond from Enchanted Forest but the saucer was only $2 and we went to Lowes first before we saw the cute fairy pond.

  8. Mini collectA dinosaurs from Amazon

All items totaled to about $80. The container was the most expensive thing at $45 but like I said, we had a coupon!

Here is how we put it together in 4 simple steps -

1. We added sand to the bottom but you can also just fill the container up with soil.

1. We added sand to the bottom but you can also just fill the container up with soil.

2. Add the soil. Fill it up, leaving about 6 inches from the top (more or less).

2. Add the soil. Fill it up, leaving about 6 inches from the top (more or less).

3. (Forgot to take a pic). Place the pieces before planting! Once satisfied, start laying in the plants, and fairy pieces, the saucer, then the sand and rocks!

3. (Forgot to take a pic). Place the pieces before planting! Once satisfied, start laying in the plants, and fairy pieces, the saucer, then the sand and rocks!

4. My son’s favorite part, adding in the creatures!

4. My son’s favorite part, adding in the creatures!

You can add some liners to make a clear path but since I did this with my son, we kept it simple. If you are looking for something fun to do with the kiddos, this is an idea!! Not a cheap one, but a fun one that we can hopefully keep alive for a while. He will change out the dinos periodically.

If you have any questions, please comment below! Thanks for reading, XoXo.

Our Half-Bath Update

I am not a fan of pedestal sinks! Guess what my hath-bath/powder room came with? A pedestal sink…ding ding ding!! If you love them, I am sorry. I need some storage, a place to store (hide) stuff. I was so thrilled to finally get rid of ours. The half bath is one of the few places, besides the common areas, that guests will definitely see. For this reason, it was the top of my list of places to update. Our house is new so we essentially had a blank canvas to work with. That can be great or overwhelming. I find myself toggling between both of those feelings as I take on projects to add some character to this blank canvas (while not breaking the bank). The half-bath took months to finish, but honestly, it is the most simple update. Life just has been busy lately!

We just did 3 simple things to update ours:

  1. Added wainscoting to the bottom of which we decided to paint.

    It was a great debate of whether to paint the top or bottom. As you will see, the bottom won, and I have absolutely no regrets. The simplest route was to use the pre-painted panels that I link. We kept the baseboards in tact in the bathroom and added it on top. I liked the simple squared edge for the top trim. Linking something similar to what we used here. I purchased 3 boards for the top trim and 5 panels for the wainscoting. I only used 4. Anyone want the extra one hanging out in my garage? Ha!

  2. Changed out the sink area.

    Bye Bye Pedestal sink! I caught a great holiday sale at Lowes and purchased the sink and handles! The sink was only $300 when I got it. We were hoping to use the handles from the pedestal but it did not work out as we needed 3 separate pieces for the sink vs the 1 block that it came with. We had to get a plumber for this part as we did not want to mess anything up. We have engineered wood in our half-bath (so not recommended), so we did not want to cause any water damage to it. It was surprisingly easy to pull up the pedestal sink.

  3. Added wall shelves.

    I found some great ones on Amazon for a great price. This part was my favorite as I got to decorate them. Everything on the shelves is from Hobby Lobby. My fav sign is the Need TP? Text me sign. I hate when that happens! The only tip for hanging wall shelves is to be sure you use your wall leveler.

There are still a few more things I am considering like adding black and white tile and framing the mirror. I will share an update when/if it ever gets done! Knowing me, it will.

Sharing some photos from the half-bath project-

The finale!!!

I am pleased with it!! Now I have to figure out what space to tackle next! Thinking my bathroom or the media room. I need to stay busy more than ever now since stuck at home due to the pandemic. If you know me, you know I am not a homebody! Pray for me, eek.

As always, thanks for reading XoXO!

What do you think of it? If you have any questions, drop them below in the comments.

A More Inviting Backyard

I have only ever owned a new home. It is a blank canvas filled with endless possibilities, which can either overwhelm you or excite you or maybe somewhere in between. I have always loved trees, but with most new homes we saw, the only included landscaping in the front yard. I do not know it is like this, but seems to be a common theme. With summer approaching and with the stay safe stay home initiatives across the country (world) in place, we have all been spending more time than we probably would like (or not) at home. I wanted to share my backyard landscape that we did shortly after we moved in. And yes, it is budget-friendly. Our backyard is huge. I love the idea of a pool with lots of yard to still enjoy. The struggle with a huge yard, is that it is more pricey to update. When I was reaching out to professional landscape designers, I was being quoted everything from 4k, all the way up to 10k. Well the frugal in me, just was not okay. I decided to take matters into my own hands and figure out a way to pack in as much varying tree types and colors as I could, without breaking the bank.

My backyard fence is about 110-120 ft. I wanted to cover about half of the fence and then leave the other blank so that I could save room for a pool and landscaping. We likely we will not be adding a pool as we will be moving at some point in the near future (a story for another day). If your fence is smaller, your pocket book is in for a treat and you can likely cover the whole back fence, which will be beautiful.

So bare!

So bare!

Here is a very basic list of the supplies purchased:

  1. Plants

  2. Weed Barrier

  3. Landscape Edging - Note: I used plastic since I was using the rocks.

  4. Soil

  5. Lots of Mulch

  6. River rocks or any kind of decorative rock - The fancier, the higher the cost. We purchased ours from Living Earth, they sell supplies in bulk. (WARNING: the rocks are insanely heavy and aren’t safe to put in the back of standard vehicle).

  7. Spray paint (for landscape)

Let me preface this project by saying that I started it, but could not finish it as I had just given birth to my son and had some complications. I ended up having to enlist help from our yard man to help me execute my vision. This project measures about 62-65 ft long. I did not list out supplies by quantity as they will vary based on project size.

I started by purchasing the plants. I wanted mostly flowering plants as they make me happy. I also wanted varying heights. I have several crepe myrtles, texas sage trees (they have beautiful purple flowers), tiny boxwoods, and various other shrubs (basically this means that I cannot recall the name of them all, haha). If you see a specific plant in the photos that you like, let me know, and I will hunt down the name. My crown jewel back there is the weeping hibiscus tree, so beautiful! I got most of my plants from the Enchanted Forest. If you are local to Houston area, check them out, it’s a magical place and great for yard inspo. We purchased 25 plants total for install.

Steps to installation:

  1. Place the plants to ensure spacing is correct

  2. Using spray paint, we drew an outline so we had an idea of what grass to dig up.

  3. Dig up the grass.

  4. Add the landscape fabric

  5. Add the soil

  6. Remove the plants from the containers and placed them in position

  7. Place the landscape edger

  8. Add mulch on top of the soil

  9. Lay the rocks down (def recommend a wheel barrel if you do not have one)

This took us almost a whole day to complete. We actually broke it up into 2 days. Remember to water the plants frequently! Newly planted plants get stressed out. Another optional step we took is adding root stimulator. Most of the plants survived, about 2 of them have been replaces for rose bushes.

I planted a few other trees in my backyard as well. A pink magnolia, peach tree, mexican sycamore tree, an oak, and two shrubs, just because you can never have too much greenery. Everything in my backyard, well apart from the patio plants, are fairly low maintenance, only requiring a few waterings. I find it important investing into the backyard space, not only for you, but it also appears to have a positive outcome when it comes down to re-selling.

I love the space even more with the addition of all the plants. There is so much more I would love to do in the back, but not sure I will get to it all. I would not turning my whole backyard into a secret garden.

As always, thanks for reading, and if you have any questions, please feel free to reach out or drop a comment below. XoXo!

Prayer/Idea Board using Sola Wood Flowers (DIY)

I have partnered with Sola Wood Flowers to share a DIY project using their AMAZING wood flowers. This was my first time working with wood flowers and the thing I am most surprised by is how much they look like real flowers and they are much easier to manipulate than I expected. They have several different colors and even have craft kits that you can purchase and make your own decor or centerpiece or bouquet. And most importantly, they support other women to succeed in the development of their own small businesses (GIRL POWER!).

IMG_4680.jpg

I really enjoyed working on this project and it felt very therapeutic. I think right now with everything going on in the world (COVID-19), it is a good time to pre-occupy ourselves (or not) and this board can be used as several things. Do you have an idea or thought that pops in your head? Jot it down and clip it to the board. Do you have someone who you want to prayer for? Jot their name or the prayer down and clip it on the board. Or perhaps you have dreams for when things are “back to normal”? Jot them down and pin them to your board!


Here is how I made the board-

The supplies:

IMG_4674.JPG
  1. Sola Wood Flowers and Greenery

  2. Hot Glue Gun and Sticks

  3. Canvas or Board - I used a Gesso Wood Board (from Hobby Lobby - don’t forget to use 40% off code)

  4. Mini clothes pins (click here for ones I used that includes the string)

  5. Push pins

  6. String

  7. Optional: Sola Wood Softener

1.Place the flowers on the board to create layout.

I decided to go with 2 corners that are symmetrical (same design, same flowers, just swapped the main colors on each). Honestly, the flowers are so beautiful that it is hard to arrange them badly. Take a picture so you can reference how you arranged them on the board.

IMG_4682.jpg

I created a small line on the side of the board of each side so that I could know how low and high the string can begin and end based on the arrangement of the flowers.

2. Remove the flowers and begin to string the board

I used a push pin to fasten the string in. That way I can make adjustments for future if need be. It can also be stapled or glued in.

3. The fun part: Glue on the flowers

Using the hot glue gun, begin to add on the flowers referencing the photo of your design. I worked my way in to out first, then added the filler - greenery and baby’s breath (seriously the weirdest name, right?). The flowers glue on very easily. Now is the time you would use the soften solution if you want to make the wood flowers more malleable (Note: I did not need to use).

4. Add the Mini Clothespins and your Content

I cut up squares of paper or you can use index cards. Mine will be used as a prayer board. There are so many times I tell people I will pray for them and I forget or I only do it in that moment. This will help me to remember my prayers for others.

5. Hang or Find the Perfect Spot for your Beautiful Board

Find a spot that works and hang it or place it. Then enjoy it and use it! Lastly, go back to Sola Wood Flowers and find your next creation.

My mom gave me this great idea and she made one of her own as well. Feel free to get as fancy as you want. You can paint the board, use fancy string/ribbon, add more greenery, etc. I wanted to make this easy and fun so that everyone can follow along!

My mom’s fancy board!

My mom’s fancy board!

I hope you enjoyed this DIY prayer/idea board using Sola Wood Flowers! If you try one, please email or tag me on Instagram!
Thanks for stopping by, XoXo.

Spring Patio Refresh on a Dime

2020 has been all about saving and getting out of debt for us. It has also been one of the most challenging years ever (sigh). Anyway, thanks to the current state of the world, it’s helped make our savings goal slightly more achievable. A big chunk of money usually goes to traveling (and shopping for these trips), but traveling has basically been canceled indefinitely sad face. It’s officially spring and since we are all stuck at home, why not refresh your patio, so you can enjoy some time relaxing outside?! Sounds like a great idea to me. You may be thinking, but we aren’t supposed to leave our houses, plus most stores are shut down. Here are a few ideas, you can order online for curbside pick-up (never leaving your car) from At Home store or you can consider fully doing online from Amazon, Target, Walmart, Wayfair, Kirklands, etc. I know Lowes and Home Depot are still open too (but shopping is discouraged due to COVID-19).

PHAssetMediaType.jpeg
My cute helpers (P.S. My youngest, 20 months, is def too big for the paci lol)

My cute helpers (P.S. My youngest, 20 months, is def too big for the paci lol)

The first tip is to decide on a color scheme. My color scheme for just about everywhere in my house is this sea blue color, but I wanted to add some pizazz, per my mom’s suggestion, I decided to go with coral. The other colors are green and sea blue.

Next, you need basic pieces of furniture, seating, a table, etc. Our patio is huge so we have a couch and table on ours. I ordered both online from Wayfair. If you have a smaller space or an apartment balcony, a rug, 2 chairs, and a small table would work nicely!

PHAssetMediaType.jpeg

Now to give it a refresh, all you need are:

  1. Rug(s) - Our original rug was huge, 8x10, and expensive-ish ($299), but this time around, we went budget friendly. The original rug was basically destroyed by the outdoor elements, even despite it being an outdoor rug. The rugs pictured are 5x7 and they come in multiple colors from At Home. They are sold in a 2 pack, one small and one large (5x7) for $29.99! At Home also sent out an additional 30% off an item coupon and I had a 15% off entire purchase birthday coupon. Don’t forget to use your coupons guys!

  2. Accent Pillows - The pillows are the most important part and can range in variety. No clue why pillows are so expensive, but they really can add up. At Home had several under $15! Ideally at least one or 2 will pick up all the colors in the scheme and they do not all have to match. I recommend at least 2 do if you get a set of 4.

  3. Decorative pieces (highlighting the color scheme) - I used 3 vases with some greenery. Previously I had mason jars filled with sand and shells and candles. This is the part where you can get creative!

The rug! Previously I tried to scrub with soap, a little upholstery cleaner, and warm water, but did not work. I also pressure washed it. Maybe these rugs have an expiration. Hard to throw away a rug so pricey. As you see, the closer to edge of pati…

The rug! Previously I tried to scrub with soap, a little upholstery cleaner, and warm water, but did not work. I also pressure washed it. Maybe these rugs have an expiration. Hard to throw away a rug so pricey. As you see, the closer to edge of patio (closer to sun), the most damage.

PHAssetMediaType.jpeg

Voila! Your patio feels like a new patio with just these simple changes! Get outside and enjoy it. Being stuck inside has been really rough, but having the ability to get outside, even if it is just the patio, makes all of this more tolerable. I hope the weather warms up if it has been cold, so you can enjoy the outdoors more.

What is your patio space at home like?

PHAssetMediaType.jpeg

As always, thanks for stopping by and reading, drop a comment below. XoXo

Budget Friendly Gallery Wall

I should also add kid friendly! I will explain why in a second. I absolutely love pictures! I like to capture the moments and then look back at the pictures over and over. Everyone by now is probably very familiar with a gallery wall. It’s a great way to showcase photos and to cover a large empty space on a wall! The cost of the frames and the matte boards can really add up. I managed to do one at a very low rate.

IMG_0415.jpg

Here is what I used for mine:

  1. 16x20 Ikea frames, only $5.99 each

  2. Picture frame pre-cut mat for 16x20 frame with an 11x14 opening, regular $4.99 but they are often only $2.50 at Hobby Lobby (linked similar)

  3. Your current favorite pictures

And voila, that’s it.

IMG_0416.JPG

The Ikea frames are very lightweight and do not have glass. You do not even need an anchor when hanging them. If you really prefer glass, they have some for $9.99 or you can catch a deal at Michaels. My kids or someone’s kid who has come over, has managed to break the glass on frames in the house; this has happened a few times. While they ate young, the non-glass covers are perfect! My nephew has even thrown a ball (accidentally), knocking a frame down, and the frame fall was shatterproof! And the frames still have nice presentation.

IMG_0879.JPG
IMG_0876.jpg

The frame matte can be changed into any color. My house is very light and airy colors, so the white on white is perfect! The boards really upgrade the look given the “low cost” frames.

There are so many variations to how many frames you can use and the colors. I originally planned for only 9 frames but the wall is huge and didn’t look complete. I had the pictures printed at Walgreens. They’re 11x14 posters. Walgreens occasionally does 60-75% off these prints and they’re almost always at least 50% off. I’m really impressed with the quality of these prints too.

The images I chose to use today are all photos from throughout my first year of blogging!

IMG_0871.jpeg

I’d love to hear your thoughts about this low budget version. As always, thanks for stopping by!

xOxO

Simple Seasonal Table Decors with Minimal Pieces

For me, the table centerpieces are often an afterthought. I typically go for big things, like accent walls, BUT the table is a great and affordable way to add some pizzazz or holiday spirit to your home. I wanted to share a few ideas that are simple and inexpensive. All items I purchased are from Hobby Lobby and they are ALL on sale - 40% or more off. I am sure you can find inspiration from other stores, like Michaels, At Home, Home Goods, etc.

The following basic pieces were used:

DSCN3872.JPG

Core items: Serving board, 2 candle holders, and a simple vase. Or another option is a tiered serving platter (these scream farmhouse).

Round Dinner Serving Board:

4 key items: floral stems, decorative item, 2 candles

DSCN3869.JPG

The details -

You can purchase this type of board at many home stores and there are so many different styles. I got this one at Hobby Lobby (for 40% off) at $11.99! I decided to go with a simple wood board and it has rounded beaded handles, which is a cute touch. I add a piece of floral to the basic, sleek, white vase - the floral can change with the season or match your room color scheme. For the candle holders, select candles that fit the season/color scheme, I chose 1 large and 1 smaller. Follow this with the selection of a decorative board or decorative item, and last but not least (and optional), add some touches of greenery for accents. My table is wood and the board is wood, so I decided to purchase a piece of fabric to separate the two. My mom was kind of enough to stitch it together (like a flat pillow) to smooth the edges. For the fall base accent,, I went with loose leaves ($3.50 at Hobby Lobby) and for Christmas, I used a poinsettia place-mat.

By the way, decorating these and shopping at Hobby Lobby got me in the Christmas mood. It is the most wonderful time of the year, after-all! LEKOCH sent me these absolutely adorable, bamboo tableware that are made from natural materials - bamboo fibre mixed with other plant-based elements. They are 100% biodegradable. Check them out here, they’re currently on sale! The best time to start shopping for Christmas is yesterday! I will definitely be using these for yummy desserts during the holidays.

Tiered Serving Platter

This one offers you a chance to showcase every pumpkin/fall item or Christmas item you can find. Add the same greenery to each tier and it ties it all together and gives uniformity (if that makes any sense). I think its best to have varying levels of pieces (i.e. the higher trees mixed with the lower pine-cone) and to have boards with wording. This tiered platter was a steal at Hobby Lobby too ($12).

I hope this gave you some good/new ideas for your table centerpieces. Table decor and mantles stress me out, but breaking it down like this helped! This is a simple yet eye catching centerpiece. For the tiered platter, just have fun with it, and remember to have one item that is consistent throughout each tier to tie it all together.

As always, I’d love to hear from you, so drop a comment below if you love it, hate it, or have some cool ideas!! Thanks for reading, XOXO!

Sharing my pumpkin this year! Wanted to try something different, it was a challenge, but I like how it came out. This makes for a nice fall decorative item as well.

Sharing my pumpkin this year! Wanted to try something different, it was a challenge, but I like how it came out. This makes for a nice fall decorative item as well.

DIY(ish) Push Pin Map

IMG_5314 (1).JPG

I tried to do a push pin map a couple times before, but both attempts were a fail. The first time I used a cork board, the second time, I used a canvas (oh and 1 attempt just using a vinyl sticky map to the wall, but I kept hitting studs). My friend recently shared her push pin map and she gave me the genius idea to use a FOAM board!!!! I wanted to share with you how I did mine and also how she did hers (which is an even more budget friendly way). It’s definitely a statement piece and makes for an excellent gift.

First I want to explain what a push pin map is, in case you have never heard of or seen one. It is a map that has a key (the key can vary), that essentially displays where you have traveled/lived. My key shows where I have traveled, where Paul has traveled, where the family has traveled, and where we plan to go. I added a few extra pin colors (not on the key) of dreams places (white) and my mom wanted to add her places she has traveled to (pink).

Let’s get to it!

What to get:

  1. Frame based on size - I chose 24 x 36 frame purchased from Michaels. The frame happened to be 70% off, so only $17 (originally $50). They always have coupons, so may sure you check their site before you go.

  2. Map -

    I purchased a digital file from Etsy. There are a ton of great ones on Etsy, so just search. The seller I used has multiple options. Cheaper non-custom printed idea is here from Amazon.

  3. Push Pins - Purchased mine for $6 on amazon, these are cute too if you want a more uniformed look.

  4. Foam board - I cheated and had the copy company print my board mounted on a foam board. This is more costly, so if you want to save money, see Quiana’s post.

  5. A cute helper (Optional - my son insisted on helping)

How to do it in 5 steps:

1 . Purchase the map (digital files are less expensive)

IMG_5297.jpg

2. Print the map - As mentioned above, I had my map printed at a copy center (FEDEX - make sure you search for coupons) and mounted on a foam board

3. Frame the board - I ended up having to trim my board. I used a kitchen knife. My exacto knife was a bit dull and so were my scissors. Had I mounted it myself, I could have just trimmed the map then glued it to the board.

4. Start pinning! Its best to have a color pin for each key category.

5. Hang that beautiful board. Don’t forget to keep updating it as you travel.

IMG_5725.JPG

After completing this, I realize, there are so many places that I must go, like most of the eastern hemisphere.

Head over to check out my friend’s pin map, here!

If you have any questions or try this, please share it with me!!!! As always, thanks for reading. XX

DIY Rustic Fire Pit

IMG_0012.JPG

Our former house was in the burbs of the burb, and just had an unplugged feel. We had a HUGE backyard, and I had this dream of doing a backyard fire pit area that had a bonfire feel. My husband and I managed to pull this off and it turned out great! We had so many memories around our bonfire fire pit, so I wanted to share how we did this. It was fairly easy and budget friendly.

Here is the supply list, all items from Home Depot (but could be purchased from Lowes as well):

Here is how we did it:

  1. Make the circle -

Find the perfect spot, then find the center of that spot. From that center point, measure the same distance to the edge of the circle from that point. Use the spray marker to mark each point you measure as the outline for creating the circle. Once you have done this several times, complete the circle with the marker, and begin to dig the grass. The depth is dependent upon your preference. We did not dig very deep, approx 6-8 inches deep. Once the grass was dug up, we began to pat the dirt (clay) with the garden hoe to make it level.

2. Form the Fire pit -

We measured the weed barrier for all parts, excluding the part where the fire pit would go. We began to start the fire pit circle using the concrete wall blocks. We had previously measured out how big we wanted the fire pit based on the size of the wall blocks and the fire pit bowl. We just places the wall blocks next to each other then started the next row, until we reached the third and final row. Then lay the weed barrier down.

3. Place the edgers on the edge and lay the pea pebbles-

We placed the edgers around the edge (honestly we winged this part, and fortunately it worked out). You can measure the size of the edgers and estimate how many you need based on the size of the circle. We then laid down the sand into all parts, including the center of the fire pit. Then we laid the pea pebbles down in all areas excluding the fire pit center. We purchased about 7 bags of these. You can always add more of these down the road.

IMG_0002.JPG

4. The bowl -

If you decide to add the bowl, the one we purchased comes with the leg options, but it was so affordable. All you have to do is not add the legs and set the bowl inside of the fire pit. Nothing further is required. It may see unstable, but the fire pit last through many storms and hurricane with no issues.

IMG_0010.JPG

5. Enjoy -

Lastly, get some wood and fire starter and create memories!!!

IMG_8922.jpg

In our new house, we have a gas fire pit that we purchased. It is not as fun and it does not smell as good, but our yard is not as big as it was in the old house. We could have made a smaller diameter area, but since we upgraded our patio to include the gas line, we decided to go the route we have now.

I won’t lie, it was hard manual work, but we saved more money than purchasing a fire pit kit and we got to design how I envisioned. You can customize it by choosing different concrete and stone selections or by adding decor like chairs, etc.

IMG_3228.JPG

Oh and the chairs we added are here. I purchased the teal color as it’s my favorite color. All and all I just want to encourage you to create memories with your family/friends. This bonfire provided just that. Not only is it extra special because we got to hang around it, but we made it.


As always, thank you for reading!!!! I hope these steps make sense. If you have any questions, feel free to comment below, email me, or DM me on Instagram.

XOXO

The Office: T-Shaped Desk

I have had the pleasure of working from home the last few years. It does have some downfalls, like I often feel isolated, but I think the benefit of not having to go into an office daily and the flexibility of working from home outweighs the alternative. I am a firm believer that you must have a designated space for work. As of recently, my husband and his team were able to pitch a plan to work from home a couple days per week. This went from 2 days per week, to now 3 (sometimes this varies).

My office (at our new house) is tiny, so we had to be creative. We wanted to come up with a solution where we can both have working space in the office. Eventually this will be a good working space for the boys. I went to Pinterest for some inspiration and liked the idea of a T-shaped desk. I started shopping around to see if I could find one, went to Ikea for inspiration, but nothing really was what I had in mind. That is when I decided to do a rough sketch of what I had in mind. I felt like Joanna Gaines lol, except Paul is no Chip in terms of his handyman skills. With the help of the Nextdoor app, we were able to find a couple contractors. I ended up choosing The Handy Hun. He was very professional and had strong references. He also was reasonably priced.

I picked out all materials and the plan began to set in motion. The pictures tell a better story of how the install went.

As a way to save on prices, we used to wood textured Formica for the actual top of the desk. The rest is real wood. I think eventually we may swap it out for a slab of wood. Although the wood alternatives, are somewhat easier to maintain as you do not have to worry about things messing up the service.

IMG_9574.jpg

Initially the “wood” inspired top we had selected was too busy (see above photo). Thankfully, the contractor was very patient and determined to ensure I was satisfied. We drove out to the counter top store to make the selection as it can be difficult looking at the small swatches, much better in person.

And voila!!!

All in all, I am very pleased with the design. Now we just have to make sure we can work together in this office haha. My husband is loving it. Me….it’s cool, sometimes distracting, definitely an adjustment. He beats a coworker and it gives us quality time together throughout the day.

Yep the photo behind me is crooked and still is in the plastic and still has factory photos. The office is still a work in progress. By the way, I love sitting in my new office and enjoying a cup of coffee in my @PineappleHeadDesignCo mug.

Yep the photo behind me is crooked and still is in the plastic and still has factory photos. The office is still a work in progress. By the way, I love sitting in my new office and enjoying a cup of coffee in my @PineappleHeadDesignCo mug.

Measurements for the desk. It is specific to my office dimensions.

Measurements for the desk. It is specific to my office dimensions.

Could you work with your significant other? IF you have any specific design questions, please do not hesitate to reach out!

Thanks for reading! XOXO

Wood Plank Accent Wall

IMG_0018.JPG

I love the wood plank accent wall look. There are so many ways that you can achieve this look. I am all about easy and cost efficient and so I wanted to share how I chose to do it. (Note: I have linked all supplies I purchased below). Steps listed below -

  • Measure the wall - width x length. This will help to determine how much wood you need.

  • I went to Home Depot and purchased sanded plywood. You may be wondering why I chose this? I love the idea of pallet but trying to find it at cost was a challenge, especially as much as I need, or to purchase it was going to be costly. The pallet boards seems to be the most common route and gives amazing looks. The plywood is thin and light, which was a perk for me, and only $22.

  • Cut the boards before leaving the store. At Home Depot (and Lowes), they will cut the boards for you at no additional cost. I had them cut the 48 inch wide (x 96 in) boards evenly into 4 inches (I recommend doing 4-6 inches, unless you like the thinner look) which gave me (12)- 96 inch long boards. These will be required to be cut again by length depending on how long you want the boards, but not yet at this point. I purchased an extra board than I actually needed so that I had room to experiment with the blended stains.

IMG_0025.JPG
  • I purchased 4 stains , a mask, gloves, liquid nails, and sponge brushes. I decided to go with a dark brown, red brown, light-ish brown and a grey. (See below supply list for exact ones used)

  • Over several weeks, I began to stain each board. I started with staining a set of each board with the solid stain - about 10 -15 of each solid stain color. I did this outside due to the toxicity related issues of the stain and I did not have a well ventilated area of the house that had restricted access to my son. From there, I started blending the stains in a separate plastic container. It’s ideal to have lid if you are doing this over several days/weeks like I did for preservation purposes.

  • Once the staining is done on the boards, I needed a plan to get them on the wall. I ended up hiring a guy that I found on the street, literally. I was in a new community and went outside and asked around for someone who could help. This was risky, but my builder did good work and seemingly hired skilled men, and at the time I did not know where else to go. He was great and I wish I did not lose his contact information :(.

  • He cut the boards utilizing an electric saw while I sanded the edges. I directed him on the board placement. The idea in my mind was to vary the boards by color, not have too many of the same together but allow this to happen on an occasion. He used the liquid nails to get them up, then secured the corners with tiny nails via a nail gun.

Supplies in summary-

  1. 1 qt each of 3-4 canes of stain - I used Jacobean, Red Oak, Grey, and Weathered Oak. I could not find the brand I used but those linked are same colors in a similarly priced brand.

  2. Sanded plywood, I purchased 6 similar to here

  3. Mask

  4. Well ventilated space (outdoor or a garage maybe?)

  5. Gloves

  6. Electric saw that is capable of cutting thin wood, the contractors as similar to here

  7. Sand paper

  8. 5 -8 sponges (Note: Use 1 sponge per color prepared)

  9. Plastic container for mixing (paper bowls or tupperware works fine)

  10. Liquid Nails

This project was a lot of work, but I was so happy and proud of the results. I plan to do an accent wall similar in my current home as well, I think in my gameroom, so stay tuned. Thanks for stopping by!

XOXO

PS: I know we are in dire need of a new master bedroom comforter set lol. I ordered a new one when we moved not realizing our bed is actually a California king size so the king set is too small.

Faux Brick Wall - White Washed

IMG_0731.JPEG

Let me start by saying, this project’s results were not my favorite, but I am still working on making it exactly how I want. Despite this, I still wanted to share it, because I have gotten lots of questions about it. I am hoping that the mistakes I made can help someone make it better. Or maybe you love it just as it is.

I LOVE home projects (I get ambitious and sometimes this stresses my husband out) and I especially LOVE textured walls. My original idea was to install bricks on the wall in my master, but I have slight issues with doing something that requires such long-term commitment. It also just seems so heavy to install on a wall (yes, I know it’s perfectly fine to go on a wall, if done properly). I even considered thin brick veneers. I know me though, and eventually, I will want to change it, this still seemed too permanent. So I went to Pinterest to get some ideas - white washed faux brick wall paneling was the winner. I had installed brick panels in my old house game-room, but I did not want to leave it red as my current color scheme in my master is a light and airy pallet. This is low commitment, as the panels are easy to install and easy to remove.  

Tools used for install:

  • Kingston Brick Hardboard Wall Panel purchased from home depot - $28

  • 4 bottles of liquid nails per panel

  • Saw to cut the panels (Note: Do not forget to cut holes for the power outlet)

  • Nail gun and nails for added security (used mostly in the corners and middle)

  • Caulk – I used white

  • Small sponge (to smooth the caulk)

Supplies For white wash:

  • Rigged towel

  • White or a variation of white paint (My color is not full on white, I think it’s called Shark in the lightest shade)

  • Sponge roller

  • Bucket of water

What I would do different?

For starters, I would have purchased a darker brick panel. Lowes sells these - Embossed Red Brick Hardboard Wall Panel. They are slightly more at $34 per panel. I think the darker panel would give me better contrast and look better with the white wash. Next mistake, I applied a thin-ish coat of paint, but it dried quickly.  After sponging this on, I tried to wash off the paint but it was very challenging to get the paint off. Next time I would mix the paint with water, then apply. I would still use the rigged towel to remove some of the paint.

IMG_5947.jpg

I am going to keep the panels up for now, but I would like to somehow create more contrast between the bricks. I have seen a few ideas that I found on Pinterest to help me achieve greater contrast. I will share an update once I figure it out and find the time to do it.

I hope you enjoy this post. If you have any more questions regarding the actual install, please feel free to reach out or leave a comment below.