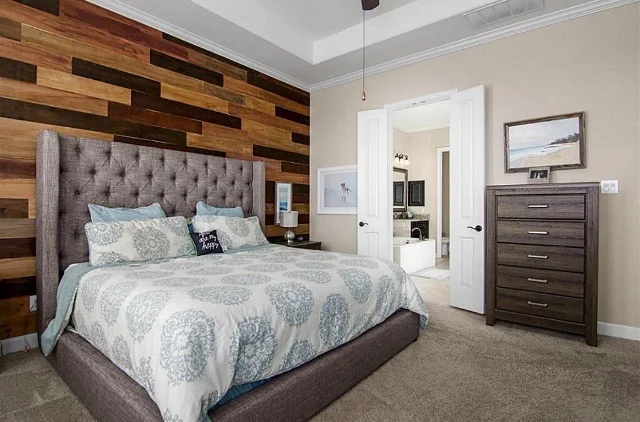

I love the wood plank accent wall look. There are so many ways that you can achieve this look. I am all about easy and cost efficient and so I wanted to share how I chose to do it. (Note: I have linked all supplies I purchased below). Steps listed below -
Measure the wall - width x length. This will help to determine how much wood you need.
I went to Home Depot and purchased sanded plywood. You may be wondering why I chose this? I love the idea of pallet but trying to find it at cost was a challenge, especially as much as I need, or to purchase it was going to be costly. The pallet boards seems to be the most common route and gives amazing looks. The plywood is thin and light, which was a perk for me, and only $22.
Cut the boards before leaving the store. At Home Depot (and Lowes), they will cut the boards for you at no additional cost. I had them cut the 48 inch wide (x 96 in) boards evenly into 4 inches (I recommend doing 4-6 inches, unless you like the thinner look) which gave me (12)- 96 inch long boards. These will be required to be cut again by length depending on how long you want the boards, but not yet at this point. I purchased an extra board than I actually needed so that I had room to experiment with the blended stains.

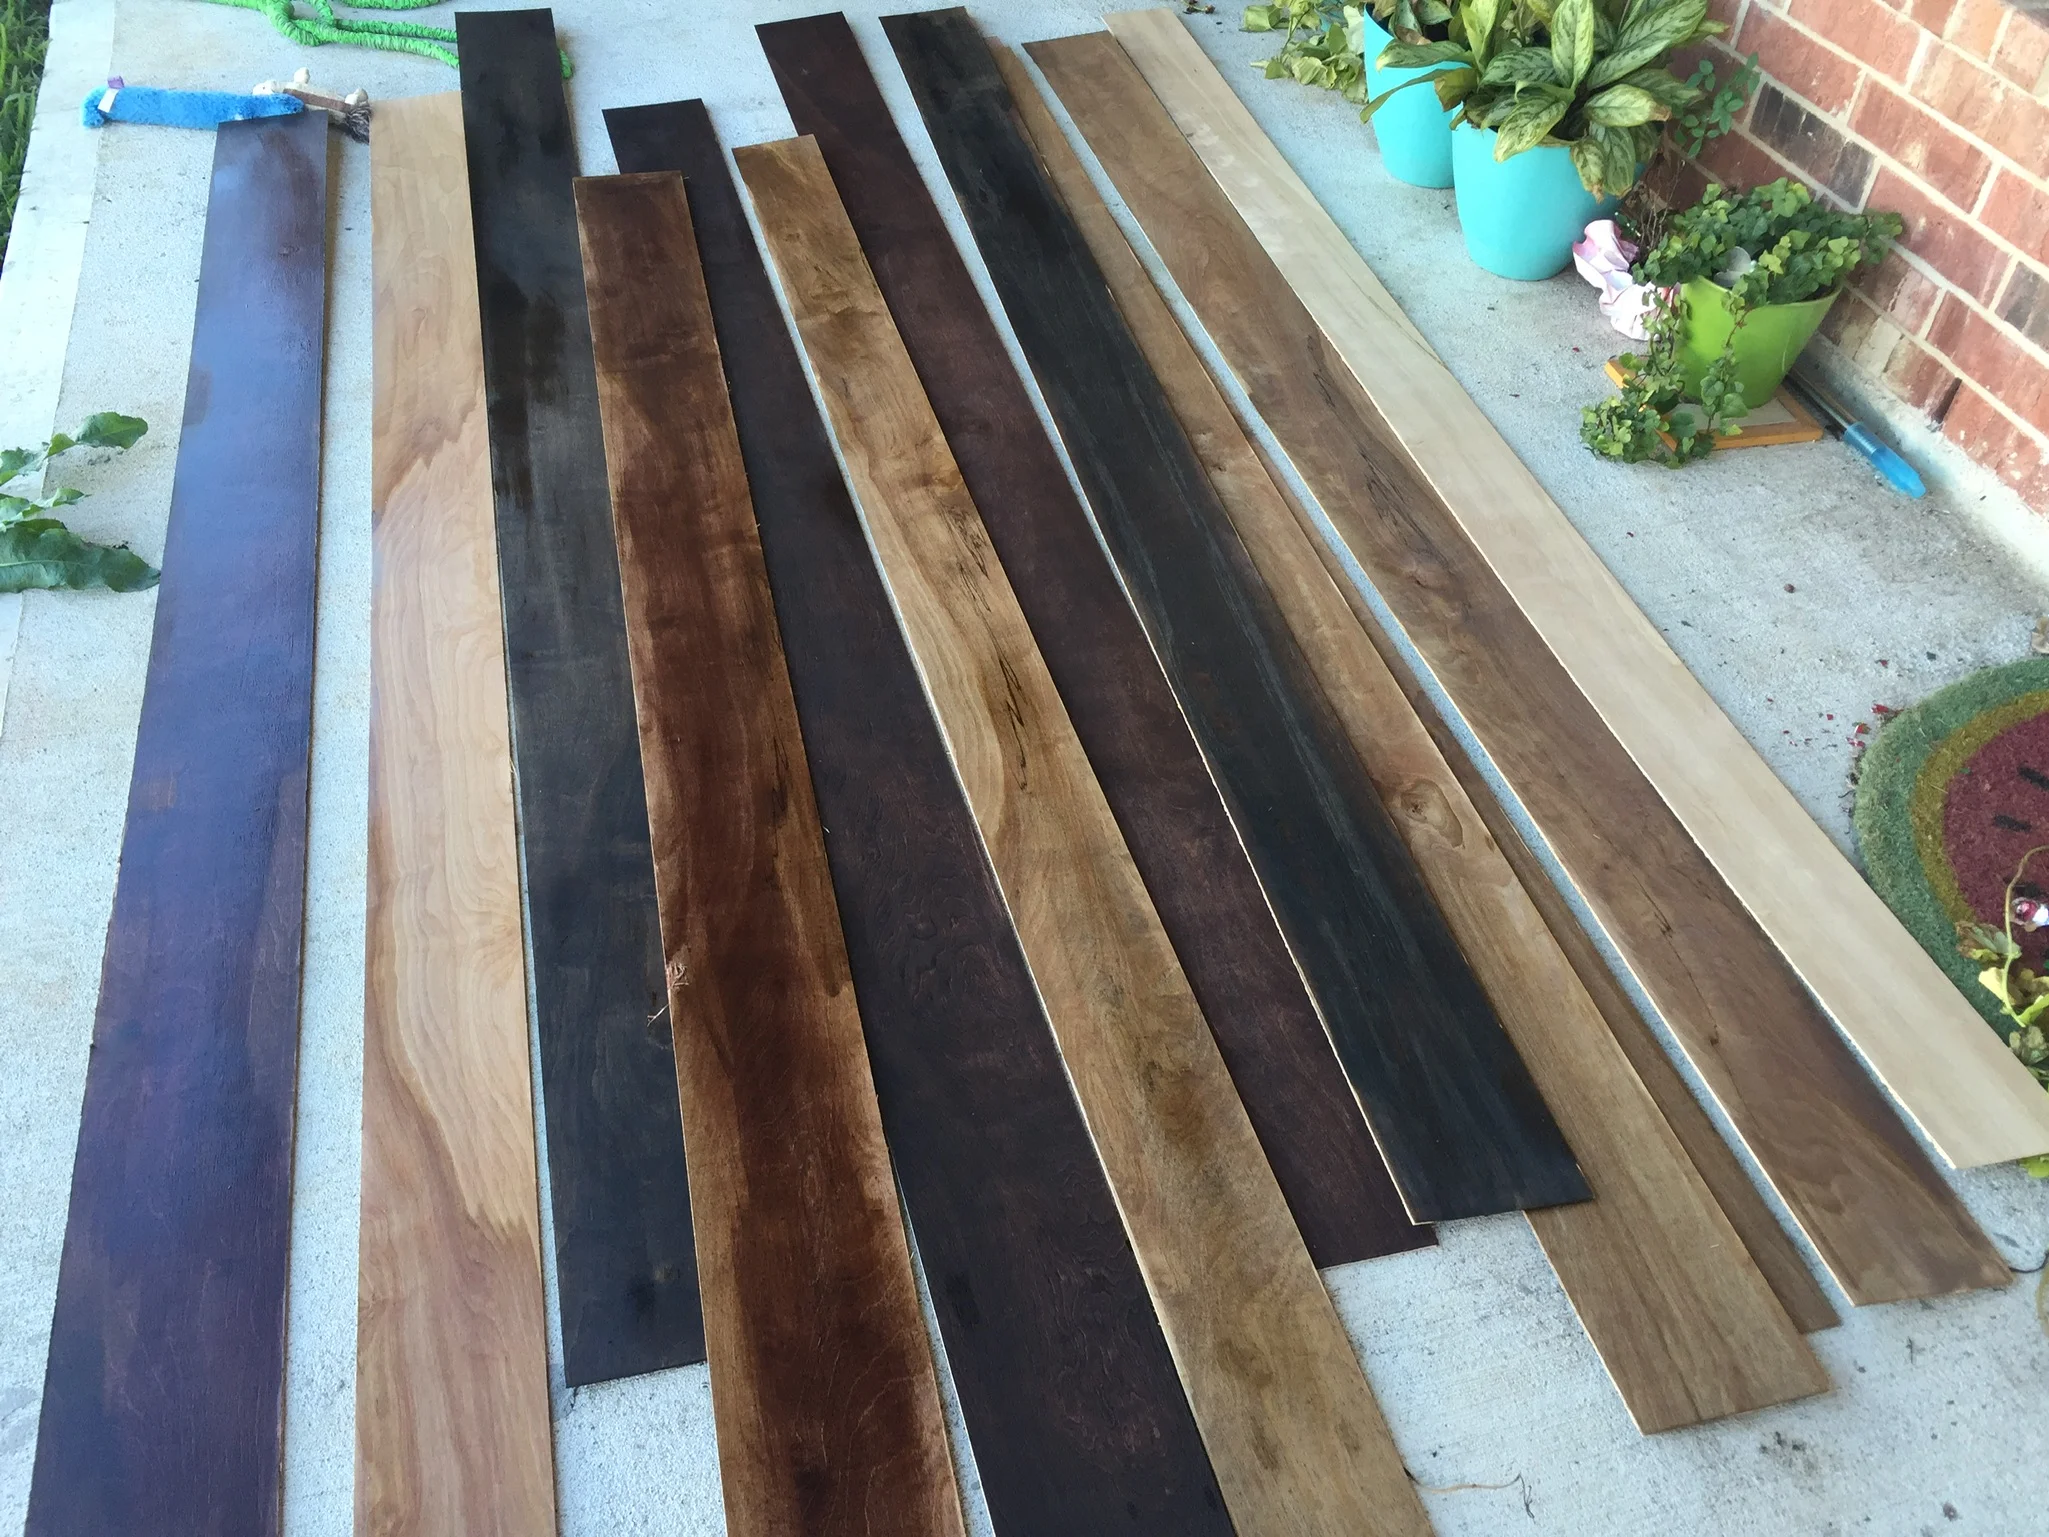
I purchased 4 stains , a mask, gloves, liquid nails, and sponge brushes. I decided to go with a dark brown, red brown, light-ish brown and a grey. (See below supply list for exact ones used)
Over several weeks, I began to stain each board. I started with staining a set of each board with the solid stain - about 10 -15 of each solid stain color. I did this outside due to the toxicity related issues of the stain and I did not have a well ventilated area of the house that had restricted access to my son. From there, I started blending the stains in a separate plastic container. It’s ideal to have lid if you are doing this over several days/weeks like I did for preservation purposes.


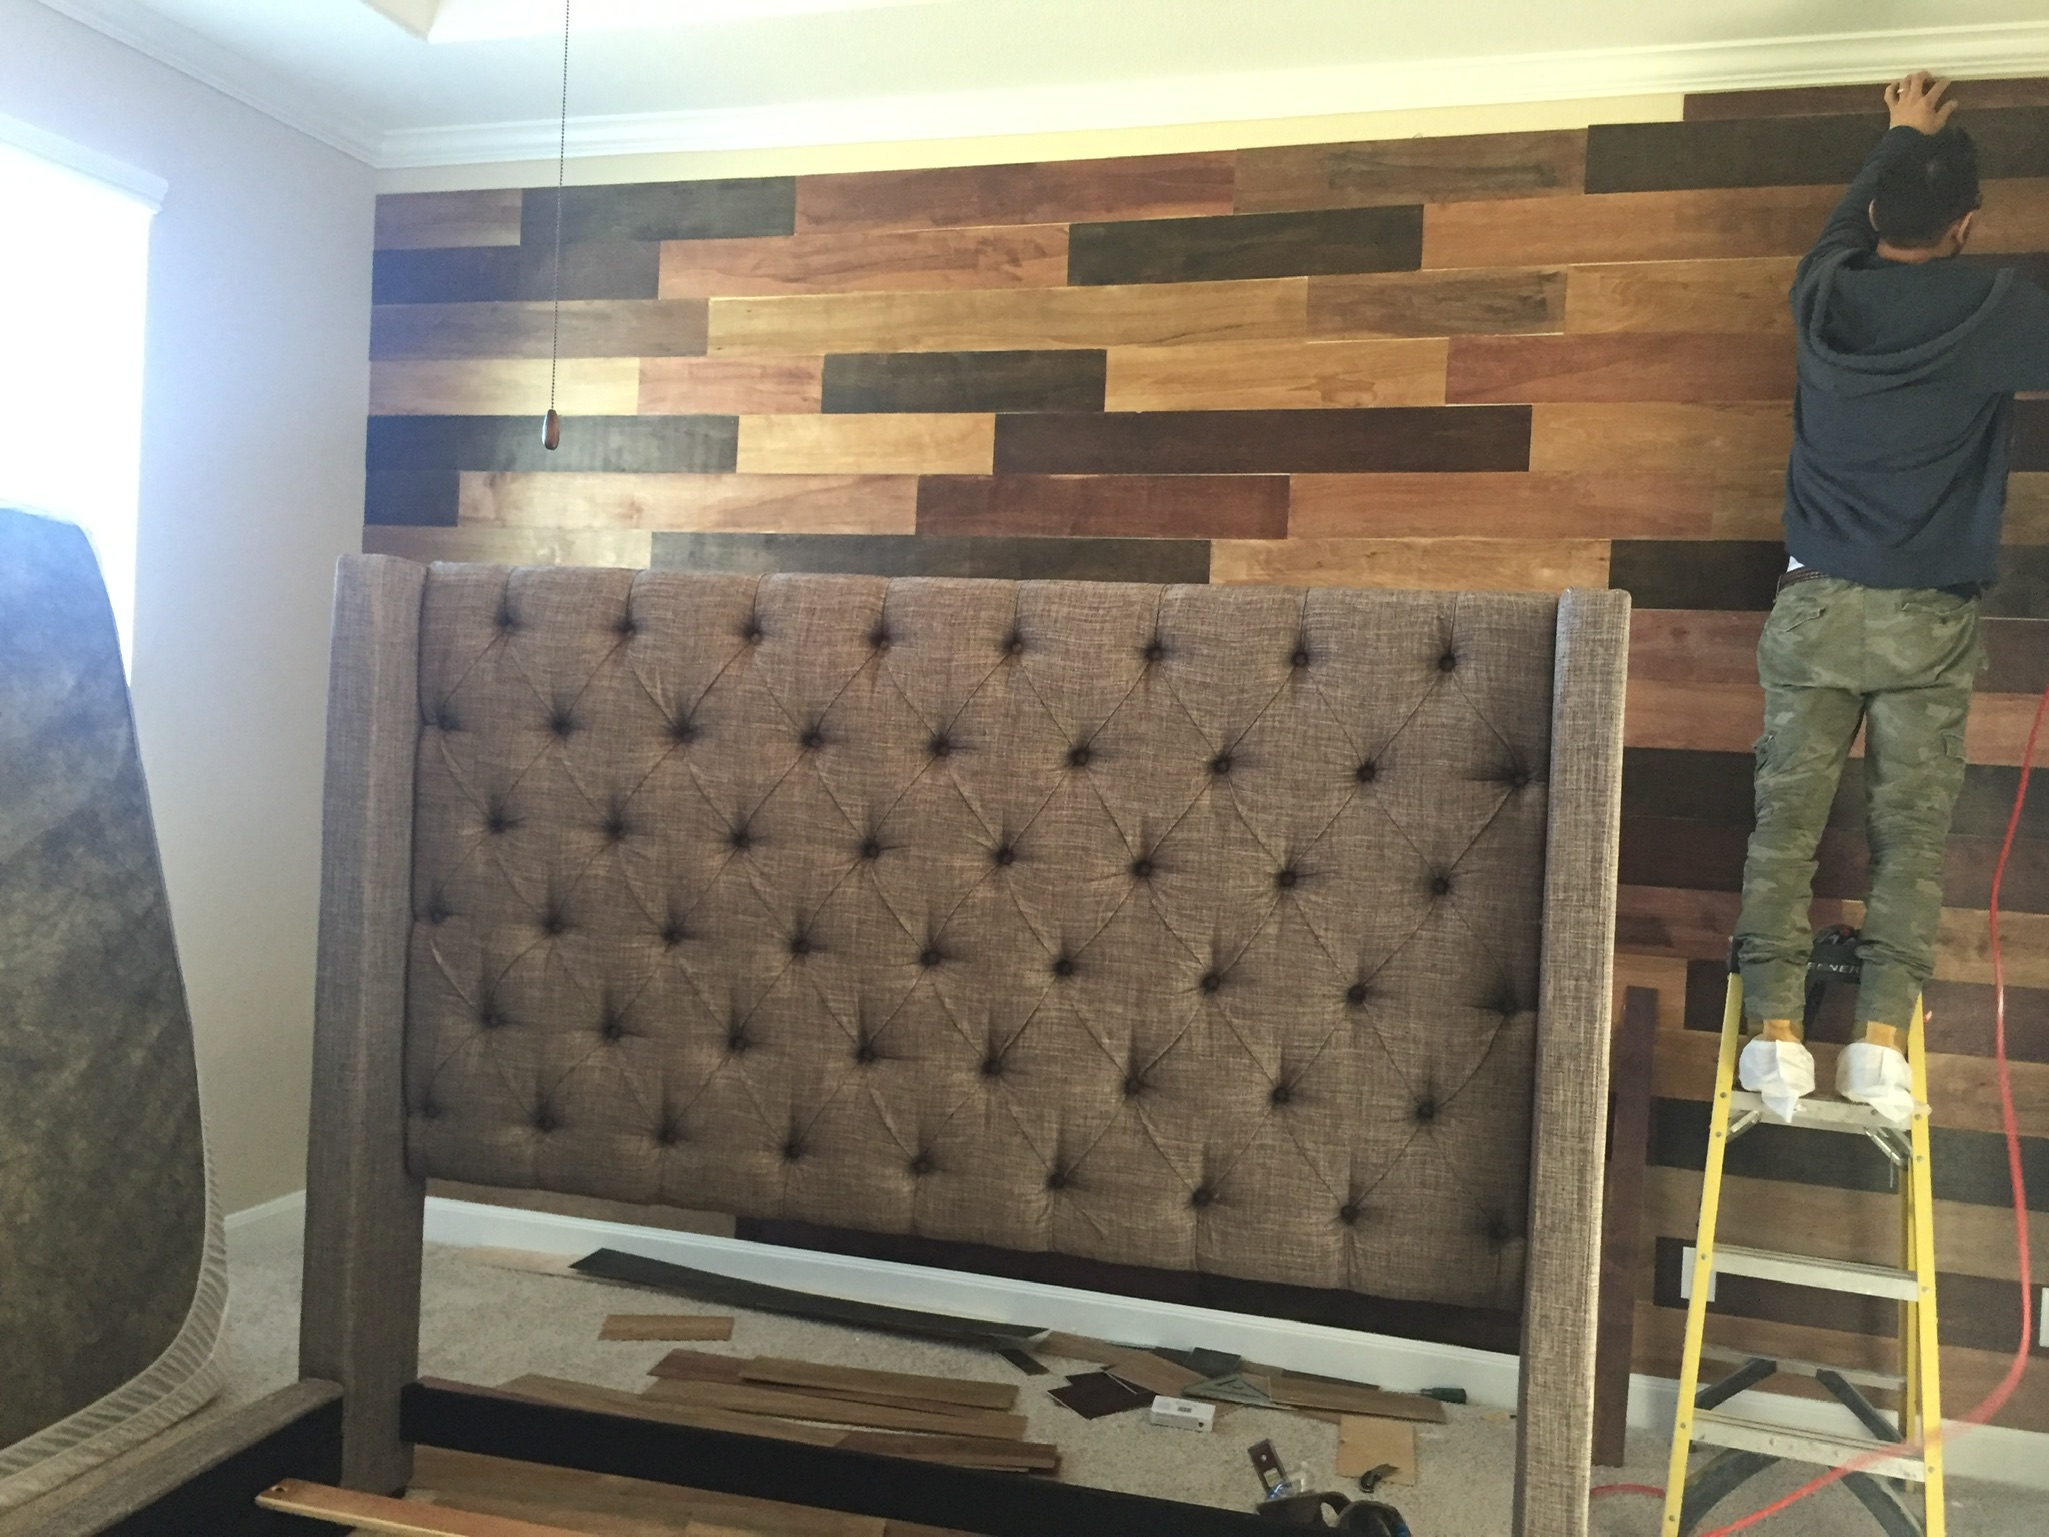
Once the staining is done on the boards, I needed a plan to get them on the wall. I ended up hiring a guy that I found on the street, literally. I was in a new community and went outside and asked around for someone who could help. This was risky, but my builder did good work and seemingly hired skilled men, and at the time I did not know where else to go. He was great and I wish I did not lose his contact information :(.
He cut the boards utilizing an electric saw while I sanded the edges. I directed him on the board placement. The idea in my mind was to vary the boards by color, not have too many of the same together but allow this to happen on an occasion. He used the liquid nails to get them up, then secured the corners with tiny nails via a nail gun.


Supplies in summary-
1 qt each of 3-4 canes of stain - I used Jacobean, Red Oak, Grey, and Weathered Oak. I could not find the brand I used but those linked are same colors in a similarly priced brand.
Sanded plywood, I purchased 6 similar to here
Well ventilated space (outdoor or a garage maybe?)
Electric saw that is capable of cutting thin wood, the contractors as similar to here
5 -8 sponges (Note: Use 1 sponge per color prepared)
Plastic container for mixing (paper bowls or tupperware works fine)


This project was a lot of work, but I was so happy and proud of the results. I plan to do an accent wall similar in my current home as well, I think in my gameroom, so stay tuned. Thanks for stopping by!
XOXO
PS: I know we are in dire need of a new master bedroom comforter set lol. I ordered a new one when we moved not realizing our bed is actually a California king size so the king set is too small.